


50
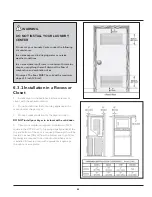
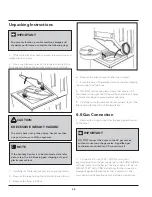
Unpacking Instructions
1. If foam tub block has been removed, reinsert it now and
retape the lid securely.
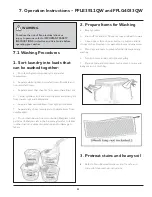
2. Use a rug, blanket or piece of cardboard to protect the
floor, and carefully lay the Laundry Center on its left side.
3. Carefully set the laundry center to an upright position.
4. Remove the tape holding the lid shut and open the lid.
5. Remove the foam tub block.
6. Remove the inlet hoses and other tub contents.
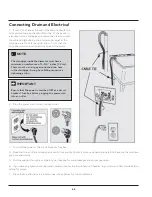
7. From the back of the washer, remove the wire shipping
clip securing the drain hose.
8. DO NOT remove the plastic clamp that secures the
drain hose to the right side of the washer backsheet. It helps
to form a standpipe to prevent water siphoning.
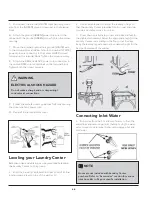
9. Carefully move the Laundry Center within 4 feet of the
final location for the start of the installation.
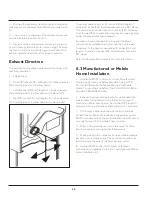
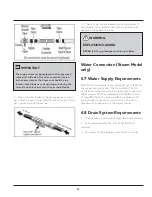
6.6 Gas Connection
1. Remove the shipping cap from the gas pipe at the rear
of the dryer.
2. Connect a 1/2 inch (1.27 cm) I.D. semi-rigid or
approved pipe from the gas supply line to the 3/8 inch (0.96
cm) pipe located on the back of the dryer. Use a 1/2 inch to
3/8 inch (1.27 cm to 0.96 cm) reducer for the connection.
Apply an approved thread sealer that is resistant to the
corrosive action of liquefied gases on all pipe connections.
IMPORTANT
To prevent vibration, possible machine damage and
maximize performance, complete the following steps:
CAUTION
EXECESSIVE WEIGHT HAZARD
To avoid a back or any other injury, have more than
one person move or lift the appliance.
NOTE
If the Laundry Center is to be transported at a later
date, retain the tub blocking pad, shipping bolt, and
plastic spacer block.
IMPORTANT
DO NOT connect the dryer to the LP gas service
without converting the gas valve. A qualified gas
technician must install an LP conversion kit.
Содержание FFLE3911QW
Страница 1: ...Publication 5995666392 October 2015 Technical Service Manual Laundry Center ...
Страница 2: ...I ...
Страница 9: ...8 3 Product Features ...
Страница 14: ...13 5 1 FFLE3911QW 5 1 1 Upper Cabinet Drum Heater 5 Exploded View and List of Parts ...
Страница 17: ...16 5 1 2 Motor Blower Belt ...
Страница 19: ...18 5 1 3 Control Panel ...
Страница 21: ...20 5 2 FFLG4033QW 5 2 1 Upper Cabinet Drum Heater ...
Страница 24: ...23 5 2 2 Motor Blower Belt ...
Страница 27: ...26 5 2 3 Control Panel ...
Страница 32: ...31 5 3 3 Wash Assembly POS NO DESCRIPTION 14 Screw 2 PLCS 15 Lock Hub Functional parts ...
Страница 33: ...32 5 3 4 Cabinet Assembly ...
Страница 69: ...68 User Interface of Laundry Center FFLG4033QW ...
Страница 70: ...69 User Interface User Interface UI Board FFLE3911QW Washer User Interface UI Board FFLG4033QW Washer ...
Страница 72: ...71 8 2 Schematic Diagram for Laundry Center Dryer Electronic Control Board FFLE3911QW and FFLG4033QW ...
Страница 73: ...72 8 3 Schematic Diagram for Laundry Center Washer Main Control Board FFLE3911QW and FFLG4033QW ...
Страница 74: ...73 8 4 Schematic Diagram for Laundry Center Washer User Interface UI FFLE3911QW and FFLG4033QW ...
Страница 75: ...74 8 5 Schematic Diagram for Laundry Center Washer Motor Control Board FFLE3911QW and FFLG4033QW ...
Страница 76: ...75 8 6 Wiring Diagram FFLE3911QW Electric Dryer Model ...
Страница 77: ...76 8 7 Wiring Diagram FFLG4033QW Gas Dryer Model ...
Страница 78: ...77 8 8 Wiring Diagram FFLE3911QW and FFLG4033QW Washer Model ...
Страница 91: ...90 Wiring Diagram FFLE3911QW Wiring Diagram FFLG4033QW ...
Страница 125: ...124 ...
Страница 161: ...160 ...
Страница 165: ...164 ...
Страница 168: ...167 ...
Страница 170: ...169 ...
Страница 179: ...178 ...
Страница 181: ...180 ...
Страница 183: ...182 ...