14
SETTING SURFACE CONTROLS
On the left side of the cooktop there are two single burners
with a bridge element between them. When turned on, the
bridge element allows for a larger cooking area by cycling at
the same temperature as the left rear element.
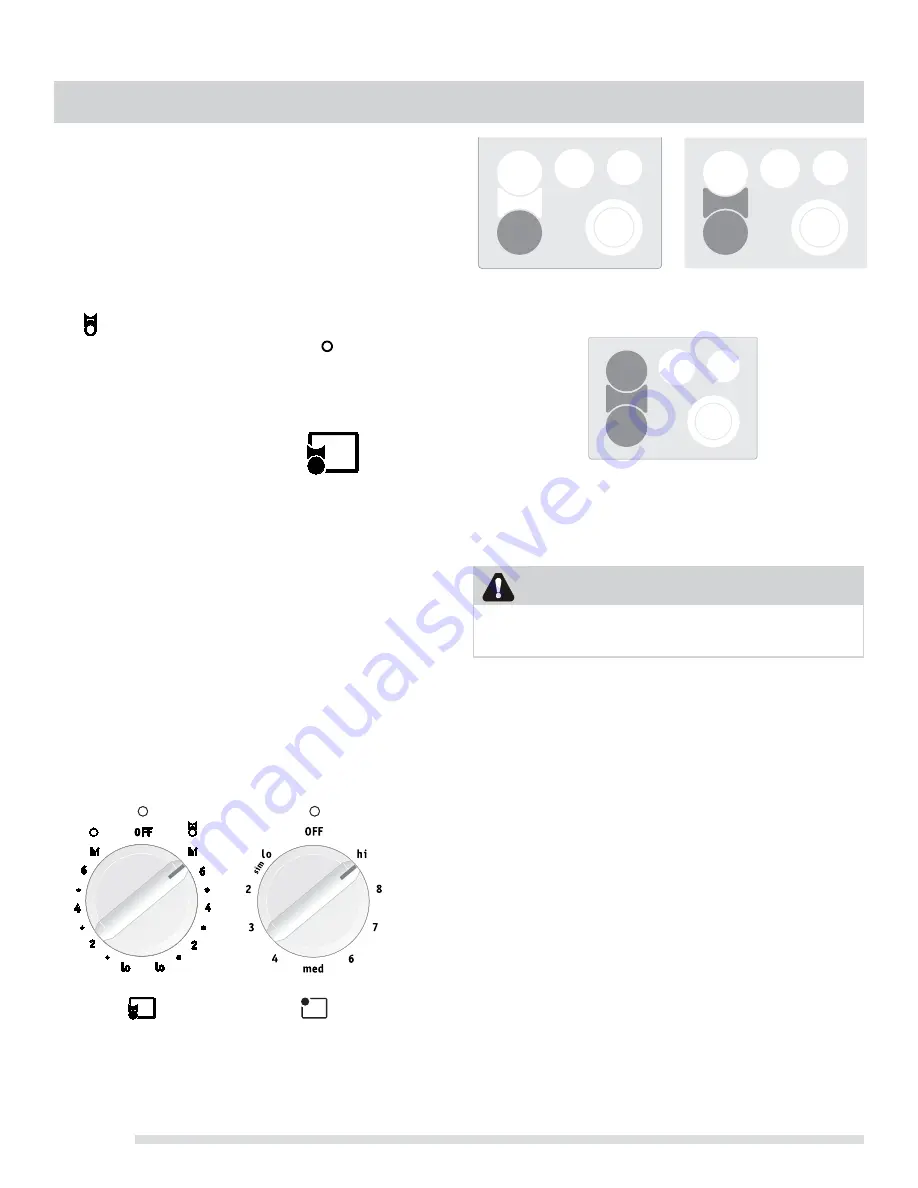
Bridge element operation symbols are located on the control
panel on each side of the Bridge element control knob. These
symbols indicate the direction to turn the control knob when
operating the Bridge element.
The symbol indicates that only the single portion of the
Bridge element will heat (See Fig. 2). The symbol indicates
that both the single and Bridge portions of the element will
heat together (Fig. 3). You may switch from either of these
settings at any time during cooking with the Bridge element.
Bridge Element
CAUTION
Use only cookware specifically designed for use with
the bridge element.
.
Heating with front and
bridge elements
Heating with front
element only
Heating with front, bridge and rear elements on
Areas that heat are shown darkened.
Heating with front
element only
Heating with front
and bridge elements
Heating with front, bridge and rear elements on
areas that heat are shown darkened
Fig. 1
Fig. 4
To operate the bridge element:
1. Place the griddle over the two 7 inch elements and
bridge element.
2. To activate the front single element alone turn the
knob to the single setting.
3. To add the bridge element turn the knob to bridge.
4. For even cooking on the griddle make sure the bridge
setting is the same as the rear single knob setting.
5. Allow the griddle to heat for a few minutes when
cooking items that require a preheated surface such
as pancakes and eggs. The two elements will work
together with the bridge element to provide even
heating.
6. After turing off the bridge knob and rear single knob
the griddle will remain hot for several minutes. Allow
to cool completely before removing from the cooktop.
Fig. 2
Fig. 3


