background image

Содержание BGGF3042KFT

Страница 1: ...lation instructions before installing range Remove all packing material from the oven compartments before connecting the gas and electrical supply to the range Observe all governing codes and ordinances Be sure to leave these instructions with the consumer important notes to the consumer Keep these instructions with your Use Care Guide for future reference Be sure your range is installed and groun...

Страница 2: ...CONTROLS TO OFF IN THE EVENT OF A POWER FAILURE The electric ignitor will automatically re ignite the oven burner when power resumes if the oven thermostat control was left in the ON position When an electrical power failure occurs during use the surface burners will continue to operate During a power outage the surface burners can be lit with a match Hold a lighted match to the burner then slowly...

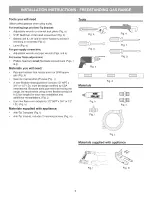
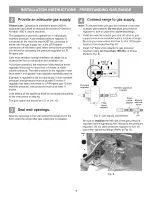
Страница 3: ...int sealant that resists action of LP Propane gas Fig h Gas line manual shut off valve Fig i A new flexible metal appliance conduit 1 2 NPT x 3 4 or 1 2 I D must be design certified by CSA International Because solid pipe restricts moving the range we recommend using a new flexible conduit 4 to 5 foot length for each new installation and additional reinstallations Fig j Use new flare union adapter...

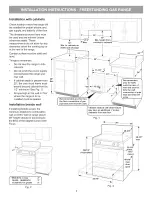
Страница 4: ...et front by 1 2 minimum See Fig 1 All openings in the wall or floor where the range is to be installed must be sealed installation beside wall If installing beside a wall the minimum distance to combustible wall on either side of range above 36 height should be according to the BTU of the largest burner See Fig 2 9500 BTU or less 2 _ 10 000 16 999 BTU 3 Fig 2 18 _ Min to cabinets on either side of...

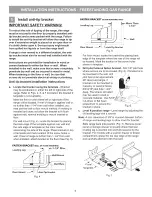
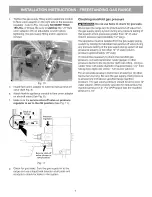
Страница 5: ...unt Fig 4 locate the bracket by placing the back edge of the template against rear wall and the side edge of template on the mark made referencing the side of the range Place bracket on top of template and mark location of the screw holes in wall If rear of range is further than 1 1 4 from wall when installed attach bracket to the floor See Fig 5 FASTEN BRACKET WALL OR FLOOR MOUNTING _1 14 1 1 4 M...

Страница 6: ...tor has been converted for LP Propane gas 10 inch manifold pressure inlet pressure must be at least 11 inches Leak testing of the appliance shall be conducted according to the instructions in step 4g The gas supply line should be 1 2 or 3 4 I D Seal wail openings Seal any openings in the wall behind the range and in the floor under the range after gas supply line is installed Note To prevent leaks...

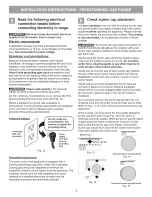
Страница 7: ...t be isolated from the gas supply piping system by closing its individual manual shut off valve during any pressure testing of the gas supply piping system at test pressures equal to or less than 14 of water column pressure approximately 1 2 psig If it should be necessary to check the manifold gas pressure connect manometer water gauge or other pressure device to the top burner right rear orifice ...

Страница 8: ... by a qualified electrician to make sure the receptacle is properly grounded and polarized 8 Check burner cap placement It is very important to be sure that all surface burner caps and burner grates are properly installed and in the correct locations before operating the appliance Please note that the burner heads are secured to the cooktop The cooktop is not removeable Do not attempt to remove or...

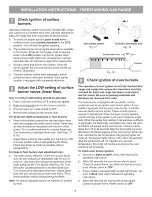
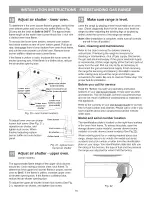
Страница 9: ...e flame size of the outer portion of the Twin Burner See Fig 18 Turn the screw counterclockwise to increase flame size Turn clockwise to decrease flame size Adjust flame size until you can quickly turn the knob from LITE to lowest position without extinguishing the flame Note Air mixture adjustments are not required on surface bumers other surface burners Fig 17 J for Dual or Twin burner only Fig ...

Страница 10: ...d electrical supply If the gas or electrical supply is inaccessible lift the range slightly at the front and pull out away from the wall Pull out only as far as necessary to disconnect the gas and electrical supply Finish removing the range for servicing and cleaning Reinstall in reverse order making sure to level the range and check gas connections for leaks Be sure to read and follow step 1 for ...

Отзывы: