manualshive.com logo in svg
background image


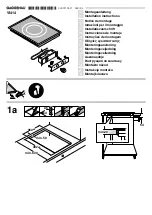
First make all connections. Then lay the strip of putty along the edge of the cut-out and  
set the hob on it. Tighten the fastening hooks, screwing them carefully. Remove excess  
putty.  
Models  
POI/POL/POC 6 3GAV-D-O  
Legend  
POI Satin-finish stainless steel Opera hob  
G Gas  
A Electronic ignition  
V Safety valve  

Important  

These are "Y" appliances in terms of fire protection. They can be installed built-in even near wooden walls higher than the worktop in which they 
are installed as long as there is a minimum distance from the edge of the appliance equal to: 50 mm. for the side wall, 30  

mm. for the rear wall and at least 700 mm from wall cabinets hung over the hob.  

Connection to the gas pipeline  

There are two ways of making the connection to the gas  
pipeline:  
A) Connect the gas hob using a dia. 12 mm rigid copper tube as illustrated in figure 3. To 
guarantee a proper  
seal insert the elastomer seal provided with the appliance.  
B) Connect the hob using a solid wall flexible steel tube.  
Here, too, you must insert the seal that is furnished in order to ensure a proper seal. We also 
recommend  
compliance with standards regarding gas-fired appliances.  
Check for leaks after making the gas connection.  


Room ventilation  

Make sure there are permanent openings to the outdoors in the room where the appliance is installed or vent ducts that permit a proper flow of air.  
All openings that are made must:  
1) have a minimum 100 cm2 cross-section area;  
2) be designed so that they cannot be blocked from the outside or the inside;  
3) be pro tected so that their ventilation passage is not reduced in size;  
4) be high enough above floor level to prevent interference with combustion exhaust.  
When openings are made in the wall of an adjacent room this room must be directly vented and, in addition, must not be:  
1) a bedroom  
2) a public room in the building  

Содержание POI63GAVDO

Страница 1: ...b 2 Keep the knob strongly pressed in for 3 4 seconds to permit the spark to light the gas that exits from the flametamer and to permit the thermocouple to heat up 3 Release the knob after about 3 4 s...

Страница 2: ...device takes effect approximately 30 seconds after the flame turns off Hob cleaning and maintenance All parts made of 18 10 stainless steel will remain just like new if they are cleaned with water and...

Страница 3: ...450 167 I h methane dual internal 0 63 700 200 67 I h G20 dual external 1 18 2600 1300 248 I h 20 mbar totale dual 3300 1500 315 I h oval 1 06 1900 700 181 h small 50 1000 400 73 g h Liquiefed Gas med...

Страница 4: ...pliance can be a source of danger Make sure gas distribution systems are as required before installing the appliance The gas for which the hob is designed is indicated on the label on the bottom of th...

Страница 5: ...as illustrated in figure 3 To guarantee a proper seal insert the elastomer seal provided with the appliance B Connect the hob using a solid wall flexible steel tube Here too you must insert the seal...

Страница 6: ...jectors when other gases are used 1 remove the grillplates and burners 2 remove the injectors by unscrewing them and replace them with injectors suitable for the gas being used Make sure they are mark...

Страница 7: ...indicated on the identification plate on the bottom of the hob Make sure the electrical system meter fuses switch plug and outlet are correctly sized for the current absorption rate of the hob Fit a...

Страница 8: ...HOSE FOR CONNECTING TO THE AUXILIARY BURNER 1 15 1981860 HOSE FOR CONNECTING TO THE RIGHT MEDIUM BURNER 1 16 1981861 HOSE FOR CONNECTING TO THE REAR MEDIUM BURNER 1 17 1981862 HOSE FOR CONNECTING TO T...

Страница 9: ...METAMER 2 39 1981849 FISH CAP AND BURNER FLAMETAMER 1 40 1981850 DUAL BURNER FLAMETAMER 1 41 1981851 BLACK CAST IRON CAP FOR AUXILIARY BURNER 1 42 1981852 BLACK CAST IRON CAP FOR MEDIUM BURNER 2 43 19...

Страница 10: ...10...

Страница 11: ...2005 Satin finish knob with nut and spring FOR HOB OPERA ONLY FOR GAS BURNER AVAILABLE ONLY AS OPTIONAL Satin finish knob with nut and spring FOR knob energy regulator HI LIGHT HEATIN ELEMENT AVAILABL...

Страница 12: ...12...

Страница 13: ...13...

Отзывы: