13
Date
:
Show date, Display the date, you can select the date through “<” or “>”button.
Timeline:
If you have purchased cloud service, you can click the timeline to watch the storage video at the
corresponding time on the cloud.
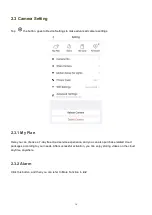
Camera Setting:
Click this button to set more.
IR LED Schedule:
On this page, you can enable/disable the IR LED, and set the IR auto switch or you can
schedule it.
Auto: As default, the IR-Cut auto switch is ON, it means that the IR LED will be OFF during 9:00~18:00,
and the IR LED will be ON at the other time.
Day: it means that the IR LED will be OFF all the time.
Night: it means that the IR LED will be ON all the time.
Schedule: You can schedule the time to turn the IR LED OFF/ON.
Mirror:
You can flip the image horizontally with this button.
Wired connection / Wireless connection:
You can use this to see whether the current camera is in a wired or
wireless connection.
Bit Rate:
You can see the current connection bit rate.
Full screen:
Click this full screen button, you can live in full screen.
More Function:
Here you can set Activity Detection and Sound Detection.
Note:
Motion Detection and face Detection cannot be turned on at the same time.
Activity Detection:To enable Activity detection, follow the steps below:


