


51
w
w
w
w
w
w
w
w
w
w
w
w
w
w
w
w
ww.foscam.co
ww.foscam.co
ww.foscam.co
ww.foscam.co
ww.foscam.co
ww.foscam.co
ww.foscam.co
ww.foscam.co
m
m
m
m
m
m
m
m
Shenzhen
Shenzhen
Shenzhen
Shenzhen
Shenzhen
Shenzhen
Shenzhen
Shenzhen
Foscam
Foscam
Foscam
Foscam
Foscam
Foscam
Foscam
Foscam
Intelligent
Intelligent
Intelligent
Intelligent
Intelligent
Intelligent
Intelligent
Intelligent
Technology
Technology
Technology
Technology
Technology
Technology
Technology
Technology
Co.,
Co.,
Co.,
Co.,
Co.,
Co.,
Co.,
Co.,
Limited
Limited
Limited
Limited
Limited
Limited
Limited
Limited
Tel:
Tel:
Tel:
Tel:
Tel:
Tel:
Tel:
Tel:
86
86
86
86
86
86
86
86
755
755
755
755
755
755
755
755
2674
2674
2674
2674
2674
2674
2674
2674
5668
5668
5668
5668
5668
5668
5668
5668
Fax:
Fax:
Fax:
Fax:
Fax:
Fax:
Fax:
Fax:
86
86
86
86
86
86
86
86
755
755
755
755
755
755
755
755
2674
2674
2674
2674
2674
2674
2674
2674
5168
5168
5168
5168
5168
5168
5168
5168
51
51
51
51
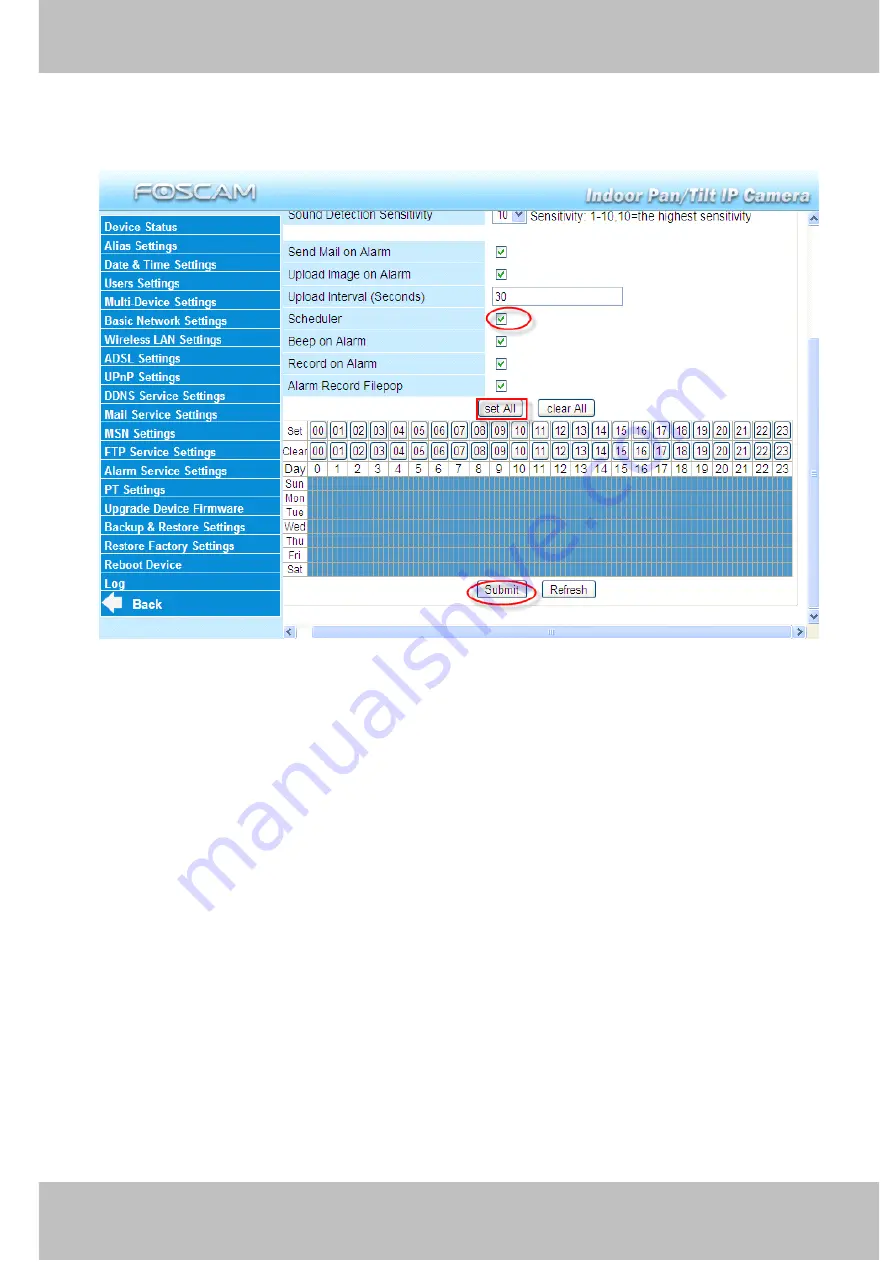
Another Way: select Scheduler, and click “set All”, you will see all time boxes turn blue as in the
following picture. Click Submit and the camera will alarm at any time when motion is detected.
Figure 3.46
2) Specify an alarm schedule.
If you want the camera to alarm during set times select
Scheduler
Scheduler
Scheduler
Scheduler
and set time range.
If you want to select one serial area, you can click any number between 00 and 23 on the first
row, the corresponding column will be selected and it will turn blue. For example, click the
number “06” on the first row, you can see the column turn blue. That means the camera will
alarm when motion/sound is detected between 6 and 7 o’clock every day. Click the number“06”
on the second row, you can cancel the corresponding column you set. And it will turn grey.
All manuals and user guides at all-guides.com


