


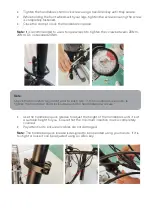


Charging
Before charging the bike, turn the power switch to “OFF” and remove the key. Keep the
charger in a dry and a well ventilated area during operation.
•
Connect the charger plug to the bike battery case socket and then connect it to a
power outlet.
•
Charge the bike for 4–6 hours. The battery charger indicator will turn from RED to
GREEN when it is fully charged. The battery can be charged for an additional 2
hours. Do not exceed more than 10 hours of charging.
•
Disconnect the charger from the power outlet and then from the battery case.
Disconnect the charger if it will not be used for an extended period of time,
especially in hot weather.
The battery can also be charged separately from the bike:
•
Unlock the battery with the ignition key.
•
Lift the seat with the lever underneath it and remove the battery.
•
To replace the battery, insert the battery along the bracket and then lock the
battery using the ignition key.
Battery capacity
•
When the battery is fully charged it will provide a riding distance of between 30km -
40km under normal use.
•
The maximum speed of the bike with electrical assistance is 25km/h. If the speed is
held at 25km/h, the battery will discharge in approximately 2-3 hours.
OPERATION
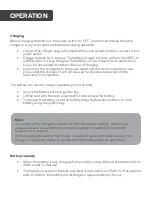
Note:
It is normal for the charger to be warm to the touch while charging. If there is an
unusual odour or it is extremely hot, stop charging it immediately and contact
Kogan.com for support.
While charging ensure that the charger is placed in a well-ventilated area and the
charger is not placed nearby or covered with flammable materials and fabrics.
Содержание FS20FATEBKB
Страница 1: ...20 FATTYRE FOLDABLE ELECTRIC BIKE FS20FATEBKB...
Страница 18: ...NOTES...


