


Configuration Overview
Page 11
FortiFone User Guide
To configure the SNTP settings via phone user interface:
1.
Tap
Menu
>
Settings
>
Basic Settings
>
Time & Date
>
SNTP Settings.
2.
Tap the
or
softkey to select the time zone that applies to your area from the
Time
Zone
field.
3.
The default time zone is
+8
.
4.
Enter the domain name or IP address in the
NTP Server1
and
NTP Server2
field
respectively.
5.
Tap the
or
softkey to select the desired value from the
Daylight Saving
field.
6.
Tap the
or
softkey to select the desired time zone name from the
Location
field.
This field appears only if
Daylight Saving
field is selected
Automatic
.
7.
Tap the
Save
softkey to accept the change or the
Back
softkey to cancel.
To configure the time and date manually via phone user interface:
1.
Press
Menu
>
Settings
>
Basic Settings
>
Time & Date
>
Manual Settings
.
2.
Enter the specific time and date.
3.
Tap the
Save
softkey to accept the change.
4.
The date and time displayed on the LCD screen will change accordingly.
To configure the time and date format via phone user interface:
1.
Tap
Menu
>
Settings
>
Basic Settings
>
Time & Date
>
Time & Date Format
.
2.
Tap the
or
softkey to select the desired time format (
12 Hour
or
24 Hour
) from the
Time
Format
field.
3.
Tap the
or
softkey to select the desired date format from the
Date Format
field.
4.
Tap the
Save
softkey to accept the change or the
Back
softkey to cancel.
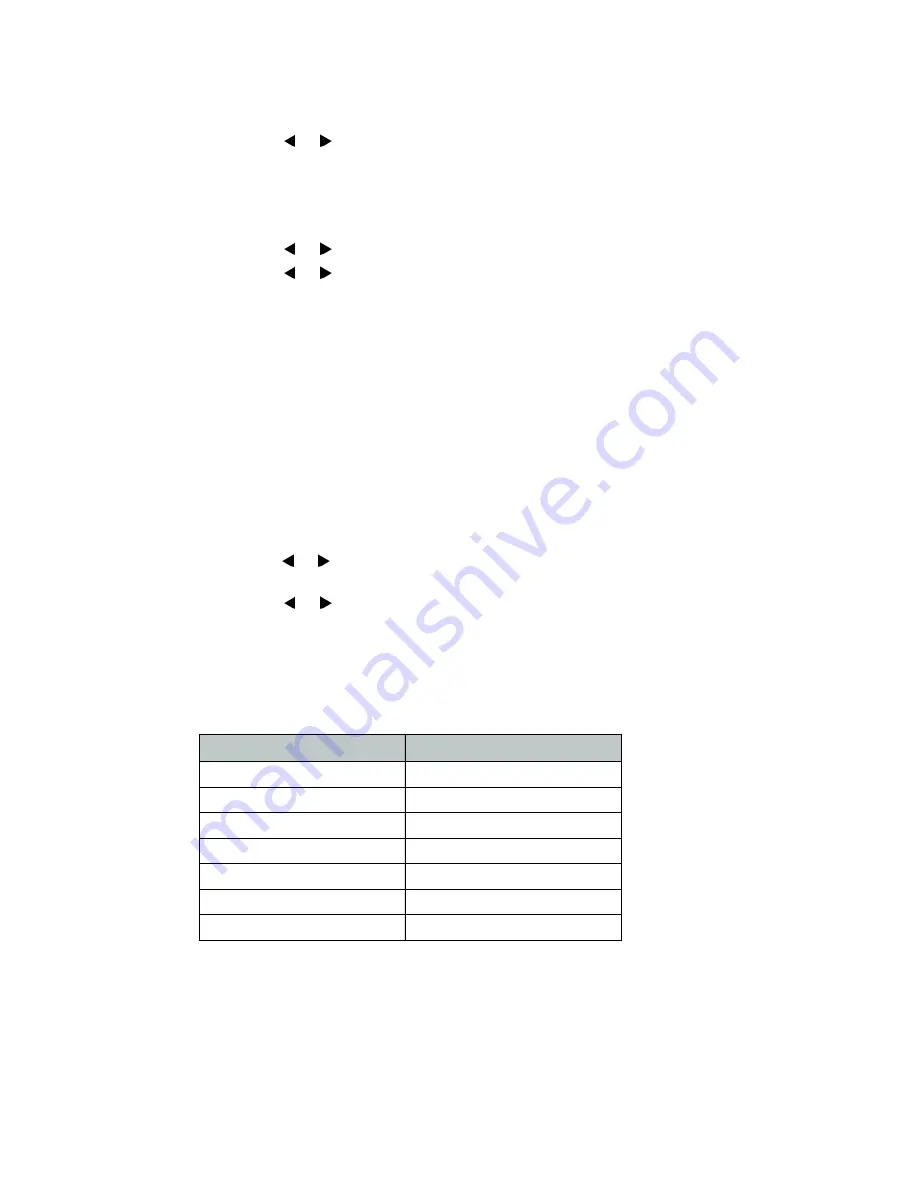
There are 7 available date formats. For example, for the date format
WWW DD MMM
,
WWW
represents the abbreviation of the weekday,
DD
represents the two-digit day, and
MMM
represents the first three letters of the month.
These are the date formats available:
Date Format
Example (2015-03-18)
WWW-MMM-DD
Wed Mar 18
DD-MMM-YY
18-Mar-15
YYYY-MM-DD
2015-03-18
DD/MM/YYYY
18/03/2015
MM/DD/YY
03/18/15
DD MMM YYYY
18 Mar 2015
WWW DD MMM
Wed 18 Mar


