background image

Water Hook-Up

  -  City Fill and On-Board 


City Fill

:  Connect to the water source using a 3/4" water hose. Attach the hose to the City 

Fill water connection located on the roadside wall to the right of the utility door. 
 
 
All the plumbing originates at the City Fill connection located on the roadside of the trailer.  
This is a standard 3/4" hose connection. Water is fed from this point, into the mechanical 
room via 1/2" plastic tubing. From that point forward the unit is supplied using 3/8" plastic 
tubing. Items supplied by this tubing include the toilets, sinks, and water heater. 
 
If your unit is supplied with a optional water heater, it will be located under the cabinet in 
the Men’s restroom. The temperature has been preset to approximately 

104

 F, eliminating 

the need for a mixing valve. The single push to operate faucets will supply warm water 
only and are timed for approximately 

5

 seconds. The supply line to the water heater also 

contains a shut-off valve. This shut-off valve will normally remain open except when 
performing water heater maintenance or when winterizing. 


On-Board

: If your unit is equipped with the On-Board Fresh Water System, you will find 

all of the components located in the mechanical room. This will include a fresh water tank, 
a fresh water pump and an expansion tank mounted above the fresh water tank. The fresh 
water tank is filled, by removing the fill cap, at the top of the tank. The water level 
indicator is the vertical clear plastic hose on the face of the water tank. The supply pump 
will operate based on demand. The expansion tank acts as a reserve, so the pump does not 
cycle continuously. 
 
The fresh water pump, powered through the 12V fuse panel, has an On/Off switch located 
directly below the fuse panel. 
Do not transport water to your site. Fill the tank at the nearest water source to your set-up 
site. When filling the fresh water tank, make sure the drain valve is in the closed position 
(turned to the side). 
Make sure the demand pump power switch is turned on during operation, so that the 
expansion tank (located above the water tank) is filled intermittently. 


Содержание CENTURY ADA +1

Страница 1: ...OPERATING MANUAL Mobile Restroom Trailer Forest River Cargo 3731 California Road Elkhart IN 46514...

Страница 2: ...ty trailers and Recreational Vehicles At Forest River we have attempted to design and manufacture a very functional and serviceable portable Restroom facility Using the best materials we have been abl...

Страница 3: ...ooking Up Set Up Leveling Assembly Steps Porches Railings Electrical Water Hook Up Operation Climate Control LED Waste Tank Sensor Doors Mirrors Soap Towel Dispensers Tear Down Dismantling Winterizing...

Страница 4: ...in the Front Carrier Porches Assembled Rubber Draw Latch Holds the Bracket Holds Porch Porch Steps in Retracted Position in Retracted Position View of Rail Locking Pin at Bottom Leveling Foot for Ste...

Страница 5: ...Railing Installed at Top Leveling Jack Exterior RV Style Electrical Cord Hook Up City Water Fill Front of Trailer Showing Porch Light Pump Out Valve and Wash Out Port...

Страница 6: ...esh Water Pump exposed Fresh Water Pump with Cover Urinal Pump View of Vent Pipe and Fresh Water Tank with Level Indicator Tube On Board Fresh Water Tank Showing Electrical Panel Fill Cap on Top of Ta...

Страница 7: ...Roof A C and Ducts A C Climate Control View of Women s Restroom Example of Toilet Paper Dispenser and Sanitary Napkin Recepticle Sink and Soap Dispenser Paper Towel Dispenser and Trash Disposal Access...

Страница 8: ...cepticle View of Men s Restroom In Locking Base Cabinet View of Sink Drain Set Up Inside Century Series Vacant Occupied Lights Lockable Base Cabinet Slide Bolt that Operates Vacant Occupied Vacant Occ...

Страница 9: ......

Страница 10: ...s Repair and service information for each available type of brake can be found in the Axle Manufacturer s Service Manual Please follow all of the Axle Manufacturer s instructions concerning brakes Rem...

Страница 11: ...us payload Distribute load as shown below Tips for the beginner Turning Backing up Always remember when turning that the trailer makes tighter and quicker turns than your tow vehicle To help compensat...

Страница 12: ...g simply twist them Connect the electrical plug on the trailer to the plug on the tow vehicle Check to make sure that all running directional and brake lights are functioning Load properly approx 60 i...

Страница 13: ...ls are located on each side of the trailer near the wheel fenders and on the front and back of the trailer The levels have been applied to indicate level when the trailer is actually tilted slightly t...

Страница 14: ...he female room and exit sides on a Denali Steps Porches and Railings It is also important when lowering each porch and step arrangement to be certain that the porch is properly leveled using the screw...

Страница 15: ...4 Remove the step s from the cube s and pin them in place Adjust leveling feet as needed 5 Unbolt and lower the ADA platform Adjust leveling feet as needed 6 Remove the ramp sections from the ADA cube...

Страница 16: ...ioner If the trailer comes equipped with a water heater the lights and Air Conditioner are on one breaker The water heater is on the other breaker Both breakers are activated by pushing each breaker i...

Страница 17: ...off valve This shut off valve will normally remain open except when performing water heater maintenance or when winterizing On Board If your unit is equipped with the On Board Fresh Water System you w...

Страница 18: ...f 104 F The shower valves are of the pull and release style and will only release water when the valve is turned Behind the small access door on the rear of the trailer is a spigot and a large red han...

Страница 19: ...sm are the keys for each cabinet and a strainer key for the faucet The strainer key is used to remove the faucet strainer for cleaning when necessary Add the appropriate odor control and waste digesti...

Страница 20: ...other pumping Doors The in use lock is the slide bolt located inside the door above the door knob A label on each slide bolt indicates the locked and unlocked position of the bolt When the slide bolt...

Страница 21: ...into the sump pump and the drainage is used to auto flush the urinal Filling the sump pump will auto flush the urinal and antifreeze should be visible in the urinal Verify that antifreeze is visible i...

Страница 22: ...e opening the warmer the mechanical room and colder the restrooms The smaller the opening then the reverse will be the case The waste tanks are heated by blanket heaters on the bottom of the tank Thes...

Страница 23: ...heck for unusual wear on chain links and hitch ball X Coupler Check the safety pin to make sure it is fastening properly X Brakes Check operation and proper adjustment X Breakaway battery and switch C...

Страница 24: ...ax use an automotive type wax Proper care and maintenance will ensure your trailer s color and the durability of its finish Floor To keep your floor in tip top shape avoid prolonged exposure to water...

Страница 25: ...The recommended torque range is 85 to 95 foot pounds Tires and Wheels Always check your tire pressure before using your trailer When checking tire pressure always check when tires are cold If you are...

Страница 26: ......
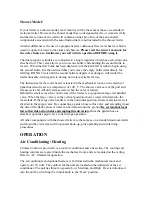
Страница 27: ...Trailer Maintenance Record Please use this Maintenance Record to keep track of any work you do on your trailer It will help keep your trailer in the best shape possible Trailer Maintenance Record...

Страница 28: ...gation and if it finds that a safety defect exists in a group of vehicles it may order a recall and remedy campaign However NHTSA cannot become involved in any individual problems between you your dea...

Страница 29: ...ranty forestriverinc com Parts and Service For Parts Contact Forest River Cargo Division Parts Department 3731 California Road Elkhart IN 46514 Phone 574 266 7554 Fax 574 266 7555 E Mail cargo16parts...

Отзывы: