background image

U49C RED HERON 

User Manual

9

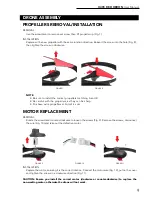
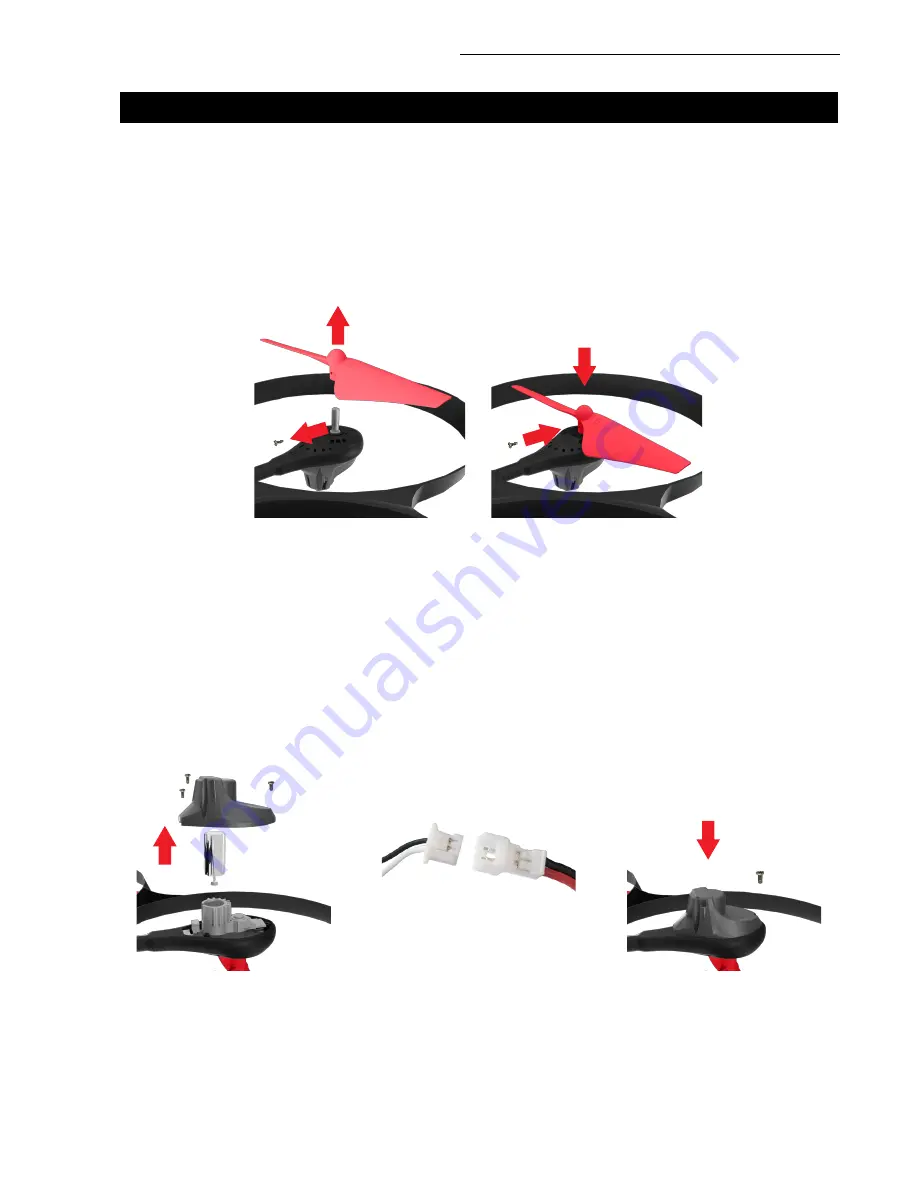
FIGURE 7

FIGURE 8

DRONE ASSEMBLY

PROPELLERS REMOVAL/INSTALLATION

REMOVAL
  Use the screwdriver to remove set screw, then lift propeller up (Fig. 7).

INSTALLATION
  Replace with a new propeller with the same rotation direction. Reinsert the screw into the hole (Fig. 8), 

then tighten the screw in clockwise.

INSTALLATION
  Replace the motor, ensuring it is the correct rotation. Connect the motor wire (Fig. 10), put on the cover 

and tighten the screws in a clockwise direction (Fig. 11).

CAUTION: Ensure you install the correct motor (clockwise or counter-clockwise) to replace the 

non-working motor; otherwise the drone will not work.

MOTOR REPLACEMENT

REMOVAL
  Rotate the screwdriver counter-clockwise to loosen the screws (Fig. 9). Remove the screws, disconnect 

the wire (Fig. 10) and take out the defective motor.

FIGURE 9

FIGURE 10

FIGURE 11

NOTE

• 

Be sure to install the correct propellers matching A and B

• 

Be careful with the propellers, as they can be sharp

• 

Purchase extra propellers at Force1rc.com

Содержание U49C RED HERON

Страница 1: ...USER MANUAL Visit us online at force1rc com for product information replacement parts and flight tutorials FOR MORE INFORMATION U49C With 120 wide angle 720P HD Camera RED HERONHD...

Страница 2: ......

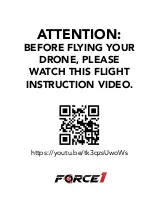
Страница 3: ...ATTENTION BEFORE FLYING YOUR DRONE PLEASE WATCH THIS FLIGHT INSTRUCTION VIDEO https youtu be tk3qzsUwoWs...

Страница 4: ...e Battery Charging 5 Contents Drone Overview 6 Transmitter Overview 7 Transmitter Battery Installation 8 Drone Assembly 9 Quick Start Guide 12 Preflight Checklist 13 Preflight Operations 13 Flight Con...

Страница 5: ...rc com for fast friendly service Please use only original Force1 parts and accessories Please keep the packaging and this user manual for future reference This drone is suitable for experienced RC dro...

Страница 6: ...using further heating Charging DO NOT overcharge the battery never charge batteries unattended and stop charging as soon as your batteries indicate they are charged DO NOT attempt to charge batteries...

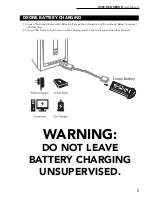
Страница 7: ...CHARGING UNSUPERVISED DRONE BATTERY CHARGING 1 Connect the drone battery with USB cable first and then choose one of the methods below to connect with USB plug 2 The red USB indicator light turns on w...

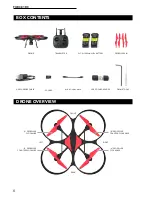
Страница 8: ...E TRANSMITTER 2 x 7 4v 1000mAh LiPo BATTERY PROPELLERS 4 USB CHARGER CABLE MICRO USB CABLE USB SD CARD READER DRONE TOOLS B PROPELLER COUNTER CLOCKWISE A PROPELLER CLOCKWISE A PROPELLER CLOCKWISE B PR...

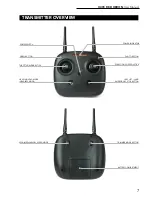
Страница 9: ...RVIEW THROTTLE RUDDER STICK HIGH MEDIUM LOW SPEED MODE DIRECTION CONTROL STICK TRIMMER MODE BUTTON HEADING HOLD MODE HEADLESS MODE 1 KEY LIFT LAND EMERGENCY STOP BUTTON BATTERY COMPARTMENT PHOTO BUTTO...

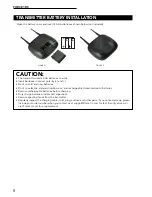
Страница 10: ...on t mix alkaline standard carbon zinc and rechargeable nickel cadmium batteries Remove rechargeable batteries before charging Only charge batteries under adult supervision Remove spent batteries from...

Страница 11: ...the motor wire Fig 10 put on the cover and tighten the screws in a clockwise direction Fig 11 CAUTION Ensure you install the correct motor clockwise or counter clockwise to replace the non working mot...

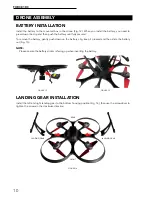
Страница 12: ...ly push down on the battery clip keep it pressed and then slide the battery out Fig 13 NOTE Please ensure the battery sticker is facing up when inserting the battery LANDING GEAR INSTALLATION Install...

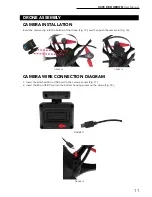
Страница 13: ...into the bottom of the drone Fig 15 and then push the camera in Fig 16 CAMERA WIRE CONNECTION DIAGRAM 1 Insert the attached Micro USB Cord to the camera socket Fig 17 2 Insert the Micro USB Cord into...

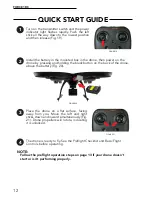
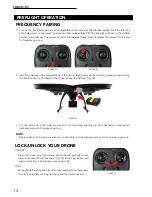
Страница 14: ...n to the lowest position and then release Fig 19 Install the battery in the mounted box in the drone then power on the drone by pressing and holding the black button on the back of the drone above the...

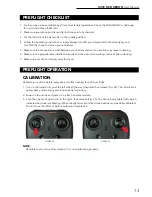
Страница 15: ...d correctly and the motors are working normally after unlocking 7 Make sure your drone is facing away from you PREFLIGHT CHECKLIST FIGURE 22 FIGURE 23 CALIBRATION Calibrate your drone before every use...

Страница 16: ...e left stick all the way down to the lowest position and then release Fig 25 The left stick will back to the middle position automatically The power indicator light flashes slowly which indicates the...

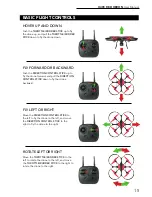
Страница 17: ...p to fly the drone forward and pull the DIRECTION CONTROL STICK down to fly the drone backward FLY LEFT OR RIGHT Move the DIRECTION CONTROL STICK to the left to fly the drone to the left and move the...

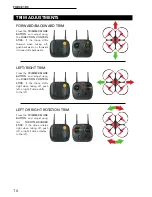
Страница 18: ...if drone drifts backwards LEFT RIGHT TRIM Press the TRIMMER MODE BUTTON and adjust using the DIRECTION CONTROL STICK If the drone drifts right when taking off push left or right if drone drifts to the...

Страница 19: ...ccessful pairing Your drone will rise and hover about 4 feet off the ground MANUAL TAKEOFF Push the left and right sticks as shown below to start the motors after successful pairing Fig 29 Then push t...

Страница 20: ...aerial outdoor stunts ALTITUDE HOLD MODE Altitude Hold places your drone at a consistent altitude while allowing roll pitch and yaw to be controlled normally It makes it easier to control the drone fo...

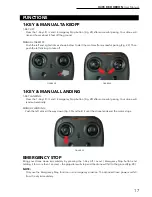
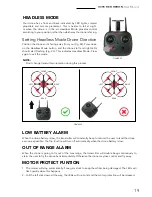
Страница 21: ...e max range the transmitter will double beep continuously to alarm the user to fly the drone back immediately Otherwise the drone may lose control and fly away MOTOR PROTECT FUNTION 1 The motors will...

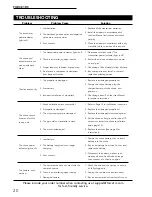
Страница 22: ...rby 1 The camera wire has no contact with the camera box wire 2 There is an interfering signal nearby 2 A propeller is damaged 2 Install the battery in accordance with the User Manual instructions and...

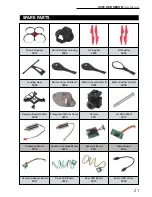
Страница 23: ...er Board 0017 Drone Bottom Housing 0002 Motor Cover Holder A 0006 Transparent Motor Cover 0010 Counter clockwise Motor 0014 Front LED Board 0018 Rear LED Board 0019 Micro USB Cable 0020 A Propeller 00...

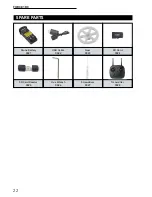
Страница 24: ...FORCE1 RC 22 SPARE PARTS Drone Battery 0021 SD Card Reader 0025 USB Cable 0022 Hex Wrench 0026 Gear 0023 Screwdriver 0027 SD Card 0024 Transmitter 0028...

Страница 25: ...try to correct the interference using the following measures Reorient or relocate the receiving antenna Increase the separation between the equipment and receiver Connect the equipment into an outlet...

Отзывы: