5
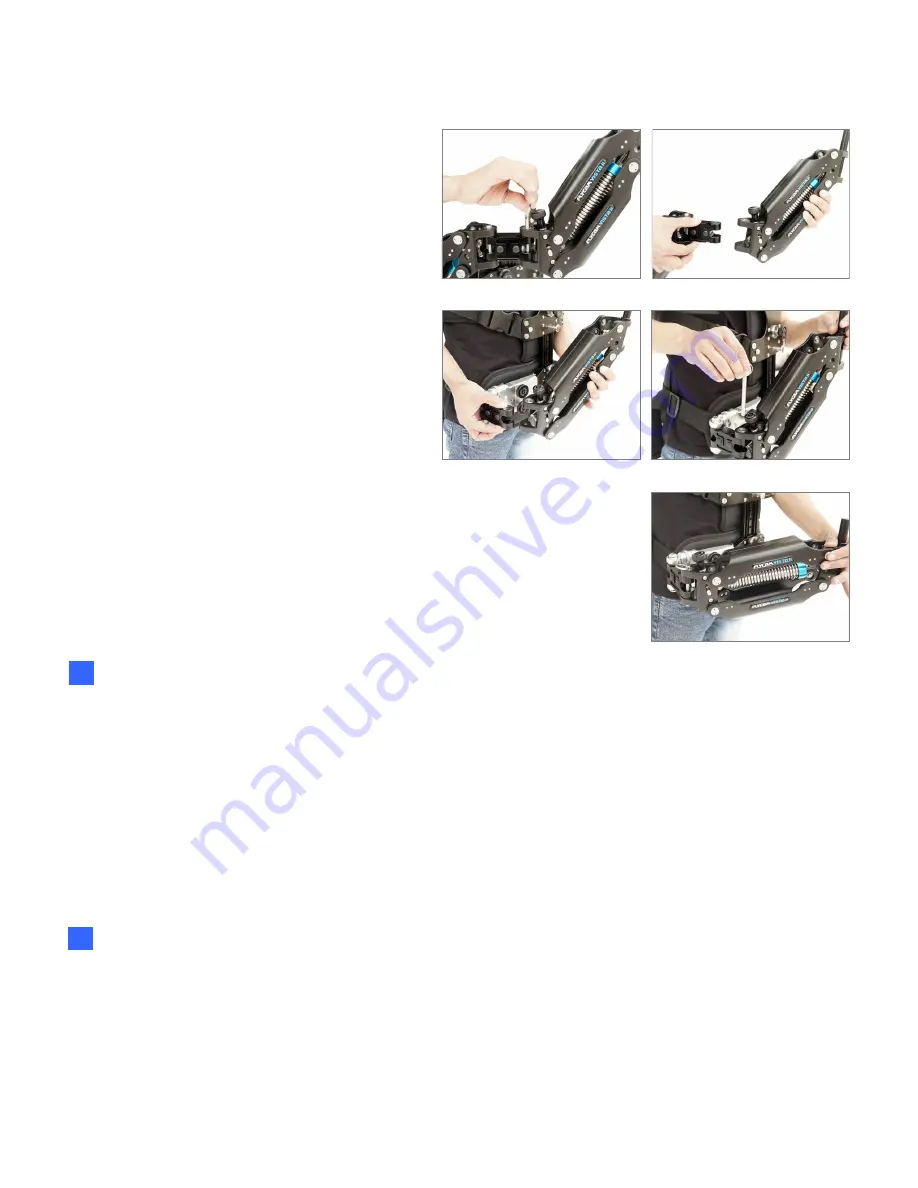
To Use As Single Arm Configuration
19. Pull the pin from middle jointer.
20. Remove one section of the Arm (Part-3).
23. Finally, single arm (Part-3) properly attached
as shown in the image.
21. Now, attach the single arm (Part-3)
22. Insert the pin from middle jointer to secure
with it.
19
21
20
22
23
The arm tension is adjusted for the heaviest camcorder it can hold, so it does not bottom-out when you
put the camcorder and sled on it for the first time.
Now adjust Arm for the weight of your camcorder:
With the Vest On, attach Arm & unlock the rig.
Move Arm to the middle of its booming (up and down) range and let go (If it stays where it is, you are
probably close to the right adjustment).
Keep making small adjustments until the camcorder does not rise or fall when you let go of it in the
middle of its booming range.
Arm Adjustment
Position arm
Move the camcorder to your left so the arm crosses your body.
Adjust the arc of your arm so the rig feels comfortable to you.
Keep the camcorder close to your body.
For Interchanging the Spring, Follow this video
https://bit.ly/3eYzHs6


