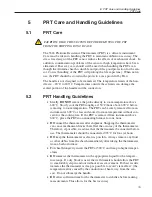
cern for the cooling rate. If the PRT is removed from instrument above
600°C, place the PRT in an annealing furnace for one hour.
•
For sheath longevity, insert the PRT at 500°C and ramp to higher temper-
atures.
•
DO NOT remove the label from the handle. This cautions the user con-
cerning the delicate nature of the instrument.
•
DO NOT drop or bang the probe in any way. This will cause damage to
the probe internally and affect its calibration.
•
Read Section entitled “PRT Care and Handling Guidelines” before re-
moving the PRT from the shipping box or case. Incorrect handling can
damage the PRT and void the warranty.
•
Keep the shipping container in case it is necessary to ship the PRT. Incor-
rect packaging of the PRT for shipment can cause irreparable damage.
1.3
Verifying Probe Accuracy
Before using your probe, verify that its behavior has not changed significantly
from the most recent calibration (as can sometimes occur from mechanical
shock during shipping, for example). To verify your probe, check the probe at
the triple point of water (0.01°C) or in a well-constructed ice bath, by following
these steps:
1.
Connect the probe to a calibrated readout and verify that the probe’s co-
efficients have been correctly entered into the readout.
2.
Properly prepare a triple point of water cell (TPW) or ice bath. (Contact
Hart Customer Service if unsure how to do this.) A triple of water cell is
preferred. Ice baths should use distilled water and crushed ice in a Dewar
flask or thermos bottle. The ratio of ice-to-water should be such that the
mixture is firm after prepared.
3.
Set your readout to read in ohms rather than temperature. Place your
probe in the TPW or ice bath and allow it to stabilize. (Remember a
TPW is at 0.01°C and an ice bath is at 0°C.)
4.
If using a TPW cell, compare the resistance value on your readout with
the resistance value at TPW given on the probe’s certificate. If using an
ice bath, compare the resistance value on your readout with the resis-
tance indicated on the certificate for 0°C. (You may have to use the
probe’s temperature versus resistance table and interpolate to get the
probe’s calibrated resistance value at 0°C.)
5.
Considering the probe’s uncertainty specification, determine whether or
not it is within tolerance of the data on its most recent certificate of cali-
bration. If it is, it may be placed in service. If not, double-check the
probe coefficients in the readout. If they are correct, contact Hart Cus-
tomer Service.
3
1 Before You Start
Verifying Probe Accuracy


