


Flo-Check
®
USB Hydraulic System Analyzer
Installation & Programming Instructions
Page 10
Form No. 05-SGN-PM-00191 02/12
To Record a File
1. Connect the USB cable from the Hydraulic Analyzer to the computer.
Note: This is required
before
starting the software. This allows the software application to detect a connected
unit.
2. Start the software application by double-clicking on the
Flo-tech Hydraulic Analyzer
icon on your desktop.
3. Press
the
Record
button.
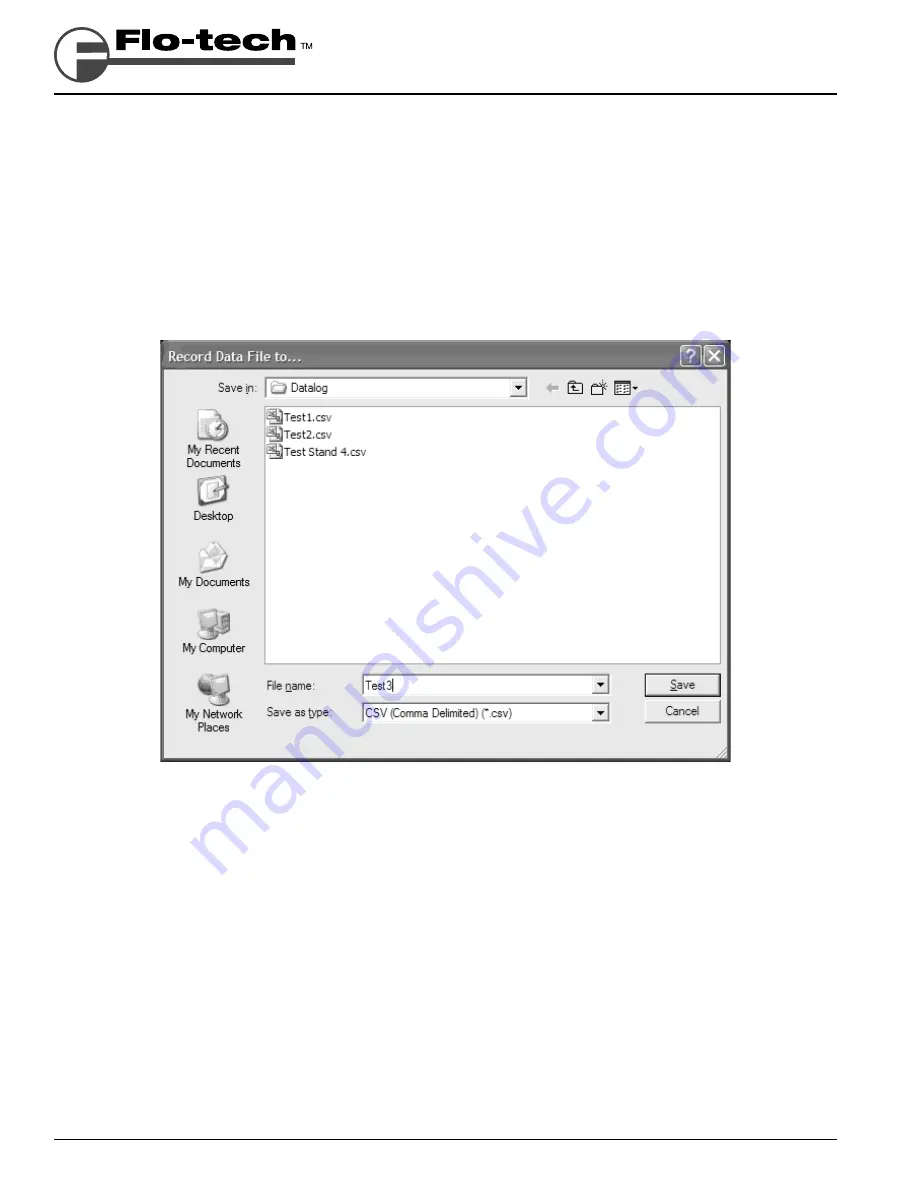
4. A dialog box will be displayed asking you to name the
fi
le you wish to create and where to save it. Type a
name in the
File Name:
textbox and press the
Save
button.
FIGURE 3 -
Record Data File to... Screenshot
Note: The default location for saving a log
fi
le for Windows XP and Windows 2000 is:
C:\Documents and Settings\<user name>\My Documents\Flo-tech\Hydraulic Analyzer\Datalog
The default location for saving a log
fi
le for Windows Vista
®
is:
C:\Users\<user name>\Documents\Flo-tech\Hydraulic Analyzer\Datalog
Note: If you wish to record over an existing
fi
le, double-click on the
fi
le from the list.
Data will be displayed on the digital displays and the strip-chart will be updated once per second. The message
Recording…
is also displayed under the Run button to indicate the software is in Record mode rather than run
mode. It’s important to note that data is not recorded if the
fi
le is already open by another application such as
Excel
®
.
5. Press
the
Stop
button when
fi
nished to halt the collection of data.


