■
Pressing SHIFT and clicking the mouse, or pressing SHIFT and one of the arrow
keys, extends the selection from the previously selected item to the current
item.
■
Pressing CTRL and clicking the mouse selects or deselects an item.
When you finished selecting images click
OK
to close the
Browse for images
dialog.
You can click the
Transfer
button to start transferring the selected images.
7.3.4
Program options
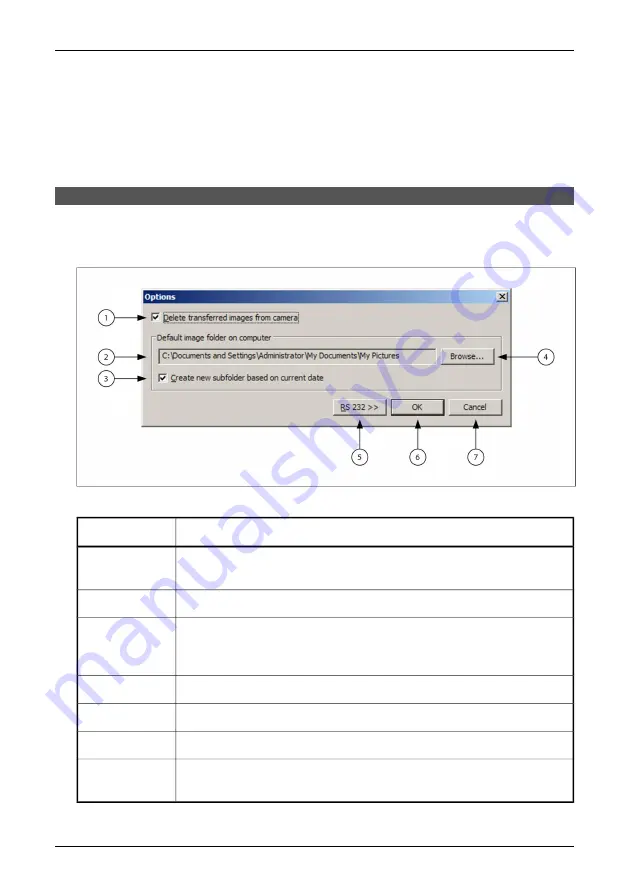
There are a few options in ThermaCAM Connect 3 that you can change. Click on
the
Options
button in the main window to open the
Options
dialog box.
10434903;1
Figure 7.4
Options
Explanation
Callout
If this option is selected transferred images will be deleted from the infrared
camera.
1
Default folder on your computer to which the images will be transferred.
2
If this option is selected a subfolder to the default image folder will be created.
The subfolder will have the same name as the current date and your images
will be transferred to that subfolder.
3
Click here to browse for a new destination folder.
4
Click here to expand the dialog and show serial communication settings.
5
Click here to close the dialog and save the options.
6
Click here to close the dialog and discard all changes you have made in the
dialog.
7
26
Publ. No. 1 557 536 Rev. a35 – ENGLISH (EN) – January 20, 2004
7.3 – Operation
Содержание ThermaCAM P20
Страница 2: ......
Страница 3: ...ThermaCAM P20 Operator s manual Publ No 1 557 536 Rev a35 ENGLISH EN January 20 2004...
Страница 12: ...x Publ No 1 557 536 Rev a35 ENGLISH EN January 20 2004...
Страница 20: ...4 System overview 10397903 1 Figure 4 1 System overview 8 Publ No 1 557 536 Rev a35 ENGLISH EN January 20 2004...
Страница 141: ......


