


Thermal and Visible Camera Operation
When the Laser pointer button
is pressed, the Laser beam appears. Use
the Laser beam and display cross-hairs to target the surfaces under test.
Note that the Laser is carefully aimed to align with the cross-hairs for easier
identification and targeting of objects and surfaces.
Cross-hairs are visible when ‘Centre Spot’ is selected from the ‘Measurement’
menu (
Measurement mode
). Cross-hairs are also visible in the ‘Custom
IGM™ mode’ when ‘IR Temperature’ is selected in the ‘Custom IGM™’ menu
in the ‘Settings’ menu (
Settings/Custom IGM™
).
8.2
Automatic/Lock Temperature Scaling
Note: For best results, allow a warm-up period of 3-5 minutes before using this
feature.
The Auto/Lock Scale option allows the colour palette range to be adjusted to
suit a given application. For example, when viewing both cold and hot objects
in the same frame, the auto-scaling (default mode) will cause the palette to
‘stretch’, as to fit the whole range of temperatures. However, this can cause
smaller temperature variations to go undetected, as the difference between
two colours might increase from 1° to 10°. In this case, the user may choose
to lock the scale with only the cold or medium-temperature objects in the
frame. This would cause the hot objects to saturate, but will provide more de-
tail to the colder objects of interest.
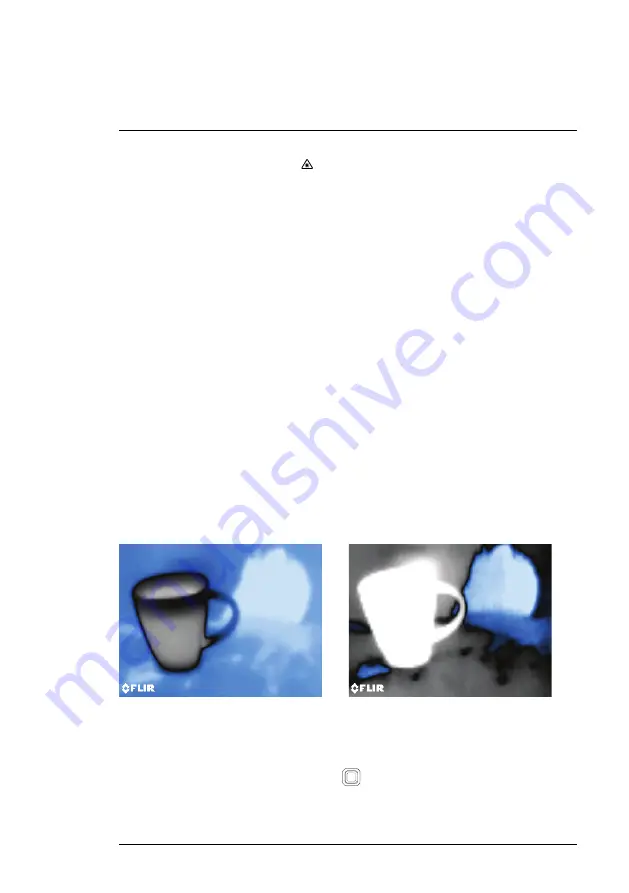
Figure 8.2
Figure on left is ‘auto-scaled’ while the figure on right is ‘scale locked’
If you wish to narrow the range of colour and limit it to colours near the cold
temperature image, set the scale mode to ‘Lock’ with no hot objects in the
frame. To lock the scale, press
Select
to access the Main Menu, scroll to
#NAS100070; r. AB/77165/77326; en-GB
38
Содержание MR265
Страница 1: ...USER MANUAL Moisture Meter and Thermal Imager with MSX Model MR265...
Страница 2: ......
Страница 3: ...USER MANUAL Moisture Meter and Thermal Imager with MSX NAS100070 r AB 77165 77326 en GB iii...
Страница 4: ......
Страница 64: ...NAS100070 r AB 77165 77326 en GB 58...
Страница 65: ......


