


FLIR MR176 USER MANUAL Document Identifier: MR176-en-GB_AB
9
4.3 Menu Map and Overview
The Menu structure is outlined below and covered thoroughly in subsequent sections of this
User Guide. The center Select button and the four (4) Navigation buttons are used to access and
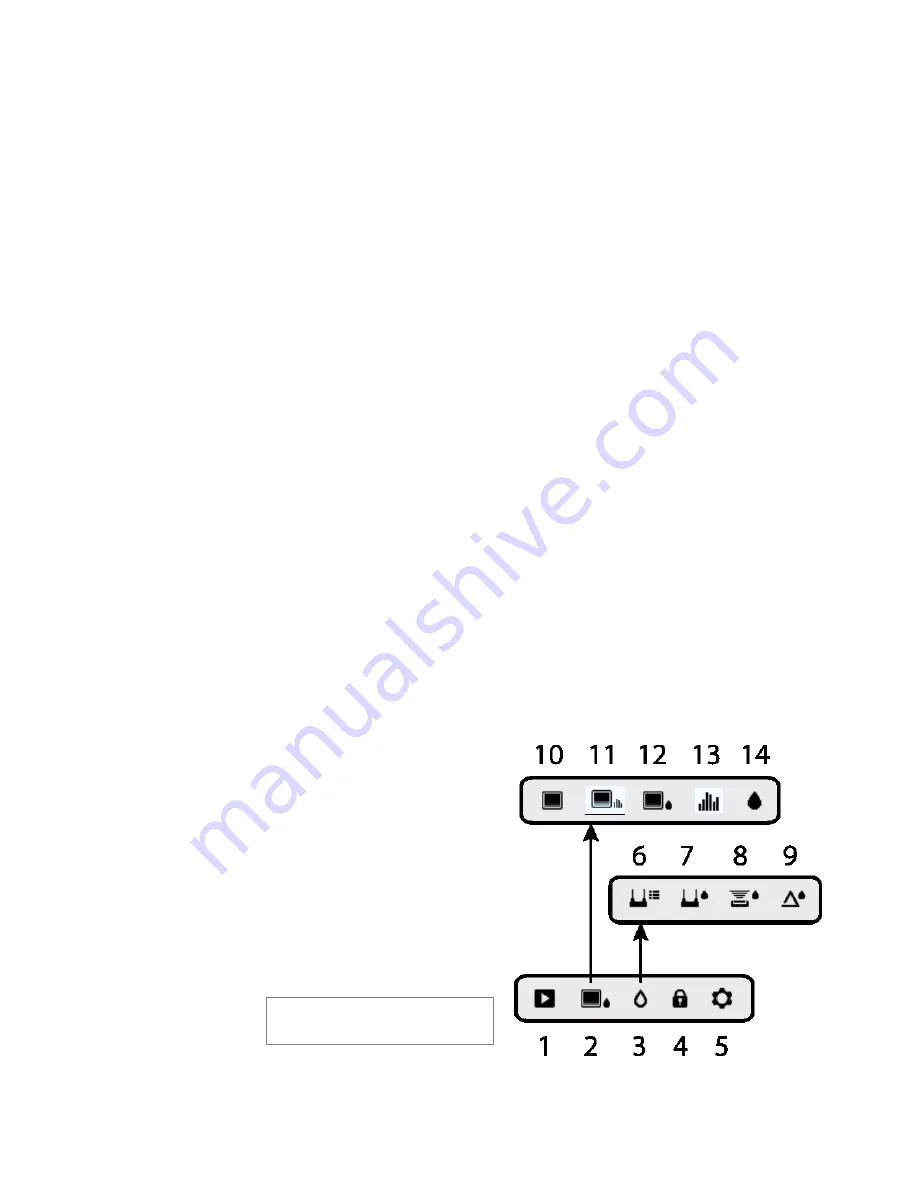
program the modes of operation available from the menus. Refer to Fig. 4-2.
Icons 1 through 5 in Fig. 4-2 make up the Main Menu. Press the Select button to open the Main
Menu:
1.
Image Review: view and delete IR Thermal Images
2.
Image modes (items 10~14): IR, IGM Custom, IGM Moisture, Psychrometrics, Moisture
3.
Moisture modes: Material Groups, Pin Mode, Pinless Mode, Set Reference
4.
Lock/Unlock Palette Auto-Scale: Select Lock to adjust the color palette range to suit a
given application (see Section 5.4 Lock/Unlock Palette Auto-Scale Mode for more detail).
Unlock for normal auto-scaling operation.
5.
Settings utility: Language, Configure IGM Custom, Palette, High Alarm, Auto Power OFF,
Temperature units, Date & Time, Help contact screen, and Meter Information screen.
Icons 6 through 9 in Fig. 4-2 are available in the Moisture Mode Menu. Press icon 3 to view
these Moisture modes. A blue dot is shown to the left of the pin icon (7) or the pinless icon (8),
depending on which is selected.
6.
Material Group: Select the material under test (Groups 1~9); For Pin Mode only. See
Section 9 for Wood and Material Group listings.
7.
Pin mode: Select this mode when using external pin moisture probe.
8.
Pinless mode: Select this mode when using the internal (rear) moisture sensor.
9.
Set Reference: Select this mode to store the current reading as a reference value. For
pinless mode only.
Icons 10 through 14 in Fig. 4-2 are available in the Image Mode Menu. Press icon 2 to view the
Image Mode menu.
10.
IR (View Thermal Image only)
11.
IGM Custom (View Thermal Image +
selected Psychrometrics)
12.
IGM Moisture (View Thermal Image +
Moisture readings)
13.
Mo Psychrometrics (Air
Temperature, RH%, Dew point, Mixing ratio,
Vapor pressure views)
14.
Moisture (D Bargraph reading with
Alarm, Material Group, & Relative values)
Fig. 4-2 Menu Icons


