02
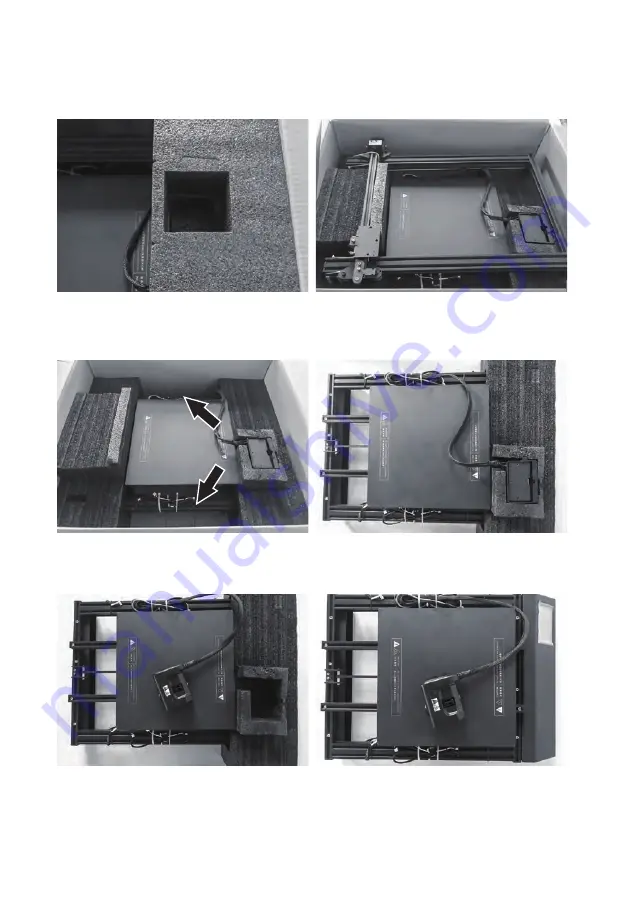
7. Take out the filament shaft.
9. As is shown, hold the position that arrow
points, and lift the printer base out of the
carton.
11. Remove the extruder and put it on the build
plate. Be careful not to scratch the nozzle.
8. Remove foam blocks on both sides, and take
out upper holder of the printer.
10. Remove the foam block on one side that
has no extruder.
12. Remove the foam blocks left, unboxing
completed. Suggest to keep packing
materials well for further storage or
transportation.
Содержание THOR300T
Страница 21: ...20 3 Z T Z T 5 M5 25 4 M4 6 5 M4 8 4 M4 5 8 4 1 300T 2 6...
Страница 22: ...21 11 9 10 7 8 12...
Страница 23: ...22 1 400T 500T 2 3 5 4 6...
Страница 24: ...23 7 8 9 Z T Z T 11 M5 25 4 M4 6 5 M4 8 4 M4 5 8 10...
Страница 27: ...26 1 2 T 3 T T 4 T T 5 T 6 T...
Страница 28: ...27 7 L L 8 L 9 M5 25 4 10 M4 5 L 4 8 11 T T T...
Страница 29: ...28 12 M4 8 T 4 13 T 14 15 M4 6 16...
Страница 30: ...29 17 M4 6 18 19 Z Steeper Z Z 20 X Steeper X X X...
Страница 31: ...30 21 Z 23 X Max X X X 24 25 26 22 Z Z T...
Страница 32: ...31 2 x 120mm 3 X 4 X 6 5 1...
Страница 33: ...32 7 Tools Home Yes Thor 4 Print Preheat Tools...
Страница 34: ...33 8 A4 A4 Thro...
Страница 35: ...34 3 Filament 4 load 1 2 Tools 5 Extruder 100 Cancel Print Preheat Tools...
Страница 38: ...37 1 2 3 4 5 6...
Страница 39: ...38 7 8 1 2 2mm...
Страница 40: ......


