


FlashForge Creator Pro 2
Flashprint - untitle.fpp
File(F)
Load
View
More
Rotate
Scale
Cut
Extruder
Supports Print
Edit(E) Print(P) View(V) Tools(T) Help(H)
38
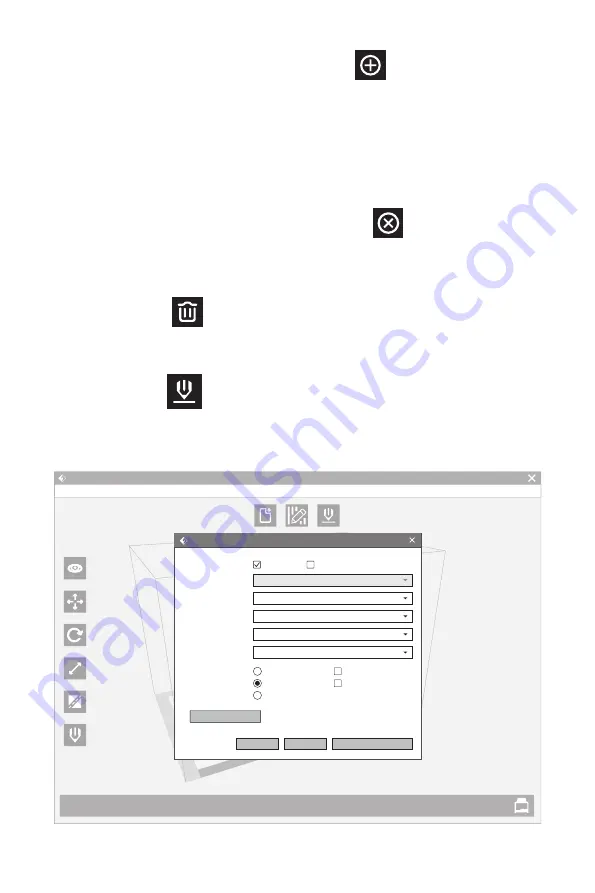
3.Add Supports
Supports will be added once clicking the [Add] button . Move the cursor to the
position where supports needed, left-click to choose the starting point of supports, hold
down the left mouse button and drag the mouse the supports preview will show up(if
support surface doesn’t need support or the support column angle is too large, the
support review will be highlighted ). Loosen the left mouse button, if support column
doesn’t meet with model, then support will be generated on origin and terminal point
(the highlighted preview support won’t create support structure )
4.Delete Supports
Supports will be deleted once clicking the [Delete] button . Move the cursor to the
supports needed deleting, current supports and its subnode support will be highlighted,
click the left mouse button to delete these highlighted support.
5.Clear Supports
Click [Clear Supports] , all supports will be deleted. The operation can be repealed
via clicking [Undo] or pressing the shortcut key Ctrl+Z.
3.2.11 Print
Click print icon and print setting will pop up. Click [OK] after setting all parameters, then
choose the right files format and place, and click [Save].
I want to:
Machine Type:
Material Right:
Material Left:
Supports:
Raft:
Resolution:
Preview
ABS
More Options >>
Print When Slice Done
OK
Cancel
Save Configuration
ABS
Enable
Enable
FlashForge Creator Pro 2
Low(Faster)
Standard
High(Slower)
Wall
Brim
Содержание CREATOR PRO 2
Страница 1: ...This guide is only applicable to FLASHFORGE Creator Pro 2 3D printer User Guide EN A01 CREATOR PRO 2...
Страница 2: ......
Страница 55: ......


