


1.
2.
Tap [Setting]-[X Calibration], or continue the X-axis calibration after the Z-axis calibra-
tion is completed. After the machine initialization movement is completed, the nozzle
and the platform will be heated. At this time, please ensure that the filament has been
inserted into the extruder.
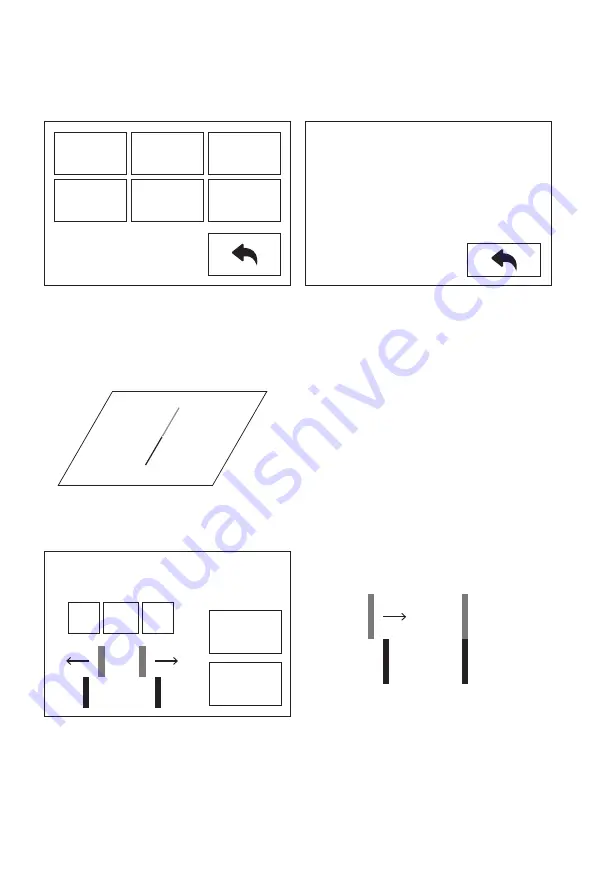
X-axis calibration: Used to adjust the consistency of the two extruders in the X-axis
direction to prevent misalignment during printing.
After heating, left and right extruders print a line one by one.
3. According to the actual printed lines, click X-, X + to adjust the bias of the extruders and
remove the printed lines; tap the verify button, the left and right extruders will print the
lines again to see if the lines coincide, if they coincide, it means that the X-axis
calibration is completed, if they are inconsistent, continue to adjust, until it coincides.
X Axis Calibration
X Calibration
L: 152/200
R: 164/200
B: 45/50
OK
Verify
X-
X-
R
L
0.00
X+
X+
R
L
X+
R
L
R
L
Please tap X-,X+ to adjust and verify make
sure the lines are aligned.
17
X
Calibration
Y
Calibration
Z
Calibration
Expert
Mode
Language
FactoryReset
Содержание CREATOR PRO 2
Страница 1: ...This guide is only applicable to FLASHFORGE Creator Pro 2 3D printer User Guide EN A01 CREATOR PRO 2...
Страница 2: ......
Страница 55: ......


