background image

4

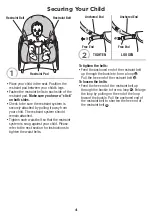
Restraint Pad

Restraint Belt

Restraint Belt

1

•  Place your child in the seat. Position the 

restraint pad between your child’s legs.

•  Fasten the restraint belts to each side of the 

restraint pad. 

Make sure you hear a “click” 

on both sides.

•  Check to be sure the restraint system is 

securely attached by pulling it away from 
your child. The restraint system should 
remain attached.

•  Tighten each waist belt so that the restraint 

system is snug against your child. Please 
refer to the next section for instructions to 
tighten the waist belts.

A

B

B

A

2

Free End

Free End

Anchored End

Anchored End

LOOSEN

TIGHTEN

To tighten the belts:

•  Feed the anchored end of the restraint belt 

up through the buckle to form a loop 

A

Pull the free end of the restraint belt 

B

.

To loosen the belts:

•  Feed the free end of the restraint belt up 

through the buckle to form a loop 

A

. Enlarge 

the loop by pulling on the end of the loop 
toward the buckle. Pull the anchored end of 
the restraint belt to shorten the free end of 
the restraint belt 

B

.

Securing Your Child

Содержание FMN39

Страница 1: ...d Assembly instructions on back side of this sheet Requires two C LR14 alkaline batteries not included Maximum weight of child using infant rocker seat recline cradle mode 9 kg Maximum weight of child...

Страница 2: ...stem until child can climb in and out of the product unaided Consumer Information IMPORTANT Before assembly and each use inspect this product for damaged hardware loose joints missing parts or sharp e...

Страница 3: ...old and new batteries or batteries of different types alkaline standard carbon zinc or rechargeable Insert batteries as indicated inside the battery compartment Remove batteries during long periods o...

Страница 4: ...aint system is snug against your child Please refer to the next section for instructions to tighten the waist belts A B B A 2 Free End Free End Anchored End Anchored End LOOSEN TIGHTEN To tighten the...

Страница 5: ...the kickstand out or in Push down on the seat bottom to be sure the kickstand is in position Press the soother power button to turn vibrations ON Press again to turn vibrations OFF Hint The soothing...

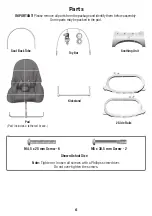
Страница 6: ...age and identify them before assembly Some parts may be packed in the pad Parts Seat Back Tube Note Tighten or loosen all screws with a Phillips screwdriver Do not over tighten the screws Shown Actual...

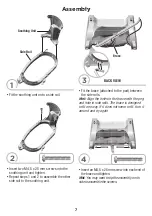
Страница 7: ...turn it around and try again Side Rail Soothing Unit Brace Fit the soothing unit onto a side rail Insert two M4 5 x 25 mm screws into the soothing unit and tighten Repeat steps 1 and 2 to assemble th...

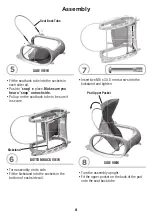
Страница 8: ...to the kickstand and tighten 5 Assembly Fit the seat back tube into the sockets in each side rail Push to snap in place Make sure you hear a snap on each side Pull up on the seat back tube to be sure...

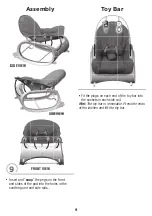
Страница 9: ...he holes in the soothing unit and side rails SIDE VIEW SIDE VIEW FRONT VIEW SIDE VIEW SIDE VIEW Assembly Fit the plugs on each end of the toy bar into the sockets in each side rail Hint The toy bar is...

Страница 10: ...isory Service 1300 135 312 New Zealand 16 18 William Pickering Drive Albany 1331 Auckland 2017 Mattel All Rights Reserved FMN39 ZZ70 PRINTED IN CHINA 1101513225 UU1 Asia Mattel East Asia Ltd Room 503...

Отзывы: