


9
[4] File
If a USB storage device is connected to the CM with .csv show files in the root directory, they will
be displayed here. Firelinx can accept Finale Generic .csv files, Firelinx LT .csv files, and the
Firelinx generic show file formats. (To get a sample of what the Firelinx generic show file looks
like go to
) or refer to the Appendix. If there are more than 4 show files on the
USB press the up and down arrow keys to scroll between the pages. Use the Numpad to select
the file to download. If there are FMs connected to the CM during this process, the CM will
automatically upload the choreography file to each of the applicable FMs. To remove the show
file from the CM, either download a new show file or with no USB inserted go to the File menu.
When prompted to switch to a manual show press YES. *Note the maximum number of files that
the CM can display is 16 show files to prevent the need to endlessly scroll through the list. If
more than 16 files are on the USB drive, please delete some of them or move them to a
subdirectory with your laptop or PC.
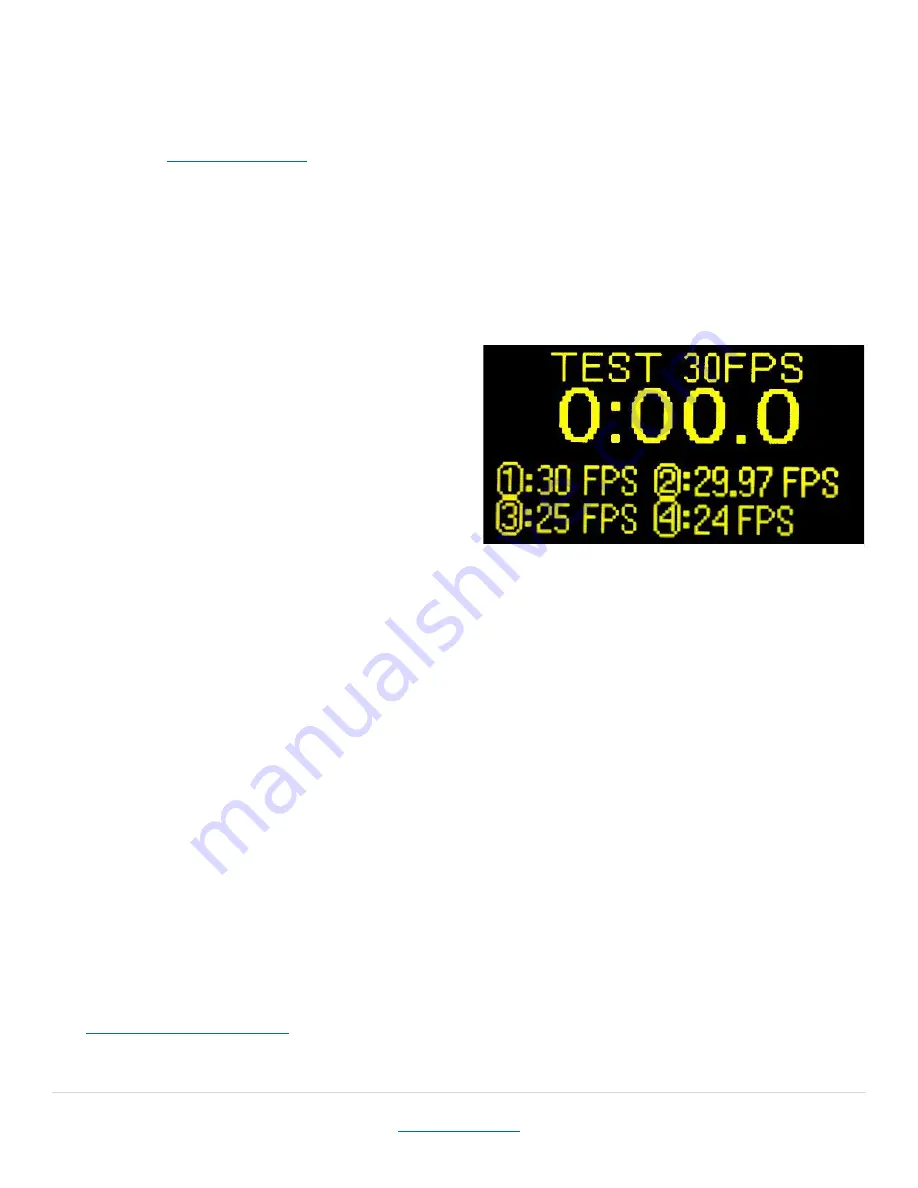
[5] SMPTE
This menu is used to test or monitor the
incoming SMPTE timecode, as well as to adjust
the SMPTE frame speed. To change the Frames
Per Second (FPS) of the incoming SMPTE
stream, press the corresponding numbers on
the Numpad and press ENTER to change the
timing. If the clock icon is displayed next to the
time, the SMPTE is currently detected by the
module. If there is no clock icon, the SMPTE is
not currently running to the module but it will continue its count of time. The firing system will
continue to operate even if the SMPTE signal is temporarily corrupted or the wire is broken. If,
when monitoring the incoming SMPTE signal, the clock icon flickers on and off it usually
indicates that the SMPTE frame rate is incorrect. Try different frame rates until the SMPTE clock
icon is steady for at least 10 seconds. If none of them seem to be steady, choose the best one
and the system will adapt to it.
[6] Edit
This option is currently not in use. It will be used to create simple scripts from within the CM
without the need for a computer to make a show file.
[7] Update
If a USB storage device is connected to the CM with an update file in the root directory, this is
where the update can be installed. The screen will display whether it is a CM, FM or OPN update
and the version number. If both exist, FM updates will be performed first, then OPN updates,
followed by CM updates. Pressing YES will install the update to the CM. An FM or OPN card must
be connected and Joined to the CM to receive its update. All FMs will turn themselves OFF after
the update is complete. Once the update is complete, it will return to the MENU screen. Re-run
the Update function to install the CM update. To download updates, go to
, download the files and transfer them to a USB flash drive.
Figure 13


