background image


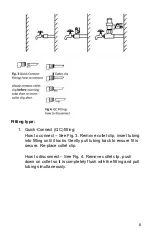
Fitting type:


1.  Quick-Connect (QC) fitting:  

How to connect 

– See Fig. 3. Remove collet clip, insert tubing 

into fitting until it locks. Gently pull tubing back to ensure fit is 
secure. Re-place collet clip.  
 
How to disconnect 

– See Fig. 4. Remove collet clip, push 

down on collet so it is completely flush with the fitting and pull 
tubing simultaneously.   


Содержание RO-H-100G

Страница 1: ...1704 807600 www finerfilters co uk enquiries finerfilters co uk Compact Reverse Osmosis System Installation and Maintenance Manual For Systems RO H 50G RO H 75G RO H 100G RO H1 50G RO H1 75G RO H1 100...

Страница 2: ...1 Contents 1 General Information Page 2 2 System Layout and Components Page 3 3 Preparation Page 4 4 Installation Page 6 5 Maintenance Page 10 6 Replacement Filters Page 11 7 Troubleshooting Page 12...

Страница 3: ...bstances heavy metals soluble solids bacteria viruses pyrogen nitrate microorganisms hormones Fluoride and other harmful impurities It only retains water molecules and dissolved oxygen To achieve this...

Страница 4: ...aining ions Main Technical Parameter 1 Purified water output based on optimal water pressure 50GPD membrane 185L day 75GPD membrane 275L day 100GPD membrane 370L day 2 Inlet water temperature 4 42 C 4...

Страница 5: ...0G RO H1 50G RO H1 75G RO H1 100G A Three way valve B Ball valve C PP sediment filter cartridge D Carbon inline filter cartridge E RO membrane housing F RO membrane G Flow restrictor 4 Stage Unit Incl...

Страница 6: ...crewdriver Plastic tube cutter Stanley Blade The 5 metres of tubing provided is to be used at the points marked by the coloured stoppers on the RO system Mark 1 Red stopper Cold water supply to RO sys...

Страница 7: ...move collet clip insert tubing into fitting until it locks Gently pull tubing back to ensure fit is secure Re place collet clip How to disconnect See Fig 4 Remove collet clip push down on collet so it...

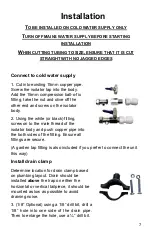
Страница 8: ...2 Using the white or black fitting screw on to the male thread of the isolator body and push copper pipe into the both sides of the fitting Ensure all fittings are secure A garden tap fitting is also...

Страница 9: ...this step Connect system Determine length of tubing needed between RO system and mains water supply and remove red stopper on unit Connect tubing from cold water supply drain clamp and water outlet t...

Страница 10: ...tubing where the leak was found Also see our troubleshooting section at the back of the manual Once the issue is resolved start process again Turn off the mains water by the isolator and let the wate...

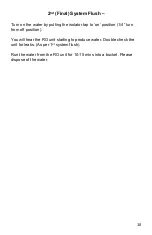
Страница 11: ...the isolator tap to on position 1 4 turn from off position You will hear the RO unit starting to produce water Double check the unit for leaks As per 1st system flush Run the water from the RO unit fo...

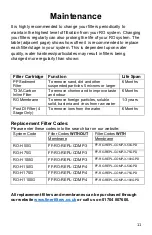
Страница 12: ...move chorine and to improve taste and odour 6 Months RO Membrane To remove foreign particles soluble solid bacteria and virus from raw water 1 3 years Post DI Filter 4 Stage Only To remove ions from t...

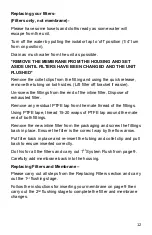
Страница 13: ...Remove any residual PTFE tap from the male thread of the fittings Using PTFE tape thread 15 20 wraps of PTFE tap around the male end of both fittings Remove the new inline filter from the packaging a...

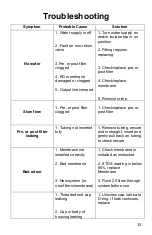
Страница 14: ...ow 1 Pre or post filter clogged 1 Check replace pre or post filter Pre or post filter leaking 1 Tubing not inserted fully 1 Remove tubing ensure end is straight Insert and gently pull back on tubing t...

Страница 15: ...e insert membrane on pg 11 Cloudy milky water 1 Defective membrane 2 New filters or membrane 1 Replace if TDS reading is below 85 2 Flush system through Leaking fitting 1 Fitting damaged or cracked 2...

Отзывы: