Page 3
Step 7:
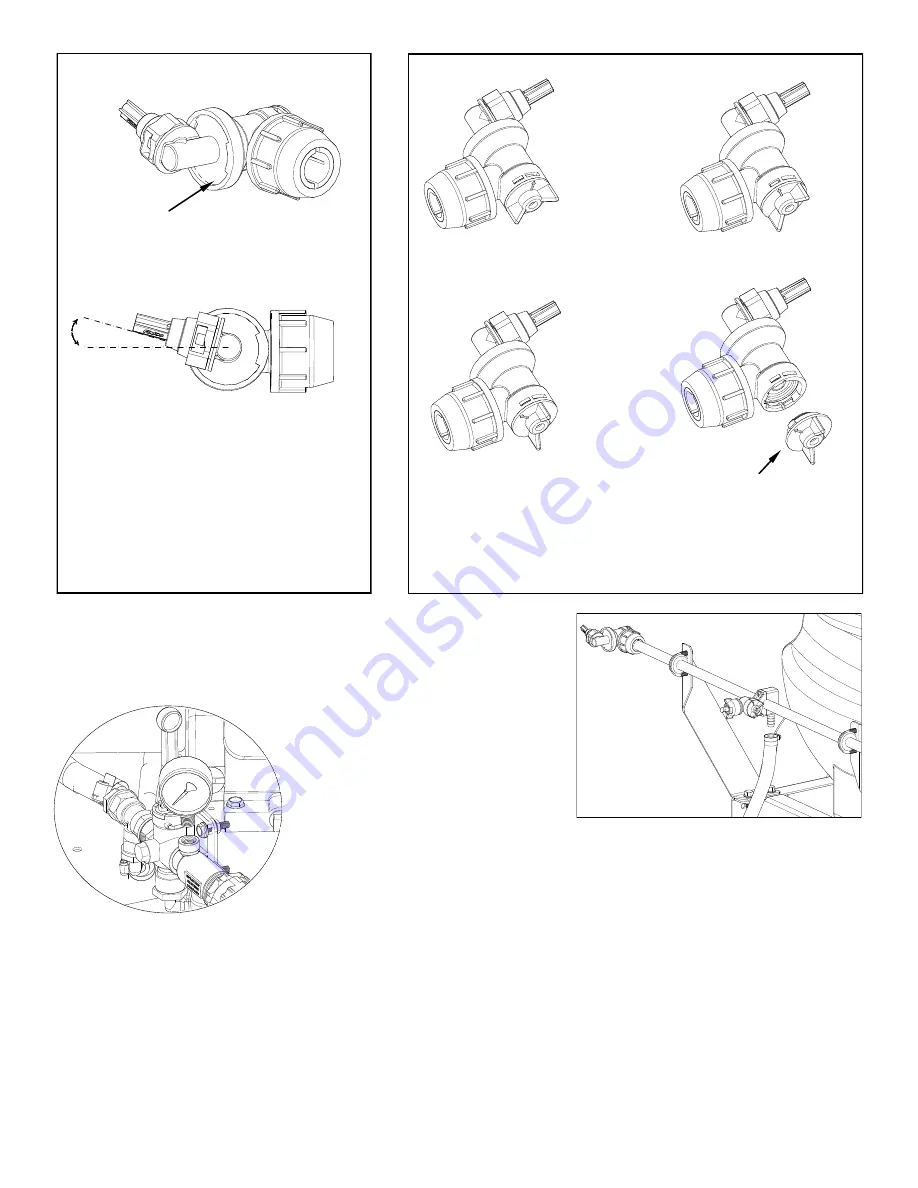
Install the pressure gauge. Hand
tighten securely.
** DO NOT OVER-TIGHTEN **
Step 6:
Place a hose clamp over the end of the feeder hose loosely. Slip the end of the hose over
the hose barb on the center nozzle. Use a twisting motion, if necessary, to get the hose fully
onto the barb. Bring the hose clamp to the connection point and tighten securely.
End Nozzle Information
(5275122)
This nozzle mounting stem
Has a ratcheting motion.
** Each “click” of the ratcheting motion is approx. 15° **
For proper/optimal spray coverage,
The nozzle must be at a 15° angle
The 15° angle shown will prevent the outer
Nozzles from overlapping with the center nozzle.
“On/Off” Valve Positions
Valve “Open”
Valve “Closed”
Service Position
On/Off Valve Knob
Eliminate line pressure, then pull out
to check diaphragm condition.
Note: The check valve & diaphragm can fall out during transport, if the
knob is not turned to the “ON” or “OFF” position.
15°
Step 6:
Step 7:
*** The Sprayer should now be ready for use ***
Содержание 5301307
Страница 11: ...Page 11 NOTES ...


