4
∗
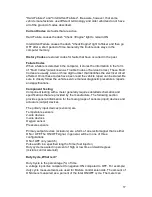
Negative Polarity indicator
∗
Press the blue button to choose between AC or DC current
∗
Press TRIG
±
to select positive (+) or negative (-) Trigger level
∗
Low battery: change the F-1860 battery when this symbol is displayed
Function and Range Selection
Turn the rotary switch in either direction to select desired function.
The F-1860 automatically selects the range. However, you can also manually
select a specific function by pressing the range button.
Always select a range higher than the expected current or voltage. Afterwards a
lower range can be selected for improved accuracy.
♦
The higher the range selected, the lower the accuracy
♦
If the range is too low, the F-1860 blinks “OL” (Over Limit) and beeps.
PUSH-BUTTON FUNCTIONS
Alternate Function
The blue-coloured button is the Alternate Function button. Press this button to
alternate between AC, audible and capacitance functions, shown in blue on the
front of the F-1860.
REL
∆
∆
∆
∆
Function
Press the REL
∆
Function button. The F-1860 will display the reading and store
it as a reference value. Keep the button pressed for two seconds to exit this
mode.
In REL
∆
mode, the indicated value is always the difference between the stored
reading and the present reading. For example, if the reference value is 24.00 V
and the present reading is 12.50 V, the F-1860 will show -11.50 V. If the new
reading is the same as the reference value, the F-1860 will display 0.
DATA STORING
The Data Storage feature stores the highest or lowest reading in the memory.
♦
First connect the F-1860 test leads to the points to be tested. Press the
MAX/MIN key once to start MIN data storage, which will be displayed.
♦
Press the MAX/MIN key twice to start MAX data storage, which will be
displayed.
♦
Press the HOLD button to stop data storage; press again to restart the
storage.


