


Tone Master PRO’s control layout is simple and easy to navigate. Navigation of Tone Master PRO can be done manually with the controls
and touchscreen or by using the footswitches.
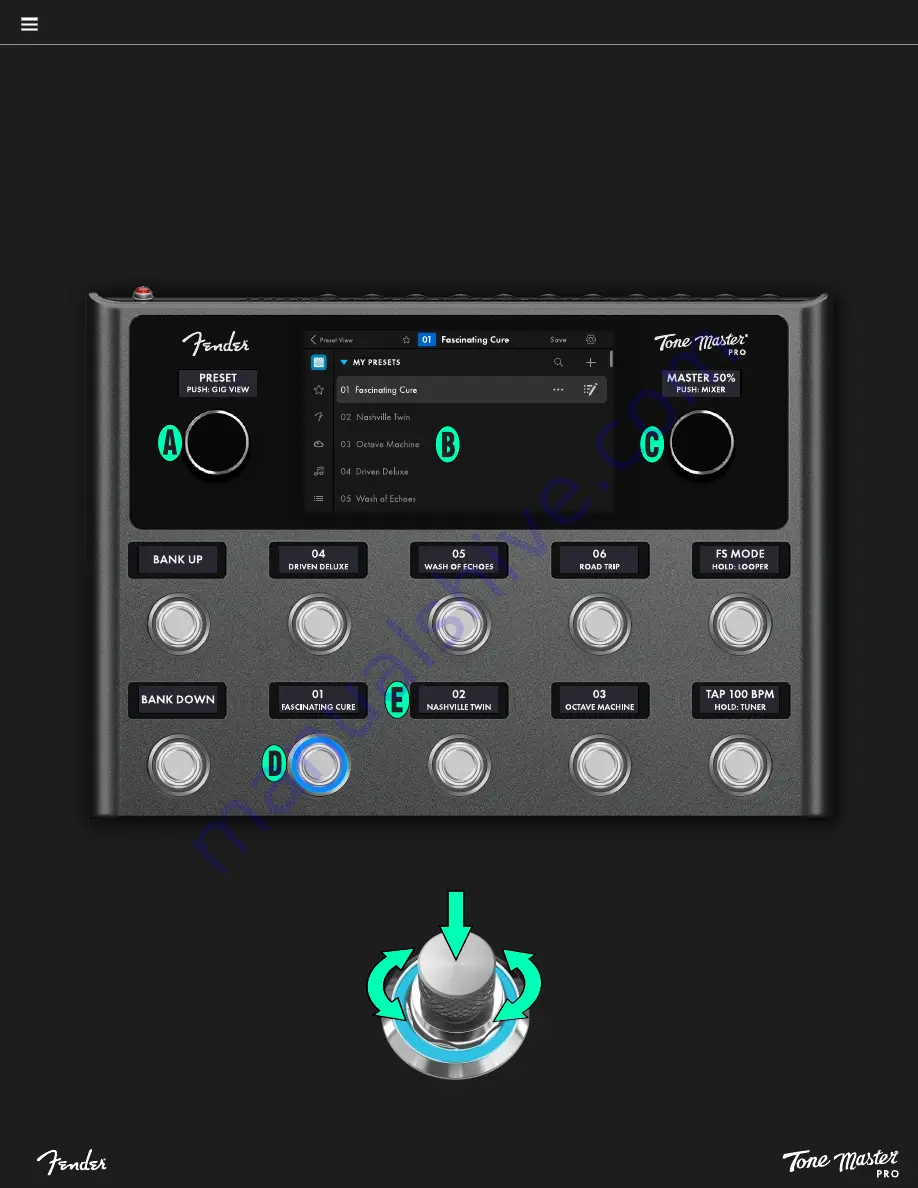
B. TOUCHSCREEN
Color 7” touchscreen displays all Tone Master PRO
functions, including operating modes, preset
selection, preset editing and other useful information.
3
A. NAVIGATION CONTROL
Multifunction rotary control with push
function. Turn to select Presets, Songs or
Setlists. Press to activate Gig View, which is
a simplified touchscreen performance view.
C. MASTER VOLUME
Multifunction rotary control with push
function. Turn to control volume for all
outputs; press to activate mixer.
D. FOOTSWITCHES/LED RINGS
Ten footswitches can be pushed to select presets,
effects and other special functions. By default,
two footswitches at far left select the preset bank;
middle six footswitches are for preset or effect
functions (depending on current footswitch
mode); two footswitches at far right activate
Presets or Effects footswitch mode, Looper, Tap
Tempo and Tuner. The top of each footswitch is a
rotary control for precise preset parameter
editing. Multicolor LEDs surround each footswitch
to indicate switch status; colors can be user-
assigned to indicate effect or function type.
E. SCRIBBLE STRIPS
Scribble strip displays above navigation control,
master volume knob and footswitches indicate their
function.
turn
press


