background image


Quick Start Guide FELIX Pro 3 


Page  

14


Calibration

IMPORTANT: Only PERFORM BED LEVELING after unboxing. The printer is already fully factory calibrated.


Bed leveling:  This physically tilts the bed so the distance between nozzle and bed is the same everywhere. Do this: 

1.


After unboxing/moving printer.  

2.


When you see first layer printed lines are deviating from width across the print surface. 

XY and Z Nozzle calibration: These calibrations align the printheads with respect to each other. Do this: 

1.


After exchanging a hot-end 

2.


When you clearly see that during dual head printing the nozzles are not aligned in x,y or height. 

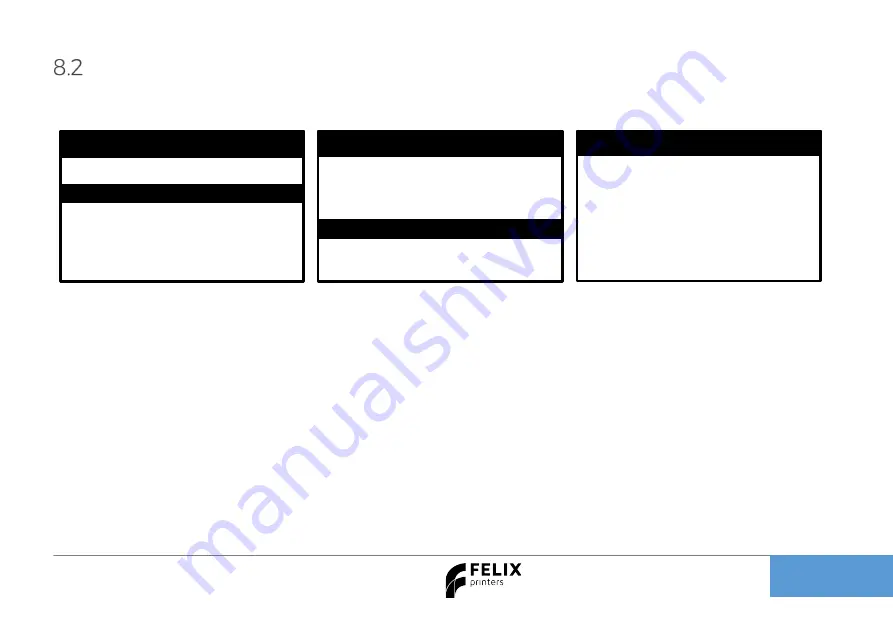
1. Press rotary button to activate 

the main menu. 

2. Scroll to Control.  

3.

Press to access the menu

Press button to  activate  the print 

bed calibration. 

The heaters will warm up and the 

bed will be probed. 


E1:20°C E2:21°C B:20°C 

Back 

>Control 

Print 
Settings 


E1:20°C E2:21°C B:20°C 

Dual Preheat/Cool 
Remove Build PLT. 
Change filament 

>Level Build PLT. 

Calibrate Extruders 


E1:20°C E2:21°C B:20°C


Make sure that the build 
platform is clear of any 

obstructions 


>>> Ok <<< 


Scroll down to Level Build PLT. and 

press button to access the menu 

Содержание Pro 3

Страница 1: ...Quick Start Guide FELIX Pro 3 www FELIXprinters com support support felixprinters com Zeemanlaan 15 3401MV IJsselstein The Netherlands...

Страница 2: ...short circuit overload over voltage and over temperature Printer placement Place the FELIXprinter on a stable table desk or something with a similar height Place the printer on a height where childre...

Страница 3: ...PRINTER SPECIFICATIONS 3 5 FELIX PRO 3 AT A GLANCE 4 6 WHAT S IN THE BOX 5 INSTALL FOOT BRACKET 6 INSTALL DISPLAY UNIT 7 PREPARING THE PRINT BED 8 INSTALL FILAMENT ACCESSORIES 10 POWER ON 11 7 DISPLAY...

Страница 4: ...emperature max 100 C Flex plate Motorized bed leveling Automatic nozzle calibrations Extruders Diameter nozzle 0 35 mm optional 0 5 and 0 7mm Nozzle temperature max 275 C Full metal hot ends Filament...

Страница 5: ...Quick Start Guide FELIX Pro 3 Page 4 5 FELIX Pro 3 at a glance Display unit Heated bed with Flex Plate Filament accessory Holder Filament roll Foot bracket Power switch Power plug Filament guide...

Страница 6: ...t bracket B 1x Tweezers I 1x Power cable C 1x MicroSD card Reader J 1x Power unit D 2x M4x12 bolts K 1x USB cable E 2x Filament Holder L 1x Display Unit F 1x Filament Guide G 2x Teflon tubes Recommend...

Страница 7: ...k Start Guide FELIX Pro 3 Page 6 Install Foot bracket 1 Place foot bracket on sturdy flat table 2 Place the printer onto the foot bracket 3 Fix the foot with 2x supplied M4 x 12 bolts and Allen key 3...

Страница 8: ...Install Display unit IMPORTANT Make sure the power is turned off when connecting the display Failing to do so could cause serious damage Connect ribbon cable on designated positions and slide the scre...

Страница 9: ...uide FELIX Pro 3 Page 8 Preparing the print bed 2 1 1 Flip the lever open 2 Firmly push on the bolt head to loosen the mechanism Usually this pops loose Rotate the bed 90 Degrees This might require a...

Страница 10: ...Quick Start Guide FELIX Pro 3 Page 9 1 Ensure the edges align 2 Flip back the lever 1 Place one edge of the Flex Plate gently on the indicated edge 2 Drop the Flex Plate gently on base 1 2 1 2...

Страница 11: ...ert and fix the t slot nut with M4x12 bolt 2 Push and rotate holder onto side of frame Over the bolt 3 It should snap into place 4 1 Place Filament roll onto holder 2 Place filament guide including du...

Страница 12: ...d turn on and immediately after turning on the printer a FELIX boot screen should be displayed Power Switch Power Cable USB Cable NOTE in some occasions if there is a firm pull exerted onto the power...

Страница 13: ...play Overview Rotate the button to navigate Push to activate menu or execute a command E1 22 C E2 22 C B 21 C X 0 00 mm Y 0 00 mm Z 0 00 mm Printer Ready Extruder 1 Extruder 2 Build plate Current temp...

Страница 14: ...nuals for more details 3 Print Filament guided to extruder with filament roll holder and guiding tubes Filament not entangled on roll Use good quality filament Ensure print surface is absolutely free...

Страница 15: ...to each other Do this 1 After exchanging a hot end 2 When you clearly see that during dual head printing the nozzles are not aligned in x y or height 1 Press rotary button to activate the main menu 2...

Страница 16: ...uders Scroll down to Change Filament and press button to access the menu E1 20 C E2 21 C B 20 C Change Filament Back Extruder 1 Extruder 2 Scroll down to the material you want and press to select it N...

Страница 17: ...with the tweezers Second use one of the two approaches to further prepare the surface A Use the already applied Kapton layer on the flex plate and clean it with detergent like methylated spirit 100 al...

Страница 18: ...Print files 3 User Manual 1_Print_Gadget gcode 2_Print_Key_Chain_dual IMPORTANT Printing via SD card is recommended for long prints It is more reliable compared to printing via USB cable Clean prepare...

Страница 19: ...late To remove the flex plate lift up the front end using the bulge in the flex plate Now you can easily remove it by pulling it forwards Remove Printed Objects To remove printed objects simply bend t...

Страница 20: ...Otherwise chances of buckling filament inside the extruder are very high Obstructions can occur if there has been printed with some hard filament before make sure it is removed from the barrel of the...

Страница 21: ...to get grip onto the first part of the flexible filament which is fed into the extruder 2 Extrude filament until the first drip comes out Then slowly extrude more piece by piece Do not extrude in a co...

Страница 22: ...a potential risk of burning as the nozzle can reach temperatures of up to 275 For cleaning or maintenance purposes the hot end can be easily removed from the FELIX Pro Please take the following steps...

Страница 23: ...and Then pull out print head 5 Reverse the assembly of the hot end into the extruder assembly Do not forget to close the lid IMPORTANT Ensure the hot end wires make the bend as shown in picture above...

Страница 24: ...ters the filament holder through the dust cleaner After a few months of printing it is recommended to replace the dust cleaners Motion system The linear bearings require almost no maintenance Recommen...

Страница 25: ...ers com support to find out how to solve this issue Heater sensor error Extruder the sensor is defect or not connected properly Please check if the connector is placed correctly and is clean on the in...

Страница 26: ...Quick Start Guide FELIX Pro 3 Page 25...

Страница 27: ...Quick Start Guide FELIX Pro 3 Page 26...

Страница 28: ...a few minutes www felixprinters com survey a small reward is waiting for you Manuals tutorials www felixprinters com support FELIX Community www felixprinters com community Quick Start Manual FELIX Pr...

Отзывы: