background image

9

Service & warranty

To locate your nearest Service Center, call 800-332-6658.

For models installed in North America – If service
or parts are required

First, make the recommended checks. If it appears that service or parts are still required,
see your warranty “How to Obtain Warranty Service or Parts”. Please have the model
number and serial number with you when calling.

For models installed 
outside of North America

For models purchased for use outside North America, the manufacturer does not extend
any warranty either expressed or implied. Consult your local dealer for any warranty
terms extended by the importer in your country.

Warranty

Within the 48 contiguous United States, State of Hawaii, the district of Columbia, Puerto Rico and
Canada

Full (One) Year Parts and Labor Warranty

During the first year after the date of original purchase, Fedders Appliances will, through
a network of authorized servicers and free of charge to the owner or any subsequent
user, repair or replace any parts which are defective in material or workmanship due to
normal use when the unit is delivered by the owner to and picked up from one of our
authorized servicers. If requested, in-home service, pick-up, redelivery and reinstallation
will be provided, but are the owner’s responsibility.

Limited (Second through Fifth Year) 
Sealed System Warranty

If any part of the sealed refrigerant system (consisting of compressor, evaporator,
condenser, and interconnecting refrigerant tubing) should fail because of a defect in
material or workmanship (including refrigerant charge), within the second through fifth
year from the date of original purchase, Fedders Appliances, through a network of
authorized servicers, will repair or replace such part, including labor, at no cost to the
owner when the unit is delivered by the owner to and picked up from one of our
authorized servicers. If requested, in-home service, pick-up, redelivery and reinstallation
will be provided, but are the owner’s responsibility.

Note: In the event of any required parts replacement within the period of this warranty, Fedders
Appliances replacement parts shall be used and will be warranted only for the period remaining on
the original warranty.

Exceptions

The above Limited Warranties do not cover failure to function caused by damage to the
unit while in your possession (other than damage caused by defect or malfunction), or
by its improper installation, or by unreasonable use of the unit, including without
limitation, failure to provide reasonable and necessary maintenance or to follow the
written Installation and Operating Instructions. If the unit is put to commercial, business,
rental, or other use or application other than for consumer use, we make no warranties,
express or implied, including, but not limited to, any implied warranty of
merchantability or fitness for particular use or purpose.

THE REMEDIES PROVIDED FOR IN THE ABOVE EXPRESS WARRANTY ARE THE SOLE AND
EXCLUSIVE REMEDIES THEREFOR, NO OTHER EXPRESS WARRANTIES ARE MADE ALL IMPLIED
WARRANTIES, INCLUDING BUT NOT LIMITED TO ANY IMPLIED WARRANTY OF
MERCHANTABILITY OR FITNESS FOR 
A PARTICULAR USE OR PURPOSE, ARE LIMITED IN DURATION TO ONE YEAR FROM THE DATE
OF ORIGINAL PURCHASE. IN NO EVENT SHALL FEDDERS APPLIANCES BE LIABLE FOR
INDIRECT, INCIDENTAL, OR CONSEQUENTIAL DAMAGES, EVEN IF ADVISED IN ADVANCE OF
THE POSSIBILITY OF SUCH DAMAGES. NO WARRANTIES, EXPRESS OR IMPLIED, ARE MADE TO
ANY BUYER UPON RESALE.

Some states do not allow limitations on how long an implied warranty lasts or do not
allow the exclusion or limitation of incidental or consequential damages, so the above
limitations or exclusions may not apply to you. This warranty gives you specific legal
rights, and you may also have other rights which may vary from state to state.

No warranties are made for units sold outside of the above stated areas. Your distributor
or final seller may provide a warranty on units sold outside of these areas.

How to obtain Warranty Service or Parts

Service for your unit will be provided by CareCo, with
authorized independent CareCo servicers nationwide.

Note: Before calling for service, carefully read the Installation and
Operating instructions booklet. 
Then if you need service:

1.

Call a CareCo authorized servicer and advise them of
model number, serial number, date of purchase and
nature of complaint. Service will be provided during
normal working hours. Contact your dealer for the name
of an authorized servicer if unknown to you.

2.

If your dealer is unable to give you the name of a
servicer or if you need other assistance, call the
following toll-free number for the name of an authorized
servicer or authorized parts distributor:

1-800-332-6658

or you may write:

CareCo, Service Department
415 W. Wabash Ave., P.O. Box 200
Effingham, IL 62401

Proof of Purchase Date

It is the responsibility of the consumer to establish the original
purchase date for warranty purposes. We recommend that a
bill of sale, cancelled check, or some other appropriate
payment record be kept for that purpose.

Содержание Portable Dehumidifier

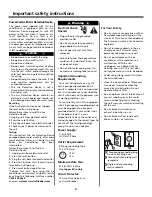
Страница 1: ...s rie Date of Purchase Fecha de compra Date d achat Keep these instructions for future reference Guarde estas instrucciones para referencia futura Gardez ces instructions pour les consulter ult rieure...

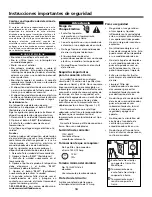
Страница 2: ...nside with blinds curtains or furniture A A B B C C 125V 15A Power Supply 115V 60HZ AC Only 1 Phase Outlet Requirement 3 Prong Grounding Type 125 V 15 Amp Minimum Wire Size 14 A W G 3 Wire Use Copper...

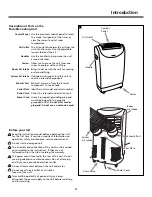
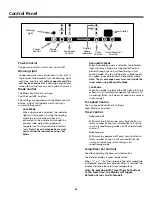
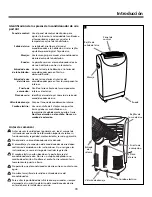
Страница 3: ...alve Power Cord Exhaust Port Serial Plate Room Air Intake System Air Intake 3 Description of Parts on the Portable Cooling Unit Control Panel Use the electronic control panel to select the mode fan sp...

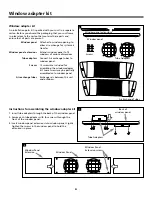
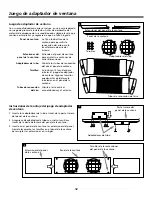
Страница 4: ...dow panel Window panel extensions Window adapter kit An installation parts kit is packed with your unit in a separate carton Before you discard the packaging that your unit came in please locate the c...

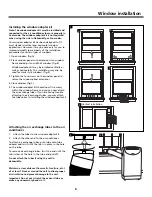
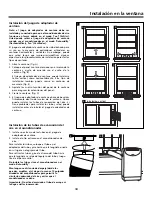
Страница 5: ...dow frame and adjust to width of window fig B Window adapter kit may be installed vertically as well as horizontally This installaton may also be used for crank style windows fig E 3 Tighten the four...

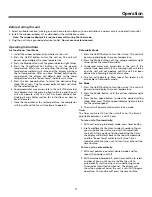
Страница 6: ...ght will shine orange Air is dehumidified as it passes through the unit without being in full cooling mode The fan will operate in Med speed Fan speed is not adjustable in Dehumidify mode Note The air...

Страница 7: ...n Med speed Fan speed is not adjustable in Dehumidify mode Fan Mode 1 Press the On Off button to turn the unit on The unit will power up and display the room temperature 2 Press the Mode button until...

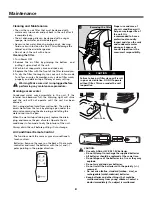
Страница 8: ...filter thoroughly run your unit in fan mode for a few minutes Remember only a clean filter works properly and delivers top efficiency at every setting Air Conditioner Remote Control AAA IEC R03 1 5V...

Страница 9: ...r by unreasonable use of the unit including without limitation failure to provide reasonable and necessary maintenance or to follow the written Installation and Operating Instructions If the unit is p...

Страница 10: ...conexi n a tierra 125V 15Amp Tama o m nimo del alambre No 14 A W G de 3 alambres Use solamente alambre de cobre Protector del circuito Fusible con retardo de tiempo o interruptor de circuito de 15 Amp...

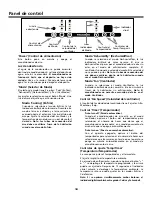
Страница 11: ...caci n de las piezas del acondicionador de aire port til Panel de control Use el panel de control electr nico para ajustar la funci n la velocidad del ventilador o el temporizador o para ver y ajustar...

Страница 12: ...ntana Extensiones del panel de la ventana Juego de adaptador de ventana Con su acondicionador de aire se incluye en una caja separada un juego de piezas de instalaci n Antes de deshacerse del material...

Страница 13: ...a ventana para asegurar las extensiones del panel 4 Cierre la ventana fig C 5 El juego de adaptador de ventana ahora debe calzar firmemente dentro del marco de la ventana Ahora puede instalar los tubo...

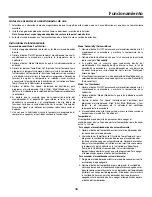
Страница 14: ...o Fan Ventilador Cuando se selecciona el modo Ventilador la luz indicadora brillar de color amarillo El aire circular a trav s de la habitaci n sin enfriamiento Nota El acondicionador no necesita evac...

Страница 15: ...odo Fan Ventilador 1 Oprima el bot n On Off para encender el acondicionador de aire El acondicionador se encender y mostrar la temperatura de la habitaci n 2 Oprima el bot n Mode Modo hasta que la luz...

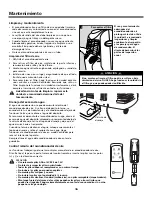
Страница 16: ...ua del dep sito colocando un recipiente debajo de la v lvula de drenaje retire el tap n de drenaje y deje que el agua escurra hacia el recipiente Cuando se termine de drenar el agua coloque nuevamente...

Страница 17: ...o realizar mantenimento razonable y necesario ni seguir las instrucciones escritas sobrela instalaci n y operaci n Si la unidad se destina a uso comercial de negocios para alquiler u otro uso o aplica...

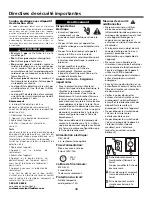
Страница 18: ...as bloquer la circulation de l air vers les claires voies ext rieures de la caisse Ne pas bloquer la circulation de l air au voisinage de l appareil l int rieur stores rideaux meubles ou l ext rieur a...

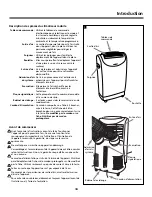
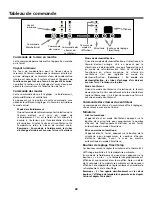
Страница 19: ...e commande Utilisez le tableau de commande lectronique pour s lectionner le mode et la vitesse de ventilateur et pour r gler la minuterie ou observer la temp rature ambiante et la temp rature programm...

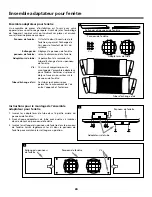
Страница 20: ...e adaptateur pour fen tre Un ensemble de pi ces d installation est fourni avec votre appareil dans un cartonnage s par Avant de jeter l emballage de l appareil rep rez celui qui contient ces pi ces et...

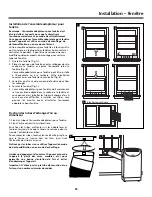
Страница 21: ...fixer les rallonges 4 Fermez la fen tre fig C 5 L ensemble adaptateur pour fen tre doit maintenant se trouver bien adapt dans le cadre de la fen tre et vous pouvez alors installer les tubes d change...

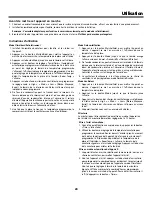
Страница 22: ...shumidification Remarque En mode de d shumidification les tubes d change d air doivent vacuer l air l int rieur de la pi ce Mode Ventilateur Quand le mode Ventilateur est s lectionn le t moin devient...

Страница 23: ...vitesse du ventilateur n est pas r glable en mode D shumidification Mode Ventilateur 1 Appuyez sur le bouton Marche Arr t pour mettre l appareil en marche L appareil se met en marche et l afficheur do...

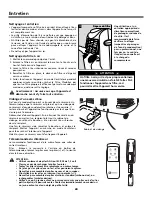
Страница 24: ...N essayez pas de recharger les piles fournies Toutes les piles doivent tre remplac es en m me temps Ne jetez pas les piles dans un feu elles pourraient exploser Ne mettez pas ensemble des piles neuves...

Страница 25: ...ar une d fectuosit ou un mauvais fonctionnement une installation incorrecte une utilisation inappropri e un entretien inad quat ou insuffisant ou le non respect des consignes d installation et d utili...

Страница 26: ......

Страница 27: ......

Страница 28: ...is plugged into an outlet Make sure the unit is not in the off position Make sure the circuit breaker has not been tripped If the unit does not cool sufficiently Make sure the exhaust tube and nozzle...

Отзывы: