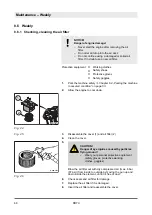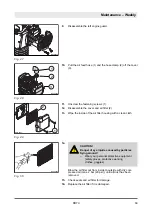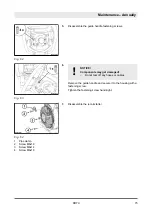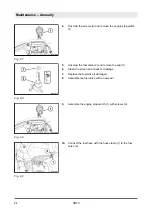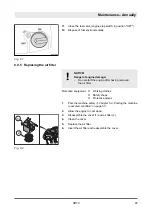
1.
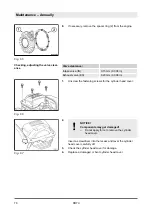
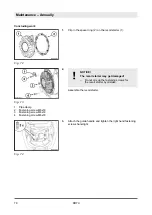
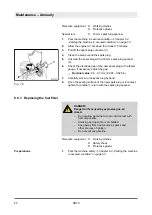
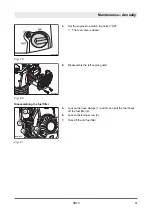
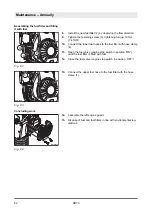
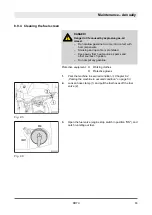
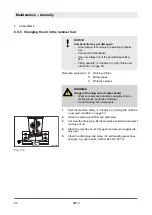
Clip in the spacer ring (2) on the recoil starter (1).
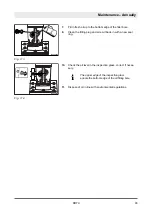
2.
NOTICE!
The recoil starter may get damaged!
–
Do not mix up the fastening screws for
the recoil starter by mistake.
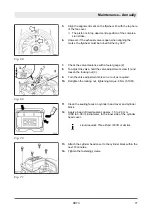
Assemble the recoil starter.
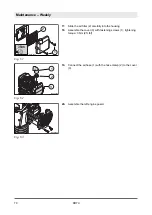
3.
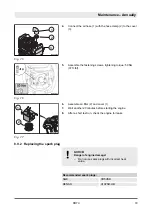
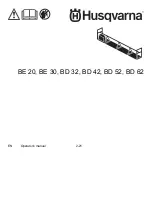
Attach the guide handle and tighten the right hand fastening
screws hand-tight.
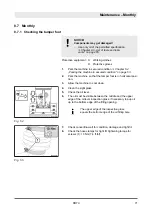
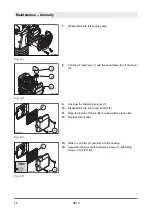
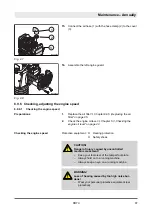
Concluding work
Fig. 72
Fig. 73
1
Pipe clamp
2
Fastening screw M6x18
3
Fastening screw M6x14
4
Fastening screw M6x18
Fig. 74
Maintenance – Annually
DR7X
78
Содержание Dynapac DR7X
Страница 2: ...2 ...
Страница 6: ...Table of contents DR7X 6 ...
Страница 7: ...1 Introduction Introduction DR7X 7 ...
Страница 11: ...2 Technical data Technical data DR7X 11 ...
Страница 15: ...3 Concerning your safety Concerning your safety DR7X 15 ...
Страница 37: ...4 Indicators and control elements Indicators and control elements DR7X 37 ...
Страница 39: ...5 Checks prior to start up Checks prior to start up DR7X 39 ...
Страница 45: ...6 Operation Operation DR7X 45 ...
Страница 56: ...Operation Operating hour meter engine rpm meter DR7X 56 ...
Страница 57: ...7 Loading transporting the machine Loading transporting the machine DR7X 57 ...
Страница 61: ...8 Maintenance Maintenance DR7X 61 ...
Страница 96: ...Maintenance As required DR7X 96 ...
Страница 97: ...9 Setting up refitting Setting up refitting DR7X 97 ...
Страница 99: ...10 Troubleshooting Troubleshooting DR7X 99 ...
Страница 106: ...Troubleshooting What to do if the engine has flooded DR7X 106 ...
Страница 107: ...11 Disposal Disposal DR7X 107 ...
Страница 109: ......
Страница 110: ......

