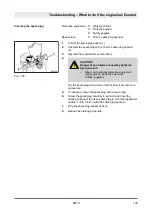
6.
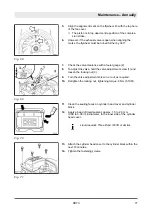
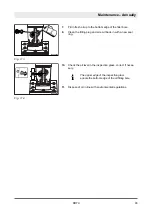
Secure the coil against winding up. For this purpose tie the
coil (2) to the housing (5) with a cable strap (1).
7.
Untie the knots of the starter rope at both ends and remove
the old starter rope.
8.
Thread in the new starter rope (3) and fix it with knots on
both ends.
9.
CAUTION!
Danger of injury caused by the starter
handle hitting against your body!
–
Do not let the starter handle hit back.
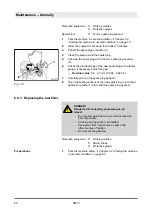
Remove the fixing of the coil and run the starter handle
slowly back to initial position.
10.
Pull the starter handle to check the function and light move-
ment of the recoil starter.
11.
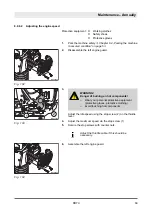
Clip in the spacer ring (2) on the recoil starter (1).
12.
NOTICE!
The recoil starter may get damaged!
–
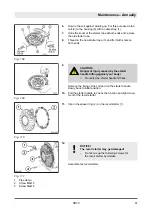
Do not mix up the fastening screws for
the recoil starter by mistake.
Assemble the recoil starter.
Fig. 108
Fig. 109
Fig. 110
Fig. 111
1
Pipe clamp
2
Screw M6x18
3
Screw M6x14
Maintenance – Annually
DR7X
91
Содержание Dynapac DR7X
Страница 2: ...2...
Страница 6: ...Table of contents DR7X 6...
Страница 7: ...1 Introduction Introduction DR7X 7...
Страница 11: ...2 Technical data Technical data DR7X 11...
Страница 15: ...3 Concerning your safety Concerning your safety DR7X 15...
Страница 37: ...4 Indicators and control elements Indicators and control elements DR7X 37...
Страница 39: ...5 Checks prior to start up Checks prior to start up DR7X 39...
Страница 45: ...6 Operation Operation DR7X 45...
Страница 56: ...Operation Operating hour meter engine rpm meter DR7X 56...
Страница 57: ...7 Loading transporting the machine Loading transporting the machine DR7X 57...
Страница 61: ...8 Maintenance Maintenance DR7X 61...
Страница 96: ...Maintenance As required DR7X 96...
Страница 97: ...9 Setting up refitting Setting up refitting DR7X 97...
Страница 99: ...10 Troubleshooting Troubleshooting DR7X 99...
Страница 106: ...Troubleshooting What to do if the engine has flooded DR7X 106...
Страница 107: ...11 Disposal Disposal DR7X 107...
Страница 109: ......
Страница 110: ......

