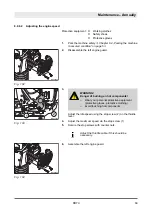
5.
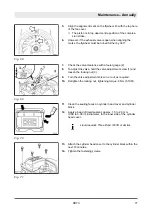
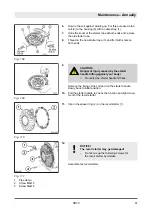
Align the alignment mark on the flywheel rib with the top bore
of the fan cover.
ð
The piston is in top dead centre position of the compres-
sion stroke.
6.
However, if the exhaust valve is open when aligning the
marks, the flywheel must be turned further by 360°.
7.
Check the valve clearance with a feeler gauge (2).
8.
To adjust the valve, hold the valve adjustment screw (1) and
loosen the locking nut (3).
9.
Turn the valve adjustment screw in or out, as required.
10.
Retighten the locking nut, tightening torque: 8 Nm (6 ft·lbf).
11.
Clean the sealing faces on cylinder head cover and cylinder
block.
12.
Apply a bead of liquid sealant, approx. 1.5 to 2.0 mm
(0.06 to 0.08 in) in diameter, to the inner side of the cylinder
head cover.
Liquid sealant: Three Bond 1207B or similar.
13.
Attach the cylinder head cover to the cylinder block within the
next 10 minutes.
14.
Tighten the fastening screws.
Fig. 68
Fig. 69
Fig. 70
Fig. 71
Maintenance – Annually
DR7X
77
Содержание Dynapac DR7X
Страница 2: ...2...
Страница 6: ...Table of contents DR7X 6...
Страница 7: ...1 Introduction Introduction DR7X 7...
Страница 11: ...2 Technical data Technical data DR7X 11...
Страница 15: ...3 Concerning your safety Concerning your safety DR7X 15...
Страница 37: ...4 Indicators and control elements Indicators and control elements DR7X 37...
Страница 39: ...5 Checks prior to start up Checks prior to start up DR7X 39...
Страница 45: ...6 Operation Operation DR7X 45...
Страница 56: ...Operation Operating hour meter engine rpm meter DR7X 56...
Страница 57: ...7 Loading transporting the machine Loading transporting the machine DR7X 57...
Страница 61: ...8 Maintenance Maintenance DR7X 61...
Страница 96: ...Maintenance As required DR7X 96...
Страница 97: ...9 Setting up refitting Setting up refitting DR7X 97...
Страница 99: ...10 Troubleshooting Troubleshooting DR7X 99...
Страница 106: ...Troubleshooting What to do if the engine has flooded DR7X 106...
Страница 107: ...11 Disposal Disposal DR7X 107...
Страница 109: ......
Страница 110: ......


