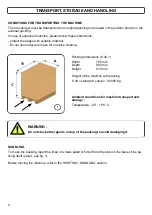
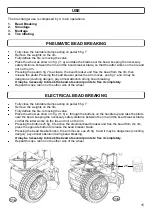


Wheel clamping
Check if there any weights left on the rim; if so, remove them.
Thoroughly lubricate the sides of the tire around the entire circumference of the lower and
upper bead to facilitate the demounting and avoid damaging the beads fig. 12
Twist the tower.
Depending on the rim diameter, close the four clamps if the rim has to be clamped from inside
or open them if the rim has to be clamped from outside.
Place the wheel on the turntable, push it lightly down and act on the control pedal to lock the
wheel in its proper position .
Acting on the turntable pedal
5 fig. 7 closes the clamps and may
be dangerous, (danger of hands crushing).
While rim clamping, do not keep the hands under the tire.
12
16
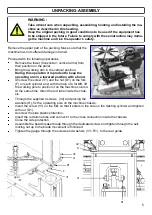
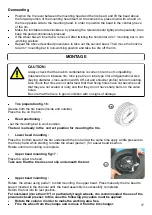
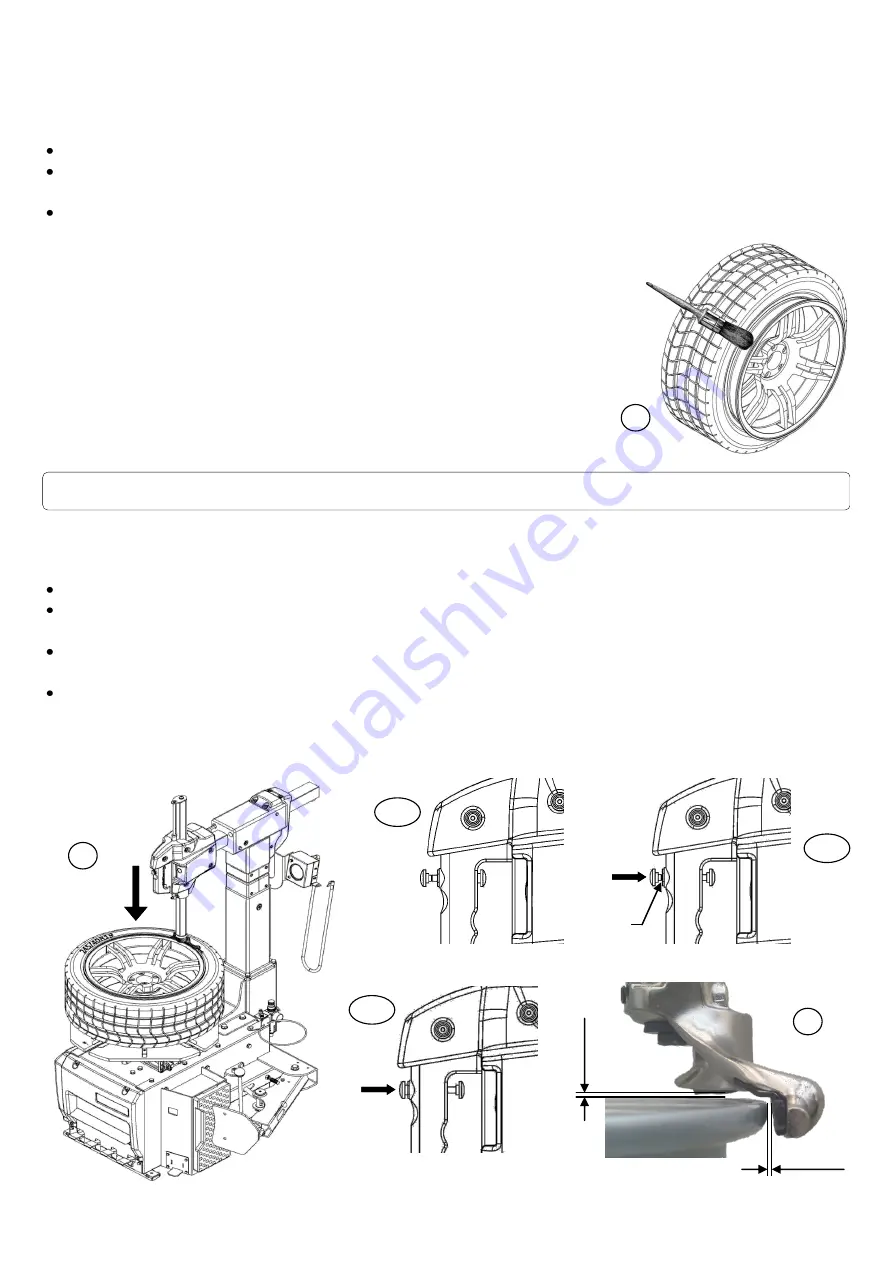
Tool positioning
Bring the working arm in working position by pressing the twisting control pedal.
Starting from the initial position (fig. 14a), press the yellow button till the pin line, so that the
pneumatic descent of the working arm is active.
Set the mounting bar in working position and let the mounting head touch the edge of the rim
fig. 13
Press the yellow or black button from handle extern (fig.14c).
This operation fasten the working arm and the horizontal column simultaneously.
The mounting head will distance from the rim edge of 2/3 mm automatically (fig.15).
13
15
2
-
3 mm
2 - 3 mm
DEMONTAGE
14 a
Linea
14 b
14 c
Содержание RASE.2247
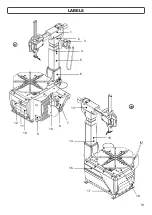
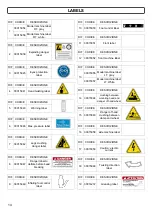
Страница 13: ...DECALCOMANIE 9 10 13 1 2 3 4 13 18 14 15 9 19 8 5 6 10 11 12 16 17 7...
Страница 36: ...LABELS 13 9 10 1 2 3 4 13 18 14 15 9 19 8 5 6 10 11 12 16 17 7...
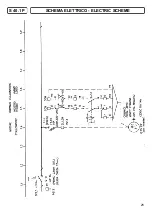
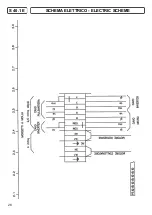
Страница 48: ...SCHEMA ELETTRICO ELECTRIC SCHEME 25 S 40 1 P...
Страница 49: ...26 SCHEMA ELETTRICO ELECTRIC SCHEME S 40 1 P...
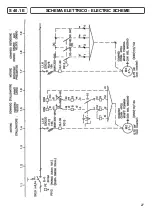
Страница 50: ...SCHEMA ELETTRICO ELECTRIC SCHEME S 40 1 E 27...
Страница 51: ...SCHEMA ELETTRICO ELECTRIC SCHEME S 40 1 E 28...


