background image

INSTRUCCIONES DE SEGURIDAD / INSTRUCTION DE SÉCURITÉ / SAFETY INSTRUCTIONS / INSTRUÇÕES DE SEGURANÇA / SICHERHEITSHINWEISE / 

VEILIGHEIDSINSTURCTIES / INSTRUZIONI DI SICUREZZA    / 

Ο∆ΗΓΊΕΣ


ΑΣΦΑΛΕΊΑΣ

 /   

ИНСТРУКЦИИ


ПО


ТЕХНИКЕ


БЕЗОПАСНОСТИ


Lípari  ref 33362 


faro - 11 

IMPORTANTI PRECAUZIONI PER LA SICUREZZA 

Grazie per aver acquistato una ventola da soffitto FARO. Avete scelto il prodotto migliore! Questa ventola è stata 
progettata per durare negli anni e offrire le massime prestazioni. 
AVVERTENZE: 

  Escludere  la  corrente  staccando  il  fusibile o direttamente    dal quadro elettrico prima di installare la ventola 

e/o la lampada. 

  Per  ridurre  il  rischio di  incendi,  scosse  elettriche o danni personali, montare solo su una scatola di 

distribuzione approvata come supporto per ventole. 

  Se  si  sceglie  il  comando  a  parete,  usare  un  dispositivo  di controllo della velocità appositamente 

progettato  per  le  ventole  a  soffitto,  al  fine  di  evitare  rischi  di  incendi,  scosse elettriche o danni 
personali.     

  Per  ridurre  il  rischio  di  danni  personali,  non  piegare i supporti delle pale durante l'installazione, il 

bilanciamento    o    la    pulizia della    ventola. Non inserire corpi estranei tra le pale in rotazione. 

NOTA: 
Le  precauzioni,  l’avvertenze e l’istruzioni importanti riportate in questo manuale non coprono tutte le possibili 
condizioni e situazioni di pericolo. È  necessario  anche  l'uso  del  buon  senso e della dovuta attenzione da 
parte di chi si occupa dell'installazione, della manutenzione e dell'uso della ventola. 

 
STRUMENTI E MATERIALI NECESSARI 

DISIMBALLAGGIO DELLA VENTOLA 

A.   Aprire  la  confezione  e  verificare  il  contenuto.  Non  buttare  la  scatola: in caso di sostituzione o 
riparazione  in  garanzia la ventola deve essere restituita nella confezione originale. Togliere dalla confezione tutte le 
parti e i componenti. Non appoggiare l'alloggiamento del motore su un lato onde evitare di piegarlo o danneggiarlo. 
La confezione contiene anche il telecomando e il ricevitore. Se si desidera, la ventola può essere azionata da un 
dispositivo di controllo ventola e luce a parete, anziché dal telecomando. 
Ricevitore del telecomando (se utilizzato) all'interno del supporto e della calotta. 
 

PREPARAZIONE: 

Assicurarsi di avere tutti le parti prima di iniziare l'installazione. Controllare    attentamente l'imballaggio in caso di parti 
mancanti.    Disimballare il motore. Per evitare danni,    assemblare    il motore su una superficie morbida o sulla spugna 
usata per l'imballaggio. 
Non appoggiare la ventola su di un lato per non provocare uno spostamento del motore. 
 

INSTALLAZIONE DEL SUPPORTO A SOFFITTO: 

Attenzione: Al fine di evitare il rischio di scosse elettriche, escludere la corrente dal quadro elettrico prima di iniziare il 
cablaggio. Le connessioni devono essere effettuate in conformità con i regolamenti nazionali e locali sugli impianti 
elettrici.   La   ventola   a   soffitto   deve   essere  collegata  a  terra per  evitare il rischio di scosse 
elettriche. 
 
1. 

Scegliere il punto in cui montare la ventola, assicurandosi di rispettare la distanza minima necessaria Da    pareti   

e  altri  oggetti.  Se  si  monta  la  ventola su una trave, accertarsi che questa sia solida e di dimensioni tali da 
poter sostenere almeno 16 kg di peso. 


2. 

Montare una scatola di distribuzione con marchio    UL    adatta come supporto per ventole, seguendo le relative 

istruzioni. La scatola di distribuzione    deve essere in grado di sostenere un peso di almeno 16 kg. 
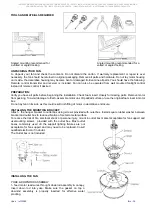
3.     Fissare  la  staffa di  supporto alla  scatola di distribuzione usando 2 viti per legno fornite in dotazione con la 
scatola di distribuzione. (Fig. 1) 

Содержание Lipari

Страница 1: ......

Страница 2: ...r onmogelijk is Questo apparecchio di alluminazione deve essere installato solamente in locali in cuil el conttato diretto con l acqua impossible Este material s deve ser instalado em divisoes onde o...

Страница 3: ...arse a una La distancia entre las aspas y el suelo no debe ser inferior a aprox 2 metros 4 Siempre que sea posible fije el ventilador a una viga del techo que debe tener la suficiente capacidad de car...

Страница 4: ...ienen y utilizan el producto HERRAMIENTAS Y MATERIALES REQUERIDOS DESEMBALAJE DEL VENTILADOR A Desembale el ventilador y controle si el contenido est completo No tire el cart n ya que en caso de un re...

Страница 5: ...ntilador 2 Haga pasar los 3 cables por dentro de la barra de suspensi n e introduzca el extremo de la barra de suspensi n en el elemento de brida con el interruptor avance marcha atr s 3 Introduzca el...

Страница 6: ...SICUREZZA L pari ref 33362 faro 5 Tija flor n embellecedor Pieza de ensamble pasador Tornillos de la tija pasador Cable toma tierra tija gancho bola soporte soporte Cable toma tierra bola Cable toma t...

Страница 7: ...e hacia arriba la tapa para el techo y f jela al soporte principal con los tornillos suministrados DESPU S de haber completado todas las conexiones el ctricas FIJACI N DE LAS ASPAS DEL VENTILADOR 1 In...

Страница 8: ...a unidad de control de pared tal como se describe en las p ginas anteriores INFORMACI N GENERAL Y MODO DE EMPLEO 1 Ajuste del c digo Paso 1 activar la corriente AC del controlador despu s de acabar el...

Страница 9: ...exiones 4 Introduzca el receptor en el soporte principal Fig 4 y baje la antena por el lado del soporte principal del ventilador 5 Vuelva a fijar la tapa para el techo en el soporte principal del vent...

Страница 10: ...ier anomal a en el funcionamiento de su ventilador proceda de la siguiente manera REPARACI N DE FALLOS ATENCI N Desconecte la alimentaci n el ctrica del ventilador antes de realizar cualquiera de las...

Страница 11: ...a un altezza di almeno 2 10 metri dal pavimento quando la ventola in funzione 4 Se possibile montare la ventola su una trave del soffitto la trave deve essere in grado di Sostenere il movimento e il p...

Страница 12: ...restituita nella confezione originale Togliere dalla confezione tutte le parti e i componenti Non appoggiare l alloggiamento del motore su un lato onde evitare di piegarlo o danneggiarlo La confezione...

Страница 13: ...l asta per bloccare il perno in posizione 4 Serrare bene le viti sull asta usando un lungo cacciavite piatto NOTA La ventola dotata di un cavo di allacciamento di 185 cm nel caso si usi un asta di pro...

Страница 14: ...DSINSTURCTIES INSTRUZIONI DI SICUREZZA L pari ref 33362 faro 13 ganchio ganchio giallo verde albero perno cavi albero perno innesto supporto supporto innesto supporto Giallo verde innesto Giallo verde...

Страница 15: ...e fissarla alla staffa di supporto con le viti in dotazione DOPO aver completato tutte le connessioni elettriche FISSARE LE PALE 1 Inserire le pale nelle scanalature sul lato del motore della ventola...

Страница 16: ...che il setup sia finite poi potete premere qualsiasi tasto La ventola torner alla velocit normale Step 4 come allo step 3 premere il tasto reverse La ventola raggiunger la velocit massima fino alla fi...

Страница 17: ...ente potrebbe essere necessario controllare ed eventualmente stringere le viti delle pale per evitare ronzii o rumori durante il funzionamento soprattutto se l unit installata in ambienti con forti es...

Страница 18: ...des d installation de c blage et de produits lectriques demandez les services d un lectricien qualifi et agr ainsi qu une personne qui peut v rifier la r sistance des l ments de soutien du plafond et...

Страница 19: ...arde et consignes importantes contenues dans ce manuel ne sont pas destin es couvrir toutes les conditions et situations qu il est possible de rencontrer Il faut bien comprendre que le bon sens la pru...

Страница 20: ...r les 3 fils dans le haut du ventilateur par l une des extr mit s de la tige et fixez l autre extr mit de la tige dans le collier de montage 3 Ins rez la clavette de la tige dans les trous du collier...

Страница 21: ...TIES INSTRUZIONI DI SICUREZZA L pari ref 33362 faro 20 goupille goupille Jaune Vert tije croisillon fils tije croisillom bola Support de montage Support de montage support Vert jaune bille Vert jaune...

Страница 22: ...on et attachez au support de suspension avec les vis fournies APRES avoir effectu tous les raccordements lectriques FIXATION DES PALES 1 Ins rez les pales dans les emplacements l int rieur du moteur d...

Страница 23: ...t du ventilateur et maintenir appuy le bouton SET de la partie arri re du commandement distance entre 5 5 et 60 secondes La lampe clignote deux fois lorsque le r glage est termin tape 3 apr s avoir r...

Страница 24: ...n est pas utilis e pendant une dur e prolong e B Eloignez l metteur de toute source de chaleur ou d humidit excessive C Cette t l commande est quip e de 16 combinaisons de code pour viter toutes autre...

Страница 25: ...la ligne de raccordement des fils vers le ventilateur V rifiez que le commutateur avant arri re est sur l une de ces positions et non pas bloqu entre les deux 2 Si le ventilateur est bruyant V rifiez...

Страница 26: ...nductors should be turned upward and pushed carefully up into outlet box The wire should be spread apart with the grounded conductor and the equipment grounding conductor on one side of the outlet box...

Страница 27: ...he installation Check foam insert closely for missing parts Remove motor from packing To avoid damage to finish assemble motor on soft padded surface or use the original foam inset in motor box Do not...

Страница 28: ...EITSHINWEISE VEILIGHEIDSINSTURCTIES INSTRUZIONI DI SICUREZZA L pari ref 33362 faro 27 2 insert the cross pin throught yoke downrod then secure with the cotter pin 3 thighhten both jam screws to furthe...

Страница 29: ...within 60 seconds The lamp twinkles twice when finishing setup step 3 after setup the controller fan will ran the highest speed until setup finished after press any button Then back to the original s...

Страница 30: ...TIES INSTRUZIONI DI SICUREZZA L pari ref 33362 faro 29 ATTACHING THE BLADES Attach the blade holder with screws provided in hardware bag Make sure that all screws are firmly tightened BLADE ASSEMBLY R...

Страница 31: ...n climates with broad temperature and humidity ranges and the fans with painted or high gloss blades When dusting the blades you must support the blade to prevent bending no pressure should be applied...

Страница 32: ...nstala o de cablagens e produtos el ctricos assegure os servi os de um electricista qualificado e devidamente licenciado bem como algu m que pode verificar a for a das partes de suporte do tecto e que...

Страница 33: ...ificam que cobrem todas as poss veis condi es e situa es que podem ocorrer Tem que se compreender que o senso comum o cuidado e a aten o s o factores que n o podem ser constru dos dentro deste produto...

Страница 34: ...do tirante no colar de montagem 3 Insira o pino do tirante atrav s dos buracos no colar de montagem e no tirante deslize o pino de chaveta atrav s do buraco pequeno na ponta do pino do tirante para s...

Страница 35: ...irante e bola de montagem at abertura do suporte de suspens o NOTA A alheta da abertura do suporte de suspens o oposto deveria engatar na fenda na bola Fig 3 3 Deslize o resguardo para cima e prenda a...

Страница 36: ...buracos n o alinharem porque as p s est o viradas ao contr rio 2 Inicie os parafusos das p s com os parafusos de fibra em cada buraco N O APERTE AT AMBOS OS PARAFUSOS ESTAREM INICIADOS Repita para as...

Страница 37: ...t o de invers o A ventoinha volta a trabalhar velocidade mais elevada at terminar a configura o Em seguida volta velocidade original Nota substitui o das l minas desligue substitua as l minas ligue a...

Страница 38: ...s p s ao motor est o apertados Verifique que o vidro resiste ao dedo e que as l mpadas est o bem encaixadas nos casquilhos se um kit de luzes estiver a ser usado Verifique que o resguardo est firmemen...

Страница 39: ...verlegt werden Die Kabel sollten getrennt werden mit der Geh usemasse und der Nullphase an der einen Seite und der Phasenleitung an der anderen Seite der Box 7 Elektrische Diagramme dienen nur als Ref...

Страница 40: ...chen Unterlage oder auf dem originalen Polstermaterial zusammen Legen Sie den Ventilator nicht auf die Seite da dies verursachen kann dass der Motor aus seinem Geh use rutscht INSTALLIEREN DES MONTAGE...

Страница 41: ...n mit einem grossen flachen Schraubenschl ssel gegen die Stange um einen festen Sitz gegen die Stange zu garantieren ANMERKUNG Der Ventilator hat 1 8m Kabel f r den Fall dass Sie eine Verl ngerungssta...

Страница 42: ...s wird nun an dem Halter h ngen 2 F hren Sie nun den Zusammenbau Ventilator Stange in die Halter ffnung ANMERKUNG der Keil der Halter ffnung muss in die Nut der Kugel eingef hrt werden Fig 3 3 Schiebe...

Страница 43: ...bereinander passen ist das Blatt um 180 verdreht 2 F hren Sie die Schrauben mit Scheiben in jedes Loch SCHRAUBEN SIE SIE NICHT FEST BEVOR BEIDE SCHRAUBEN ANGESETZT SIND Wiederholen Sie dies f r alle...

Страница 44: ...en wird Dr cken Sie danach eine beliebige Taste Daraufhin geht es zur ck auf Originalgeschwindigkeit Bei Setup Anfang started es mit H chstgeschwindigkeit und die gleiche Geschwindigkeit wird beibehal...

Страница 45: ...schen m ssen Sie die Bl tter halten um ein Verbiegen zu vermeiden es sollte dabei keine Kraft auf die Bl tter ausge bt werden Wenn Sie irgendwelche Fehler im Betrieb des Ventilators feststellen lesen...

Страница 46: ...en de correcte installatie s en verbindingen kan maken 3 Verzeker u ervan dat draaiende ventilatorbladen nergens contact mee maken op de plaats van installatie De ventilatorbladen moeten zich minimaa...

Страница 47: ...duidelijk zijn dat gezond verstand voorzichtigheid en zorgvuldigheid aspecten zijn die niet in dit product ingebouwd kunnen worden De persoon personen die de unit installeren er zorg voor dragen en g...

Страница 48: ...de bevestigingskraag en de neerhangende staaf steek de splitpen door de kleine opening in het einde van de pen van de neerhangende staaf om de pen van de neerhangende staaf op haar plaats te houden 4...

Страница 49: ...STURCTIES INSTRUZIONI DI SICUREZZA L pari ref 33362 faro 48 haaken haaken aardleiding as pin kabels as pin Muntage stuk drager drager Muntage stuk drager Groen geel bola Groen geel Receptor 220V Recep...

Страница 50: ...gbeugel vast met de meegeleverde schroeven NADAT alle elektrische verbindingen volledig gemaakt zijn DE VENTILATORBLADEN AANBRENGEN 1 Steek de ventilatorbladen in de gleuven aan de zijkant van de vent...

Страница 51: ...tilator stroom aan druk op de SET knop die aan de achterkant van afstandsbediening zit en houd die 5 a 60 seconden ingedrukt De lamp zal twee keer knipperen zodra de set up klaar is Stap 3 zodra de se...

Страница 52: ...en zij niet gebruikt wordt voor een lange periode B Bewaar de batterij buiten het bereik van overdadige hitte of vochtigheid C Deze afstandsbediening is uitgerust met 16 codecombinaties om mogelijke i...

Страница 53: ...geoefend worden op de ventilatorbladen Als u enige tekortkoming opmerkt in de werking van uw ventilator controleer dan de volgende punten PROBLEEMOPLOSSING IN GEVAL VAN MOEILIJKHEDEN WAARSCHUWING Slui...

Страница 54: ...CIONES DE SEGURIDAD INSTRUCTION DE S CURIT SAFETY INSTRUCTIONS INSTRU ES DE SEGURAN A SICHERHEITSHINWEISE VEILIGHEIDSINSTURCTIES INSTRUZIONI DI SICUREZZA L pari ref 33362 faro 53 2 3 2 4 10 5 16 5 6 7...

Страница 55: ...RUCCIONES DE SEGURIDAD INSTRUCTION DE S CURIT SAFETY INSTRUCTIONS INSTRU ES DE SEGURAN A SICHERHEITSHINWEISE VEILIGHEIDSINSTURCTIES INSTRUZIONI DI SICUREZZA L pari ref 33362 faro 54 A B 1 9 2 1 2 1 2...

Страница 56: ...ION DE S CURIT SAFETY INSTRUCTIONS INSTRU ES DE SEGURAN A SICHERHEITSHINWEISE VEILIGHEIDSINSTURCTIES INSTRUZIONI DI SICUREZZA L pari ref 33362 faro 55 4 1 70 5 5 6 1 pasador pasador Cable toma tierra...

Страница 57: ...URAN A SICHERHEITSHINWEISE VEILIGHEIDSINSTURCTIES INSTRUZIONI DI SICUREZZA L pari ref 33362 faro 56 1 2 3 Cable toma tierra bola Cable toma tierra Receptor 220V Receptor casa Marr n Azul Amarillo verd...

Страница 58: ...URIDAD INSTRUCTION DE S CURIT SAFETY INSTRUCTIONS INSTRU ES DE SEGURAN A SICHERHEITSHINWEISE VEILIGHEIDSINSTURCTIES INSTRUZIONI DI SICUREZZA L pari ref 33362 faro 57 1 2 3 10 15 3 12 1 1 AC 2 SET CET...

Страница 59: ...AN A SICHERHEITSHINWEISE VEILIGHEIDSINSTURCTIES INSTRUZIONI DI SICUREZZA L pari ref 33362 faro 58 3 4 4 5 6 E 12V A23 MN21 F 16 HI MED LOW FAN OFF LIGHT 1 8 2P grigio rojo giallo grigio grigi tecto ma...

Страница 60: ...SEGURIDAD INSTRUCTION DE S CURIT SAFETY INSTRUCTIONS INSTRU ES DE SEGURAN A SICHERHEITSHINWEISE VEILIGHEIDSINSTURCTIES INSTRUZIONI DI SICUREZZA L pari ref 33362 faro 59 1 2 3 DC 1 DC 60 5 18 3 3 5 2...

Страница 61: ...IONES DE SEGURIDAD INSTRUCTION DE S CURIT SAFETY INSTRUCTIONS INSTRU ES DE SEGURAN A SICHERHEITSHINWEISE VEILIGHEIDSINSTURCTIES INSTRUZIONI DI SICUREZZA L pari ref 33362 faro 60 2 3 2 4 10 5 16 5 6 7...

Страница 62: ...ONES DE SEGURIDAD INSTRUCTION DE S CURIT SAFETY INSTRUCTIONS INSTRU ES DE SEGURAN A SICHERHEITSHINWEISE VEILIGHEIDSINSTURCTIES INSTRUZIONI DI SICUREZZA L pari ref 33362 faro 61 B 1 2 9 3 1 3 1 2 3 3 4...

Страница 63: ...INSTRUCCIONES DE SEGURIDAD INSTRUCTION DE S CURIT SAFETY INSTRUCTIONS INSTRU ES DE SEGURAN A SICHERHEITSHINWEISE VEILIGHEIDSINSTURCTIES INSTRUZIONI DI SICUREZZA L pari ref 33362 faro 62 6 7 1...

Страница 64: ...INSTRUCCIONES DE SEGURIDAD INSTRUCTION DE S CURIT SAFETY INSTRUCTIONS INSTRU ES DE SEGURAN A SICHERHEITSHINWEISE VEILIGHEIDSINSTURCTIES INSTRUZIONI DI SICUREZZA L pari ref 33362 faro 63 1 2 3 1 2 3 10...

Страница 65: ...DE SEGURIDAD INSTRUCTION DE S CURIT SAFETY INSTRUCTIONS INSTRU ES DE SEGURAN A SICHERHEITSHINWEISE VEILIGHEIDSINSTURCTIES INSTRUZIONI DI SICUREZZA L pari ref 33362 faro 64 15 3 12 1 16 A a b ON OFF 1...

Страница 66: ...RUCTION DE S CURIT SAFETY INSTRUCTIONS INSTRU ES DE SEGURAN A SICHERHEITSHINWEISE VEILIGHEIDSINSTURCTIES INSTRUZIONI DI SICUREZZA L pari ref 33362 faro 65 3 4 4 5 6 a 12V A23 MN21 b c 16 d 1 1 6 2 ON...

Страница 67: ...INSTRUCCIONES DE SEGURIDAD INSTRUCTION DE S CURIT SAFETY INSTRUCTIONS INSTRU ES DE SEGURAN A SICHERHEITSHINWEISE VEILIGHEIDSINSTURCTIES INSTRUZIONI DI SICUREZZA L pari ref 33362 faro 66 1 2 3...

Отзывы: