


4
NetLINE
™
Setup Guide
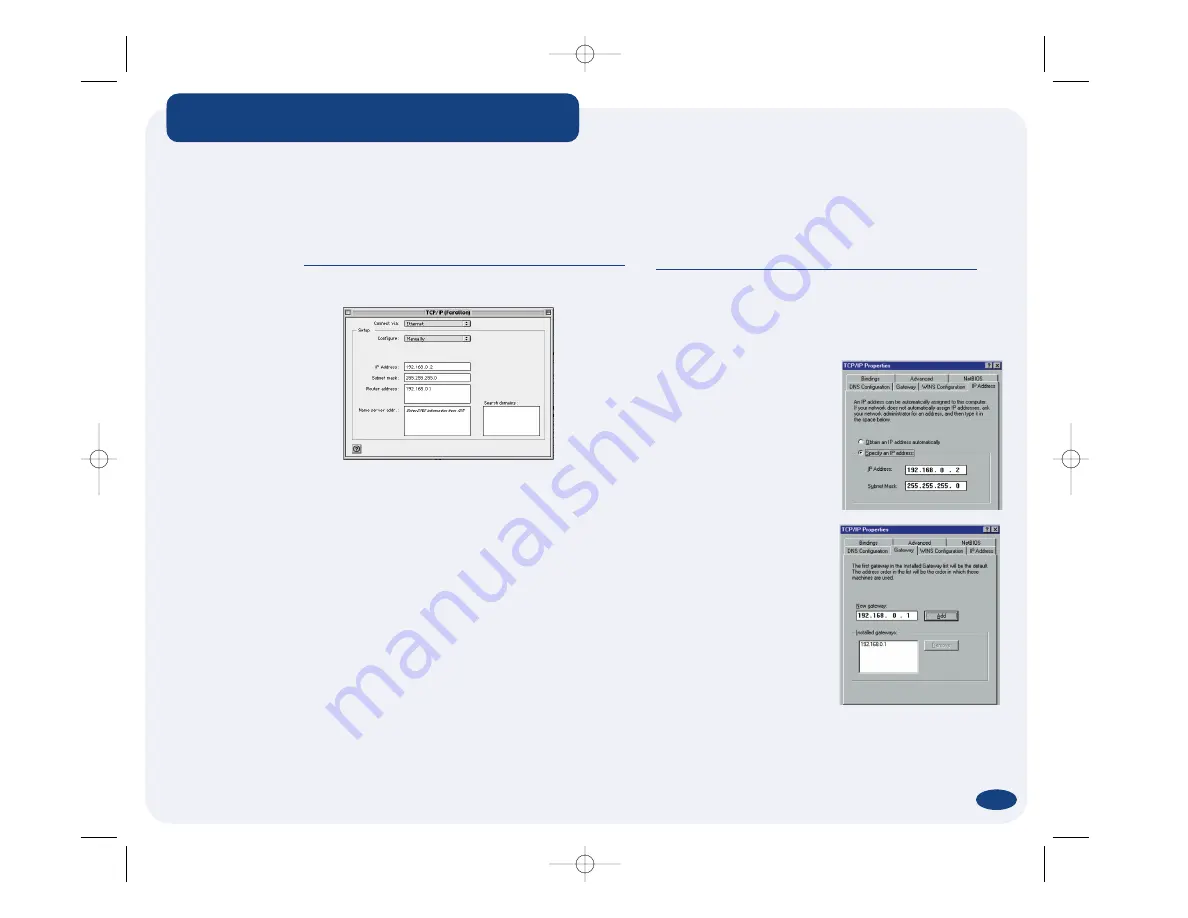
Using fixed IP Addresses for Macintosh clients
1. Open the TCP/IP Control Panel.
2. Select
Ethernet
(or
Wireless
or
AirPort
or whichever port you
are using to connect this computer to your local network)
from the
Connect via
menu.
3. Select
Manually
from the
Configure
menu.
4. Enter the following information into the TCP/IP panel:
IP Address: 192.168.0.
x,
where
x
is any number from
2
to
252.
Each computer on the local network needs a distinct IP Address.
Subnet mask: 255.255.255.0
Router address: 192.168.0.1
Name server address:
Enter the
Domain Name Server
informa-
tion from your ISP.
Search domains:
Enter the information from your ISP.
5. Close the TCP/IP Control Panel, saving your settings.
Next, see
Client connection
on
page 5
of this user guide.
Client configuration using fixed IP Addresses
If using DHCP (as described on page 3) does not work for your local network, you can manually assign each computer a specific IP Address
as described below.
Using fixed IP Addresses for Windows PC clients
1. Right-click on the
Network Neighborhood
icon on the desktop,
then select
Properties
.
If TCP/IP is not listed, you will need to add it,
using your original Windows CD or .cab files. After TCP/IP is added,
exit Network Properties, restart your PC, and return to the Network
configuration panel.
2. Select the TCP/IP > Network
card entry, in the
Network
config-
uration panel. Click the
Properties
button. Click the
IP Address
tab
and enter the following:
IP Address: 192.168.0.x,
where
x
is any number from
2
to
252.
Each
computer on the local network
needs a distinct IP Address.
Subnet mask: 255.255.255.0
3. Click the
DNS Configuration
tab
and enter the DNS information
provided by your ISP.
4. Click the
Gateway
tab and enter
the IP Address of the NetLINE
Wireless Broadband Gateway
into the Gateway IP Address
field:
192.168.0.1
.
5. Click
OK
and restart the PC.
Next, see
Client connection
on
page 5
of this user guide.
2
configuring
client
computers
6150270-00-02 4/3/01 12:46 PM Page 4


