G
ETTING
S
TARTED
WITH
MAMBO2-B6 EVALKIT
V
ERSION
1.0.3
Step 3
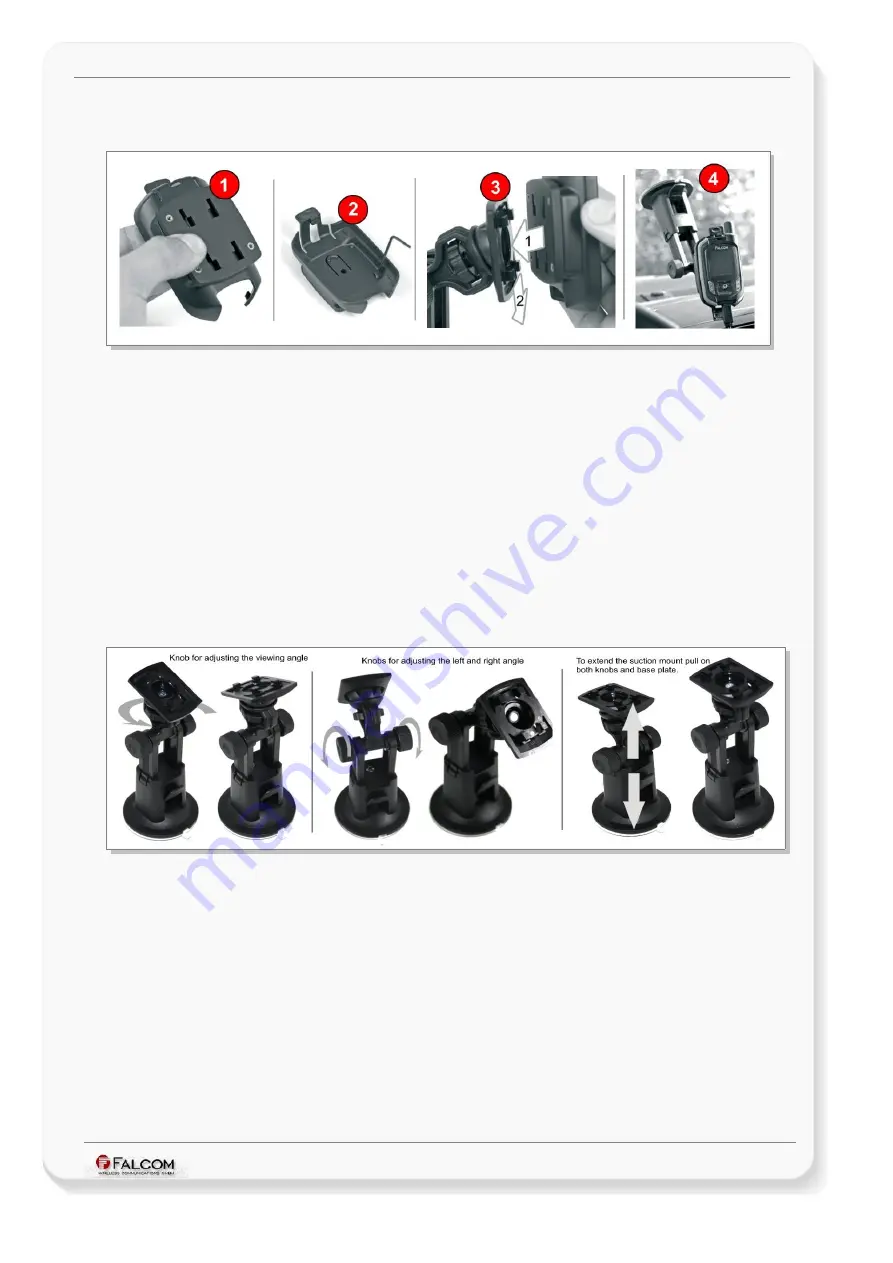
Later on, unpack the suction mount and hook the assembled holding frame into the 4
legs of the suction mount and push the holding frame down until it snaps into the place.
Figure 12: Car mounting kit.
Step 4
Select an appropriate mounting position for the suction mount on the car windscreen.
Clean the part of the installation area with a cleaning-cloth (not included) and attach the
mount onto the cleaned area. Now place the MAMBO2-B6 on the holding frame, adjust
the viewing angle of MAMBO2-B6, connect the power cable to the MAMBO2-B6 mini-
USB port and car charger and plug the car charger into the vehicle cigarette light.
When putting the MAMBO2 into the cradle first insert the two slots on the bottom of
the MAMBO2 into the two latches on the cradle. Thereafter, apply light pressure on the
MAMBO2 toward the cradle until you hear it snaps into the cradle.
To adjust right/left position, turn both knobs the left and the right ones clockwise. Then
turn back to fix that position. To adjust the viewing angle of MAMBO2-B6 turn the
middle knob clockwise. Then turn back to fix that position.
In addition the holding frame can be extended by pulling the on both knobs and the base
plate.
Figure 13:
Suction mount.
Safety Precautions:
❢
Do not install this product over an air bag cover or within the air bag deployment
zone or where it will obstruct view of the road. FALCOM is not responsible for any
damages caused to your car, your device, or yourself due to the installation or use
of this suction mount.
This confidential document is a property of FALCOM and may not be copied or circulated without previous permission.
Page 21 of 24


