E n g l i s h
E n g l i s h
2 3
2 3
I C T- 0 1
I C T- 0 1
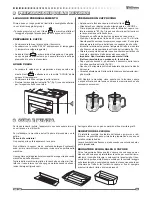
2. Remove the machine from the base by unhooking it from the
lateral guides using the levers (Fig. 3), raising the lever of the ri-
ght-hand guide and lowering the lever of the left-hand guide (1).
3. Slide the base of the machine into the unit all the way back (2).
4. Attach the base to the shelf using the 10 holes and the screws
provided (Fig.4).
Note : If the sides of the base are not fl ush with the sides of the
unit, use the shims provided (3).
5. Close the machine guides all the way.
6. Connect the plug to the power outlet following the safety regula-
tions in force. Important : The power outlet must be accessible
after the machine has been installed.
7. Insert the machine in the unit, taking care that the machine gui-
des are correctly inserted in the guides on the base, and slide
the machine in leaving the necessary space for reaching and
connecting the power plug.
8. Close the machine by sliding it all the way back.
9. Fill the water tank and the coffee container.
10. Supply power to the machine using the main switch situated on
the left side of the machine (page 4 Fig. 17)
The manufacturer declines any responsibility towards per-
sons or objects, as well as for the proper operation of the ma-
chine, due to failure to follow the instructions given above.
Fig. 3
Fig. 3
Fig. 4
Fig. 4
Fig. 3
Fig. 3
Содержание Built-In Coffee Machine MQC-A10 US
Страница 1: ......
Страница 7: ...I tal i ano Itali ano 7 7 I CT 01 ICT 01 Fig 2B Fig 2B...
Страница 22: ...E n g l ish En g l i s h 2 2 2 2 I CT 01 I CT 01 Fig 2B Fig 2B...
Страница 36: ...Deutsch Deutsch 3 6 3 6 I CT 01 I CT 01 ABBILDUNG 2A ABBILDUNG 2A...
Страница 50: ...Fr an a i s Fr a n a is 5 0 5 0 I CT 01 I CT 01 Fig 2B Fig 2B...
Страница 64: ...E spa o l Es p a o l 6 4 6 4 I CT 01 I CT 01 Fig 2B Fig 2B...
Страница 74: ...FAGOR AMERICA APPLIANCES DIVISION P O BOX 94 LYNDHURST NJ 07071 PLACE STAMP HERE...
Страница 75: ......
Страница 76: ......

