background image

IMPORTANT NOTE:

 THIS OWNER'S MANUAL IS PROVIDED AS AN 

INSTALLATION AND OPERATING AID. FACTOR ELECTRONICS DOES NOT 

ASSUME ANY RESPONSIBILITY AS TO ITS ACCURACY AND SHALL NOT BE 

LIABLE IN TORT OR CONTRACT FOR ANY DIRECT, CONSEQUENTIAL OR 

INCIDENTAL LOSS OR DAMAGE ARISING FROM THE INSTALLATION, USE OR 

INABILITY TO USE THIS PRODUCT.

WARNING: 

TO REDUCE THE RISK OF FIRE OR ELECTRIC SHOCK DO NOT 

EXPOSE THIS APPLIANCE TO WATER, RAIN OR MOISTURE. THIS APPLIANCE 

SHOULD NOT DAMPENED BY WATER DROPS OR SPLASHING. CONTAINERS OF 

LIQUID SUCH AS VASES SHOULD NOT BE PLACED ON THIS APPLIANCE.

Immediately upon receipt, inspect the unit and shipping container for indications of improper 

handling or in-transit damage. This equipment was carefully inspected and tested before 

leaving the factory. Notify the Transportation Company, Wholesaler or Retailer immediately if 

any damage is found. Be sure to save the carton and packing material as evidence of damage 

for later inspection. DO NOT SHIP the unit back to the factory unless authorized to do so by the 

factory. IN TRANSIT DAMAGES ARE NOT COVERED BY THE WARRANTY.  

DO NOT INSTALL OR 

ATTEMPT TO OPERATE THIS UNIT IF IT HAS BEEN DAMAGED. 

IMPORTANT SAFETY INSTRUCTIONS

• Read and keep these instructions.

• Heed all warnings and follow all instructions contained within this manual.
• Do not use this unit near water.

• Clean only with dry cloth.

• Do not block any ventilation openings. Install in accordance with the manufacturer’s 

instructions.
• Do not install near any heat sources such as radiators, heat registers, stoves, or other 

apparatus (including 

amplifiers) that produce heat.

• Do not defeat the safety purpose of the polarized or grounding-type plug. A polarized plug 

has two blades 

with one wider than the other. A grounding type plug has two blades and a third 

grounding prong. The wide blade or the third prong are provided for your safety. If the provided 

plug does not fit into your outlet, consult an electrician for replacement of the obsolete outlet.

• Protect the power cord from being walked on or pinched particularly at plugs, convenience 
receptacles, and 

the point where they exit from the apparatus.

• Only use attachments/accessories specified by the manufacturer.

• Unplug this apparatus during lightning storms or when unused for long periods of time.

• Refer all servicing to qualified service personnel. Servicing is required when the apparatus 
has been 

damaged in any way, such as when the power-supply cord or plug is damaged, liquid 

has been spilled or objects have fallen into the apparatus, the apparatus has been exposed to 

rain or moisture, does not operate normally, or has been dropped.

• Operate the product only with the voltage specified on the unit. Fire and/or electric shock 

may result if a 

higher voltage is used.

• Do not modify, kink, or cut the power cord. Do not place the power cord in close proximity to 

heaters and 

do not place heavy objects on the power cord and/or the product itself, doing so 

may result in fire or electrical shock.

• Replace the protective cover over the speaker terminals after installation. Do not touch the 
70V speaker 

terminals as electric shock may result.

• Ensure that the safety ground terminal is connected to a proper ground. Never connect the 

ground to a gas 

pipe, as a severe explosion and/or fire may result.

• Be sure the installation of this product is stable, avoid slanted surfaces as the product may 
fall and cause 

injury, property damage, electrocution and/or fire.

• Note when the unit is turned off it is not completely disconnected from the wall AC power 

outlet. Do not open 

the cover unless the device is unplugged from the wall AC power outlet.

[email protected]

       www.factorelectronics.com
Содержание V-4120

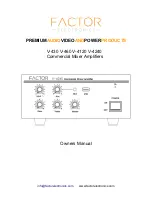
Страница 1: ...V 430 V 460 V 4120 V 4240 Commercial Mixer Amplifiers PREMIUMAUDIOVIDEOANDPOWERPRODUCTS Owners Manual info factorelectronics com www factorelectronics com ...

Страница 2: ...er A grounding type plug has two blades and a third grounding prong The wide blade or the third prong are provided for your safety If the provided plug does not fit into your outlet consult an electrician for replacement of the obsolete outlet Protect the power cord from being walked on or pinched particularly at plugs convenience receptacles and the point where they exit from the apparatus Only u...

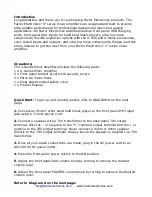
Страница 3: ... mains fuses 1 x Clear plastic output safety cover 1 x Product Manual Quick Start To get up and running quickly refer to DIAGRAM A on the next page 1 Connect an iPod or other hand held music player to the front panel MP3 input jack using a 3 5mm stereo cord 2 Connect a speaker with a 70V transformer to the back panel 70V output terminal Wire the or negative to the C common output terminal and the ...

Страница 4: ...erminals 3 After all your connections are made plug the AC power cord in 4 After all your connections are made press the power switch ON 1 Connect a hand held music player to the MP3 jack 6 Adjust the master volume 5 Adjust the AUX volume info factorelectronics com www factorelectronics com ...

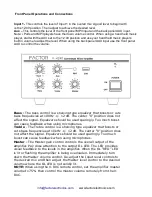
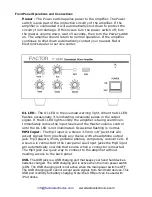
Страница 5: ...ringly Too much boost can cause feedback when using microphones Treble The Treble control is a shelving type equalizer that boosts or cuts bass frequencies at 10kHz 12 dB The center 0 position does not affect the signal Equalizers should be used sparingly Too much boost can cause feedback when using microphones Master The Master gain control controls the overall output of the amplifier Pay close a...

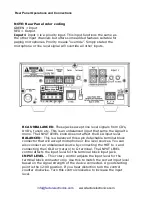
Страница 6: ...ifier is being overdriven Immediately reduce the input levels and the Master volume control until the OL LED is not illuminated Occasional flashing is normal MP3 Input The Mp3 input is a stereo 3 5mm 1 8 jack that will accept signals from practically any device with a headphone output jack Mp3 players iPods portable phones computers receivers etc If a source is connected to the rear panel Aux Inpu...

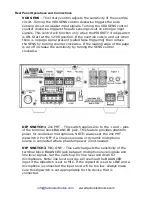
Страница 7: ...l to mono The INPUT LEVEL knob does not affect the RCA input level BALANCED This is a balanced three pin detachable terminal block connector that will accept microphone or line level sources You can also connect an unbalanced source by connecting the HOT to and connecting the COLD or return to G terminal The INPUT LEVEL control affects the input level for the terminal block input jack INPUT LEVEL ...

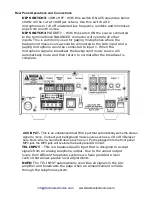
Страница 8: ...t off increase the sensitivity by turning the SENS control clockwise DIP SWITCH 1 24v PHT This switch applies 24v to the and pins of the terminal block BALANCED jack This feature provides phantom power for condenser microphones NOTE always set the 24v PHT dipswitch UP or OFF if a line level source or dynamic microphone source is connected where phantom power is not needed DIP SWITCH 2 MIC LINE Thi...

Страница 9: ...gnal is broadcast the background music source will automatically mute and then return to normal after the broadcast is complete AUX INPUT This is an unbalanced dual RCA input that automatically sums the stereo signal to mono Connect your background music source such as a CD or DVD player here Note when a hand held device such as an i Pod is plugged into the front panel MP3 jack the MP3 jack will o...

Страница 10: ... amplifier BRIDGING INPUT OUTPUT Many installations require flexibility where multiple amplifiers need to be combined for large room activities and then separated for smaller multiple room activities This is referred to as room combining Factor Electronics amplifiers offer this feature with simple easy to use bridging terminals These terminals provide a way to send and receive balanced line level ...

Страница 11: ...multiple amplifiers together you may need to adjust the volume levels on the individual amplifiers to create a well balanced mix NOTE To combine two or more amplifiers the SEL contacts must be shorted on each amplifier you wish to combine EXAMPLE Connect the bridge terminals of amp 1 to amp 2 Short the SEL contacts on amp 1 The amps will not combine Short the SEL contacts on both amps 1 2 and the ...

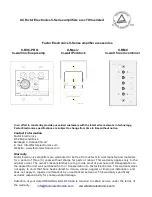
Страница 12: ...RVC s to each amplifier The amplifier provides power for the V RVC and additional power supplies are not necessary When using the V RVC connect the PRIORITY contacts provided on the V RVC to the MUTE contacts on the amplifier The V RVC can be used as a priority input with the PRIORITY switch pushed in Set the PRIORITY switch to the out position to blend the V RVC signal with other signals present ...

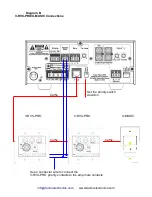
Страница 13: ...w factorelectronics com Diagram B V RVC PRO X MUSIC Connections Cat5e Cat5e Cat5e Set the priority switch down on V RVC PRO V RVC PRO X MUSIC Use 2 conductor wire to connect the V RVC PRO priority contacts to the amp mute contacts ...

Страница 14: ...70V 16 18 AWG stranded copper unshielded 100V 16 18 AWG stranded copper unshielded CAUTION Keep the speaker output guard on at all times This will help prevent shock and fire hazards Ensure the power cord is not connected to the AC outlet when making connections POWER CORD Connect the AC power cord to 110V AC outlets only Do not connect the power cord until all audio connections are made Serious d...

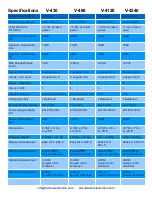
Страница 15: ...ging In Out 1 Balanced 1 Balanced 1 Balanced 1 Balanced Remote Master Volume Via V RVC Via V RVC Via V RVC Via V RVC Power Requirements AC AC120V 60Hz AC120V 60Hz AC120V 60Hz AC120V 60Hz Power Consumption AC 90W 150W 150W 250W Dimensions 8 5 W x 4 H x 11 25 D 8 5 W x 4 H x 11 25 D 8 5 W x 4 H x 11 25 D 8 5 W x 4 H x 11 25 D Shipping Weight 10 25lb 4 7 kg 12 2lb 5 5 kg 7lb 3 18kg 7 5lb 3 4kg Option...

Страница 16: ...sibilities are to provide proof of purchase and transportation to the dealer the unit was purchased from or transportation to Factor Electronics This warranty does not apply to units that have been subject to misuse abuse neglect or improper installation and does not apply to repairs or alterations by unauthorized personnel This warranty specifically excludes responsibility for consequential damag...

Отзывы: