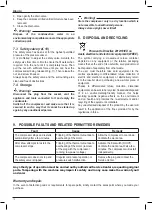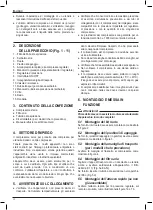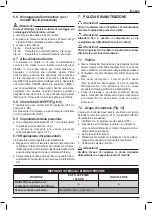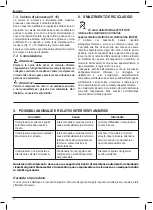
background image

16

ENGLISH

2.  LAYOUT (Fig. 1 - 11)

1. 

Intake air filter

2.  Pressure vessel

3.  Wheel

4.  Supporting rubber foot

5.  Quick-lock coupling (regulated compressed air)

6.  Pressure gauge (for reading the preset pressure by 

means of the pressure regulator)

7.  Pressure regulator

8. 

I/O

 switch (ON/OFF)

9.  Transportation handle

10. Safety valve

11. Drain valve

12. Pressure gauge (for reading the tank pressure)

13. Screw

14. Nut

15. Washer

3.  PACKAGING CONTENTS LIST


Air compressor


● Air filter


Suction tube


Hose reel kit (for models envisaging this)


Instruction manual and other documents

4.  SCOPE OF USE

The compressor is designed for generating compressed 

air for tools operated by compressed air.
Please note that our equipment has not been designed for use 

in commercial, trade or industrial applications. Our warranty 

will be voided if the machine is used in commercial, trade or 

industrial businesses or for equivalent purposes.
The machine is to be used only for its prescribed purpose. 

Any other use is deemed to be a case of misuse. The user/

operator and not the manufacturer will be liable for any 

damage or injuries of any kind caused as a result of this.

5.  POINTS TO NOTE WHEN SETTING 

UP THE COMPRESSOR


Examine the machine for signs of transit damage. Report 

any damage immediately to the company which delivered 

the compressor.


The compressor should be set up near the working 

consumer.


Avoid long air lines and long supply lines (extensions).


Make sure the intake air is dry and dust-free.


Do not set up the compressor in damp or wet rooms.


The compressor may only be used in suitable rooms (with 

good ventilation and an ambient temperature from +5°C to 

+40°C). There must be no dust, acids, vapors, explosive 

gases or inflammable gases in the room.


The compressor is designed to be used in dry rooms. It 

is prohibited to use the compressor in areas where work 

is conducted with sprayed water.

6.  ASSEMBLY AND STARTING

  Warning!  

You must fully assemble the appliance before using it 

for the first time.

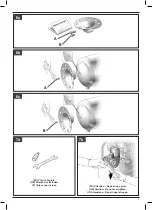
6.1  Fitting the wheel kit

If provided, the wheel kit must be installed as shown in 

figure 2.

6.2  Fitting the supporting feet

If  provided,  the  rubber  feet  must  be  fitted  as  shown  in 

figure 3.

6.3  Fitting the transport handle (for 

models envisaging this)

Screw the transport handle to the compressor as shown 

in figure 4.

6.4 

Fitting the air filter

Remove the transportation stop with a screwdriver or 

similar  and  screw  the  air  filter  (ref.  1)  securely  to  the 

equipment (Fig. 5a-5b-5c).

If supplied, insert the suction tube inside the filter cover 

(Fig. 5d).

6.5  Assembling the quick coupler (if not 

already assembled)

Tighten the quick coupler for regulated pressure to the 

coupling on the outlet as shown in figures 7a and 7b.

6.6  Fitting the hose reel (for models 

envisaging this)

  Warning!  

Before carrying out any hose reel assembling and/or 

disassembling, you have to:


disconnect the plug from the socket, 


discharge the pressure tank and vent all the air tools 

connected to it,


empty the condensate.

Fig. 6a:  Kit contents

Fig. 6b:  Tank with internal sleeve: long screw.

Fig. 6c:  Tank with external sleeve: short screw.

6.7  Voltage

The compressor is equipped with a mains cable with 

shock-proof plug. Insert the plug of the electric cable 

in a socket of suitable shape, voltage and frequency 

complying with current regulations. Before you use the 

machine, make sure that the mains voltage complies with 

the specifications on the rating plate. Make sure that the 

ON/OFF switch is 

not

 in the 

I

 (

ON

) position. Long supply 

cables, extensions, cable reels etc. cause a drop in 

voltage and can impede motor start-up. In the case of low 

temperatures below +5°C, motor start-up is jeopardized as 

a result of stiffness.

Содержание FCXCMS1524HE

Страница 1: ...779 1000R Final page size A5 148mm x 210mm WWW FACOM COM FCXCMS1524HE FCXCMS1550HE FCXCMS1550VE...

Страница 2: ...model code and serial number are printed on EC label stuck onto the last page of this manual Attenzione IT Tutti i dati identificativi costruttore modello codice e numero di serie sono riportati sull...

Страница 3: ...under its sole responsibility that the air compressor described below complies with all relevant regulations of the following EU directives 2006 42 EC 2000 14 EC 2014 30 EU 2011 65 EU The following ha...

Страница 4: ...angerous voltage IT Attenzione corrente elettrica FR Risque de d marrage automatique Le compresseur pourrait d marrer sans avertissement GB Danger automatic control closed loop Compressor may start wi...

Страница 5: ...nement bar et PSI capacit du r servoir l tours par minute RPM poids kg 7 Niveau de puissance acoustique garanti en dB A Niveau de puissance acoustique mesur en dB A 8 Donn es lectriques tension d alim...

Страница 6: ...in e cfm 6 Pressione massima di esercizio bar e PSI capacit del serbatoio l giri al minuto RPM peso kg 7 Livello di potenza acustica garantito in dB A Livello di potenza acustica misurato in dB A 8 Da...

Страница 7: ...7 2b 3 13 14 3 13 14 2a 3a 14 15 4 1a 1b 10 10 5 5 12 12 6 6 7 7 8 8 OFF ON OFF ON OFF ON OFF ON 3b 4 14 15...

Страница 8: ...8 5a 5c 5b 1 3c 13 15 4 14 4a 9 2 4b 2 9 5d...

Страница 9: ...9 7b FR Cl non fournie GB Wrench not included IT Chiave non inclusa 7a FR Attention Ne pas trop serrer GB Caution Do not over tighten IT Attenzione Non stringere troppo 6a 6b 6c A B A B...

Страница 10: ...10 Open 11 Closed 10 10 11 9 8 8 BS1362 APPROVED FUSE BS1363 A APPROVED 3 PIN PLUG FUSE 13 amp BROWN LIVE WIRE Cord grip EARTH 12...

Страница 11: ...ller cequelesenfantsetlesanimaux stationnent loin de la zone de travail de l appareil Le pr sent appareil n est pas apte tre utilis par tous sujets y compris les enfants pr sentant des capacit s physi...

Страница 12: ...t construits pour tre utilis s dans un environnement professionnel industriel ou artisanal Nous d clinons toute responsabilit sil appareil est utilis professionnellement artisanalement ou dans des soc...

Страница 13: ...pteur manom trique est ajust l usine Apr savoiratteintlavaleursup rieuredeconsigne programm e par le fabricant en phase de test le compresseur s arr te En utilisant de l air le compresseur red marre a...

Страница 14: ...e s lective des d chets lectroniques et lectro techniques ou au revendeur lors de l achat d un nouvel appareil de type quivalent raison d un pour un Une collecte s lective ad quate pour l envoi succes...

Страница 15: ...mable liquids or solvents Checkthatyouhaveunpluggedthecompressor and clean with a damp cloth only The compressor must be used only for air compression Do not use the compressor for any other type of g...

Страница 16: ...is designed to be used in dry rooms It is prohibited to use the compressor in areas where work is conducted with sprayed water 6 ASSEMBLY AND STARTING Warning You must fully assemble the appliance bef...

Страница 17: ...sor press the knob ref 8 in again to position O OFF 6 9 Adjusting the pressure You can adjust the pressure on the pressure gauge ref 6 using the pressure regulator ref 7 The set pressure can be taken...

Страница 18: ...o the centres specialising in differentiated refuse collection of electric and electronic equipment or alternatively return it to the reseller when purchasing a new similar piece of equipment Thanks t...

Страница 19: ...siche sensoriali o mentalisianoridotte oppureconmancanzadiesperienza o di conoscenza I bambini devono essere sorvegliati per sincerarsi che non giochino con l apparecchio Non posizionare oggetti infia...

Страница 20: ...n una stanza umida o bagnata Il compressore deve essere usato soltanto in luoghi adatti ben aerati temperatura ambiente 5 C 40 C Il luogo deve essere privo di polvere acidi vapori gas esplosivi o infi...

Страница 21: ...te automaticamente quando viene raggiunto il valore di taratura inferiore Il compressore continua a funzionare con questo ciclo in automaticofinoaquandononsiintervienesull interruttore I O 7 PULIZIA E...

Страница 22: ...i tirare la ghiera con forza sufficiente fino a quando si sente l aria compressa che fuoriesce Fig 11 Poi rilasciare la ghiera e riavvitarla Tenere sempre pulita e sgombra da impedimenti la valvola di...

Страница 23: ...23 Conserver le pr sent manuel pour pouvoir le consulter ult rieurement Preserve this handbook for future reference Conservare questo manuale d istruzioni per poterlo consultare in futuro FR GB IT...

Страница 24: ...istered trademark of Stanley Black Decker Inc of affiliate company and are used under license MANUFACTURED BY FNA S P A Via Einaudi 6 Robassomero TO Italy DISTRIBU EN FRANCE PAR MECAFER 112 Chemin de...

Отзывы: