


Intended use of the machines :
- The
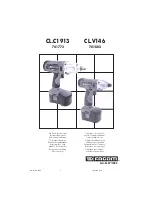
CL.V146D
and
CL.C1913D
screwdrivers and nutrunners are designed to screw and unscrew screws and nuts.
Charging the batteries :
Your new batteries will reach their full capacity only after about 3 ‘’charge-discharge ‘’ cycles.
Charging the battery:
- Press the release buttons (mark 7) on the battery to release it from the machine.
- Slide the battery to the front of the machine.
- Connect the charger to mains (230 V ~).
- Disconnect the charger.
- Press the release buttons (mark 7) on the battery and slide it to pull it out from the charger.
- Re-engage the battery firmly onto the machine.
Universal charger :
- Your charger can be used to charge different FACOM batteries, from 9.6 to 19.2 Volts, whether Ni-MH or Ni-Cd.
Charging conditions:
- To ensure the most effective charging, the battery charger has a temperature sensor (NTC) authorising charging between 10˚C
and 40˚C.
- If the battery has been stored at a temperature below 5˚C, allow it to warm up to room temperature before charging it.
- If a battery is too hot after prolonged use, allow it to cool down for a few minutes before charging it.
Ni-MH batteries :
- FACOM Ni-MH batteries have no ‘’memory effect’’; therefore you do not need to empty them completely before recharging them.
RECOMMENDATION: To prolong battery life and increase performance, completely discharge them once or twice a year, by
running the machine with no load until the motor comes to a complete standstill.
After charging :
After charging :
After charging :
After charging :
After charging :
- The Facom
CL.CH919
charger allows leaving the battery in place after charging without damaging it; a maintenance current
replaces the charging current when the green indicator is lit.
However, we recommend removing the battery once it is charged.
When you plug the charger, the
green indicator blinks, and a
sound alarm buzzes.
The charger is waiting as the
battery temperature is not
adapted to the charge, the
red indicator blinks, 2 beeps
are emitted
If the 2 indicators blink and
about twenty beeps emitted:
- the battery either does not
comply or is faulty,
- or the charger is faulty.
Contact your retailer
The battery is charged properly.
The green indicator is lit, 5 beeps
are emitted.
Fully push the battery onto the charger
by sliding it in the direction shown by
the arrow. The battery contact
protection device will automatically
retract.
The battery is
charging,
the red indicator
is lit.
1
2
3
NU-CL.CV_1005
18/11/05, 9:17
12
Содержание CL.C1913
Страница 3: ...10 11 230 V 50 60 Hz B 8 3 2 1 4 A 8 5 7 6 8 9 C NU CL CV_1005 18 11 05 9 17 3...
Страница 58: ...NOTE NU CL CV_1005 18 11 05 9 18 58...
Страница 59: ...NOTE NU CL CV_1005 18 11 05 9 18 59...
Страница 60: ...NOTE NU CL CV_1005 18 11 05 9 18 60...
Страница 62: ...CL V146 CL C1913 CL P1210 Ni MH Ni MH Ni MH CL P1413 NU CL CV_1005 18 11 05 9 18 62...