


10
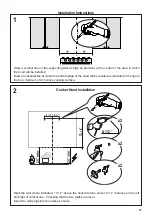
8x
8x
A1
A3
A4
A5
A2
a
2x
b
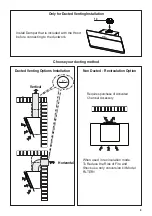
Rear Ducted Venting Options Installation
8x
8x
A1
A3
A4
A5
A2
a
2x
b
8x
8x
A1
A3
A4
A5
A2
a
2x
b
8x
8x
A1
A3
A4
A5
A2
a
2x
b
8x
8x
A1
A3
A4
A5
A2
a
2x
b
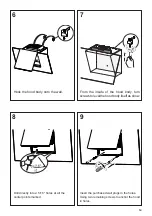
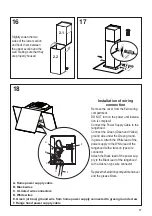
Remove the four screws from each cover plate as
shown and take off the cover plates. Do not discard
and set aside for future use.
Disconnect the Connector
from the blower
Unscrew the 2 screws that hold the blower and unlock it from the initial position.
Carefully
fold out the
4 tabs on
the sides of
the hole.
Re-attach the two plates that were removed using
the 8 screws as shown above.
8x
8x
A1
A3
A4
A5
A2
a
2x
b
Содержание CTAL31BK300-B
Страница 5: ...5 RANGEHOOD DIMENSIONS ELECTRICAL CONNECTION KNOCKOUT...
Страница 6: ...6 Min 21 3 16 Min 24...
Страница 9: ...9 Rear Ducted Venting Options Installation Horizontal...
Страница 21: ...21 Wiring Diagram...
Страница 26: ...26 DIMENSIONS DE LA HOTTE DIMENSION L ENTR E LECTRIQUE D FON ABLE...
Страница 27: ...27 Min 24 Min 24...
Страница 30: ...30 Horizontale Options d installation avec ventilation canalis e vers l arri re...
Страница 42: ...42 Sch ma de c blage...
Страница 44: ...991 0473 136_05 180309 D003060_04...


