L
11 <
<
<
<
5
removing the glass
•
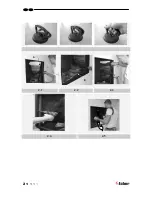
Remove the cover strips A on the side. (see fig. 2.1)
•
Remove cover strip B on the bottom. (see fig. 2.2)
•
Place the suction discs onto the glass.
•
Remove the sealing cord from the groove (see fig. 2.3)
•
Remove the groove strips C on the sides. (see fig. 2.4)
•
Slide the glass upwards so that it is released from the groove. Now gradually move
the glass outwards and downwards. (see fig. 2.5)
To replace the glass repeat the process in reverse order.
Remove all Fingerprints from the glass, these will be burned into it once the hearth is
used.
6
Placing the decorative material
It is not allowed to add different or more materials to the combustion chamber.
Always keep the pilot burner free from decorative material!
Do not toss all the decorative material onto the burner all at once, it can be obstructed by
dust particles.
6.1
Imitation logs Flatburner
•
Place a number of the chips onto the burner and on the cover plate.
•
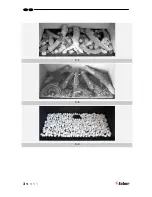
Place the imitation logs according to instructions. (see fig. 3.1 or imitation logs
instruction card supplied)
•
Divide the remainder of the chips over the burner and the cover plate . Avoid a
thick layer onto the burner, this has a negative effect on the fire image.
•
Ignite the pilot and main burner according to the instructions in the user’s manual.
Assess whether the flame division is correct. If necessary, move the chips until
there is a proper division of flames.
•
Place the glass and check the fire image.
Содержание Clear
Страница 1: ...Clear 40010631 0938 Installation guide ENG ENG ...
Страница 2: ...L 1 1 1 1 2 1 3 1 4 1 5 A ...
Страница 3: ...L 2 A B 2 1 2 2 2 3 2 4 2 5 C ...
Страница 4: ...L 3 3 1 3 2 3 3 ...
Страница 22: ...L 21 14 Dimension of the appliance ...
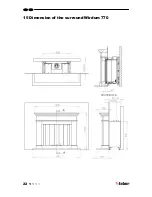
Страница 23: ...L 22 15 Dimension of the surround Wirdum 770 ...
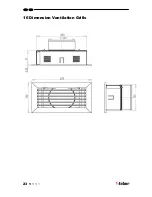
Страница 24: ...L 23 16 Dimension Ventilation Grills ...
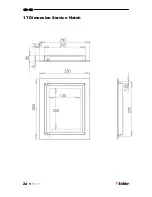
Страница 25: ...L 24 17 Dimension Service Hatch ...
Страница 26: ...L 25 ...
Страница 27: ...26 L ...


