background image

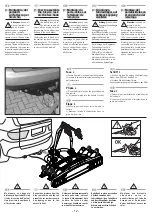
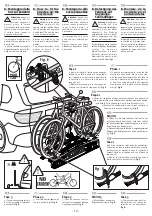
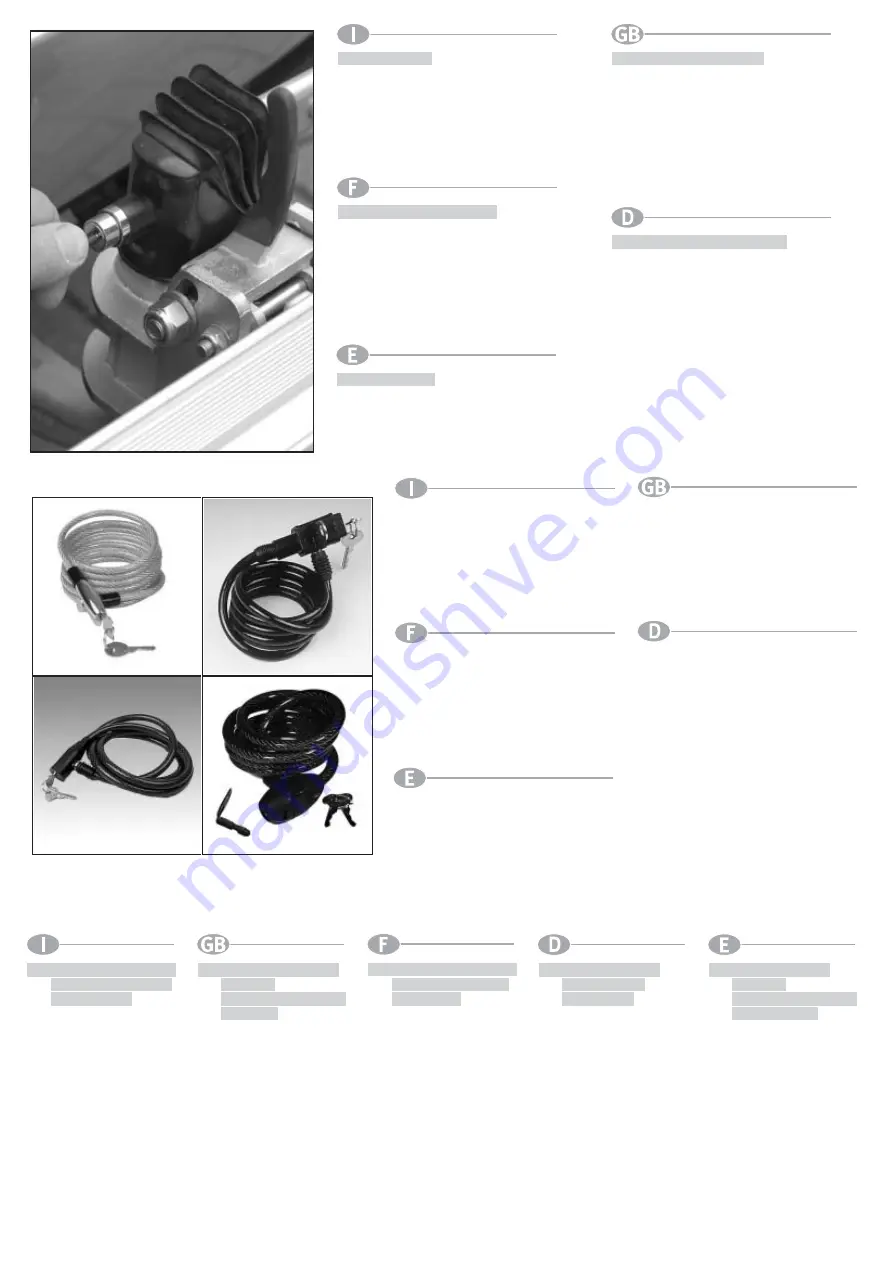
Per evitare il furto delle bici:

Usare uno dei cavetti a spirale reperibili in
commercio per assicurare le bici.
Trasporto di una terza bici:

L’art. n° 947846D  consente il trasporto di una
bici supplementare (non in dotazione).

Pour éviter le vol des vélos :

Pour bloquer les vélos, utilisez un câble spirale,
disponible dans le commerce.
Transport d’un troisième vélo:

L’art. n° 947846D permet le transport d’un vélo
supplémentaire (non fourni d’origine).

To prevent the bicycles from being stolen:

Use one of the Profex coiled wires available
in the shops to fasten the bicycles.
If a third bicycle is transported:

Art. N° 947846D allows you to transport an
additional bicycle (not supplied).

Fahrrader gegen Diebstahl sichern:

Arretieren Sie den Haltearm mittels des
Schlüssels und ziehen Sie den Schlüssel ab:

Transport eines dritten Fahrrades:
Art-Nr. 947846D ermöglicht den Transport eines
zusätzlichen Fahrrades (nicht im Lieferumfang
enthalten).

- 17 -

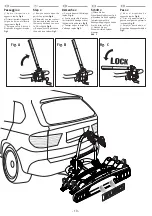
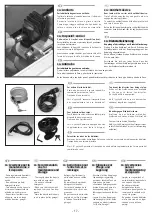
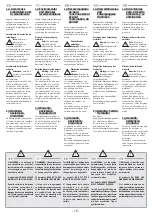
10. Antifurto

Portabicicletta da gancio con antifurto:

Togliere la chiave e premendo innestare il cilindro di
chiusura in posizione.
Per aprire inserire la chiave e girare a sinistra.

Prima di ogni viaggio verificare che il portabici sia
chiuso a chiave e che la chiave sia stata tolta.

10. Antitheft device

Rear towbar bike carrier with antitheft device:

First of all take away the key and push in order to
engage the closing cylinder.
To unlock the antitheft device fit the key into the lock
and turn it on the left.

Before the first travel don’t forget to control that the bike
carrier has been locked and that the key has been taken
away.

10. Diebstahlsicherung

Kupplungs-Fahrradträger mit Diebstahlsicherung:

Ziehen  Sie den Schlüssel ab. Durch Drücken des
Schließzylinders wird der Kupplungsträger auf der
Kupplung abgeschlossen.
Um zu öffnen, stecken Sie den Schlüssel und drehen
Sie ihn nach links.

Versichern Sie sich vor jeder Reise, dass der
Fahrradträger mit dem Schlüssel geschlossen ist und
dass der Schlüssel entfernt worden ist.

10. Dispositif  antivol

Porte-vélos à crochet avec dispositif antivol :

Retirer la clef de la serrure et presser de façon à positionner
le cylindre de fermeture.
Pour débloquer le dispositif  introduire la clef dans la
serrure et tourner la clef à gauche.

Avant chaque voyage contrôler que le porte vélo a été
fermé à clef et que la clef a été retirée de la serrure.

10. Antirrobo

Portabicicleta de gancho con antirrobo:

Quitar la llave y apretando inserir el cilindro de cierre en posición.
Para abrir introducir la llave y girar hacia la izquierda.

Antes de cada viaje controlar que el portabicicletas esté cerrado con la llave y de haber quitado la llave.

Para evitar los robos de las bicicletas:

Usar unos de los cables helicoidales Profex que se hallan en comercio para bloquear las bicicletas.
Transporte de una tercera bicicleta:

El art. N° 947846D permite el transporte de una bicicleta suplementaria (no forma parte del
suministro de serie).

11. Recommendati-

ons for

maintenance and

storage

- Thoroughly clean the bicycle
rack with a damp cloth.
- Do not use chemical
detergents.
- Make sure that the vehicle’s
tow hook is dry and free from
grease.
- Store the bicycle rack indoors,
in a dry place (cellar, garage).

11. Instructions pour

l’entretien et le

remisage

- Nettoyer régulièrement le

porte-vélos avec un chiffon
humide.

- Ne pas utiliser de produits

détergents chimiques.

- Le crochet d’attelage de la

voiture doit être sec et non
graisseux.

- Ne pas remiser le porte-vélos

en plein air ; veiller à le ranger
à l’abri de l’humidité (cave,
garage).

11. Hinweise zur

Pflege und

Lagerung

- Wischen Sie Ihren Kupplungs-

Fahrradträger regelmäßig
mit einem feuchten Tuch ab.

- Verwenden Sie keine

chemischen Reinigungsmittel.

- Achten Sie darauf, dass die

Anhängerkupplung Ihres
Fahrzeuges trocken und fettfrei
ist.

- Lagern Sie Ihren Kupplungs-

Fahrradträger nicht im Freien,
sondern an einem trockenen
Ort (Keller, Garage).

11. Avvertenze per la

manutenzione e

il deposito

- Pulire regolarmente il portabici
ripassandolo con un panno
umido.
- Non utilizzare prodotti
detergenti chimici.
- Fare attenzione che il gancio
di traino dell’autovettura sia
asciutto e privo di grasso.
- Depositare il portabici non
all’aperto, ma in un luogo
asciutto (cantina, garage).

11. Advertencias

para el

mantenimiento y

el depósito

- Limpiar con regularidad el

porta-bicicletas, repasándolo
con un paño húmedo.

- No utilizar productos

detergentes químicos.

- Cerciorarse que el gancho de

remolque del vehículo esté
seco y sin grasas.

- No guardar el porta-bicicletas

al aire libre sino en un lugar
cerrado y seco (sótano,
garaje).

Содержание WINNY

Страница 1: ...i su gancio di traino Directions for use Bicycle rack on tow hook Mode d emploi Porte vélos pour crochet d attelage Betriebsanleitung Kupplungs Fahrradträger Instrucciones para la utilización Porta bicicletas en gancho de remolque ...

Страница 2: ... e per lo smaltimento 17 13 Garanzia assistenza produttore 17 Table of contents pag 1 Safety 2 2 Approved use 4 3 Tools required for assembly 4 4 Items supplied 5 5 Position of the individual parts 6 6 Assembly 7 7 How to assemble the bicycle rack on the tow hook 12 Table of contents pag 8 How to fit the bicycles on the bicycle rack 14 9 How to open the boot 15 10 Anti theft protection 16 11 Recom...

Страница 3: ... la larghezza totale del veicolo aumenta Le biciclette stesse possono aumentare la larghezza e l altezza totale del veicolo Prestare particolare attenzione in retromarcia To all our esteemed customers Thank you for having purchased a Winny bicycle rack It allows you to simply and conveniently transport 2 max 3 bicycles on your car This bicycle rack is only supplied in the form of an assembly kit B...

Страница 4: ...Sehr geehrte Kunden vielen Dank dass Sie sich für den Kupplungs Fahrradträger Winny entschieden haben Mit diesem Gerät können Sie einfach und praktisch 2 max 3 Fahrräder mit Ihrem PKW transportieren Dieser Kupplungs Fahrradträger wird als Bausatz geliefert Sie müssen diesen Kupplungs Fahrradträger vor der ersten Verwendung sorgfältig anhand dieser Betriebsanleitung montieren 1 Sicherheitshinweise ...

Страница 5: ...tes de iniciar el montaje del porta bicicletas Prestar mucha atención a las advertencias de seguridad Advertencia atención a la carga axial admitida para el vehículo La carga axial admitida no debe superarse cuando se cargan las bicicletas El peso tara del porta bicicletas es de 15 kg Advertencia atención a la carga máxima de apoyo en el enganche para remolque Máx Carga de apoyo por lo menos de 50...

Страница 6: ...esta Cover caps Bouchons Mutter Tuerca Dado Nut Ecrou Unterlegscheibe Arandela Rondella Washer Rondelle Maschinenschraube Tornillo de fijacón Vite Scraw Vis Schlossschraube Tornillo de fijacón Vite Scraw Vis Drehgriffe Perillas Pomello Knob Pommeaux Die Zahnräderpaar aus plastik Engranajes de plástico Chiocciola Plastic gears Engrenages plastiques U Bügel Brida en U Staffa a U U bracket Support en...

Страница 7: ...rbeitszone fernhalten Halten Sie Kinder von dem Arbeitsplatz fern da der Fahrradträger kleine Einzelteile enthält die verschluckt werden können Attenzione quando si maneggiano queste parti singole tenere i bambini piccoli lontani dalla zona di lavoro Il portabici contiene elementi minuti che potrebbero essere ingeriti Warning keep small children well away from the work area when handling these ind...

Страница 8: ...uenti componenti Montez ces pièces en suivant les indications de la figure ci dessous Montieren Sie diese Teile wie in der folgenden Grafik abgebildet Montare queste componenti come mostrato dall illustrazione seguente Assemble these components as shown in the following illustration N Parte Part N N pièce Figura Figure Quantità Quantity Quantité 1 1 N Teile N parte Abb Figura Anzahl Cantidad 2 2 3...

Страница 9: ...siguientes componentes Assemble these components as shown in the following illustration Montez ces pièces en suivant les indications de la figure ci dessous Montieren Sie diese Teile wie in der folgenden Grafik abgebildet Montare queste componenti come mostrato dall illustrazione seguente Montar estos componentes como se indica en la siguiente ilustración N Parte Part N N pièce Figura Figure Quant...

Страница 10: ... these components as shown in the following illustration Montez ces pièces en suivant les indications de la figure ci dessous Montieren Sie diese Teile wie in der folgenden Grafik abgebildet Montare queste componenti come mostrato dall illustrazione seguente Montar estos componentes como se indica en la siguiente ilustración N Parte Part N N pièce Figura Figure Quantità Quantity Quantité N Teile N...

Страница 11: ... shown in the following illustration Montez ces pièces en suivant les indications de la figure ci dessous Montieren Sie diese Teile wie in der folgenden Grafik abgebildet Montare queste componenti come mostrato dall illustrazione seguente Montar estos componentes como se indica en la siguiente ilustración N Parte Part N N pièce Figura Figure Quantità Quantity Quantité N Teile N parte Abb Figura An...

Страница 12: ...ts are required for this phase Étape 6 Pièces nécessaires pour cette étape Schritt 6 Für diesen Aufbauschritt benötigen Sie folgende Bauteile Fase 6 Per questa fase occorrono le seguenti componenti Fase 6 Para esta fase se necesitan los siguientes componentes Montar estos componentes como se indica en la siguiente ilustración N Parte Part N N pièce Figura Figure Quantità Quantity Quantité N Teile ...

Страница 13: ...n diesem Abschnitt erklären wir diese Arbeitsschritte einzeln in der erforderlichen Reihenfolge 7 Montaggio del portabici sull attacco per rimorchio Attenzione quando si monta il portabici sul gancio di traino dell autovettura spegnere il motore girare la chiave d accensione sulla posizione di spento e tirare il freno a mano Il montaggio del portabici sul gancio di traino dell autovettura viene ef...

Страница 14: ...d attelage rapide Fig C Schritt 2 3 Öffnen Sie das Schnellverschluß System Fig A 4 Scheiben Sie den Kupplungs Fahrradträger auf die Anhängerkupplung und heben Sie ihn leicht an Fig B 5 Drücken Sie das Schnellverschluß System hinunter Abb C Passaggio 2 3 Aprire il dispositivo di aggancio rapido Fig A 4 Fissare il portabici da gancio sul gancio traino e sollevarlo leggermente Fig B 5 Spingere verso ...

Страница 15: ...ailler ces étapes dans l ordre d exécution 8 Befestigung des Fahrrads auf Kupplungs Fahrradträger Achtung Wenn Sie ein Fahrrad auf den Kupplungs Fahrradträger befestigen muss der Motor abgestellt die Zündung ausgeschaltet und die Hand bremse angezogen sein Das Fahrzeug muss waagrecht stehen Der Befestigung eines Fahrrads auf den Kupplungs Fahrradträger e r f o l g t i n m e h r e r e n Arbeitsschr...

Страница 16: ...sam abklappen Fase 2 Prima di iniziare la marcia riportare il portabici in posizione Attenzione il meccanismo di apertura deve scattare in posizione a fondo Fase 2 Set the bicycle rack back in position before driving again Warning the opening mechanism must snap fully in position Étape 2 Avant de prendre la route remettez le porte vélos en place Attention le mécanisme d ouverture doit se déclenche...

Страница 17: ...ffer Landeraum sollte beim Fahrbetried mit dem Heck Farradträger möglichst weit vorn verstaut werden um einer übermäßigen Hecklastigkeit vorzubeugen Voraussetzung für eine geringe Beeinträchtigung des Fahrverhaltens ist der verkehrssichere Zustand der Fahrzeug Stoßdämpfer Stoßdämpfer regel mäßig prüfen lassen Lassen Sie die Stoßdämpfer regelmäßig prüfen WICHTIG Der Fahrer muss sicherstellen dass d...

Страница 18: ...f introduire la clef dans la serrure et tourner la clef à gauche Avant chaque voyage contrôler que le porte vélo a été fermé à clef et que la clef a été retirée de la serrure 10 Antirrobo Portabicicleta de gancho con antirrobo Quitar la llave y apretando inserir el cilindro de cierre en posición Para abrir introducir la llave y girar hacia la izquierda Antes de cada viaje controlar que el portabic...

Страница 19: ... metallo nel contenitore per metalli Smaltimento definitivo del prodotto Attenzione Smaltire il portabici con modalità rispettose dell ambiente Le parti metalliche viti dadi telaio profilati ecc sono destinate ai rifiuti metallici Le parti in plastica terminali dei profilati cinghie di fermo dei pneumatici ecc sono destinate ai rifiuti in plastica Le parti in vetro del gruppo luci sono destinate a...

Страница 20: ...orte tegge 42025 CAVRIAGO RE ITALY Tel 39 0522 942840 r a 942798 Fax 39 0522 942948 e mail info flli menabo it http www flli menabo it Cod Art Cod istr Data Rev Creato da Approvata da 946846D FI0441 27 01 2010 B AS LM DM ...

Отзывы: