


3
Step7
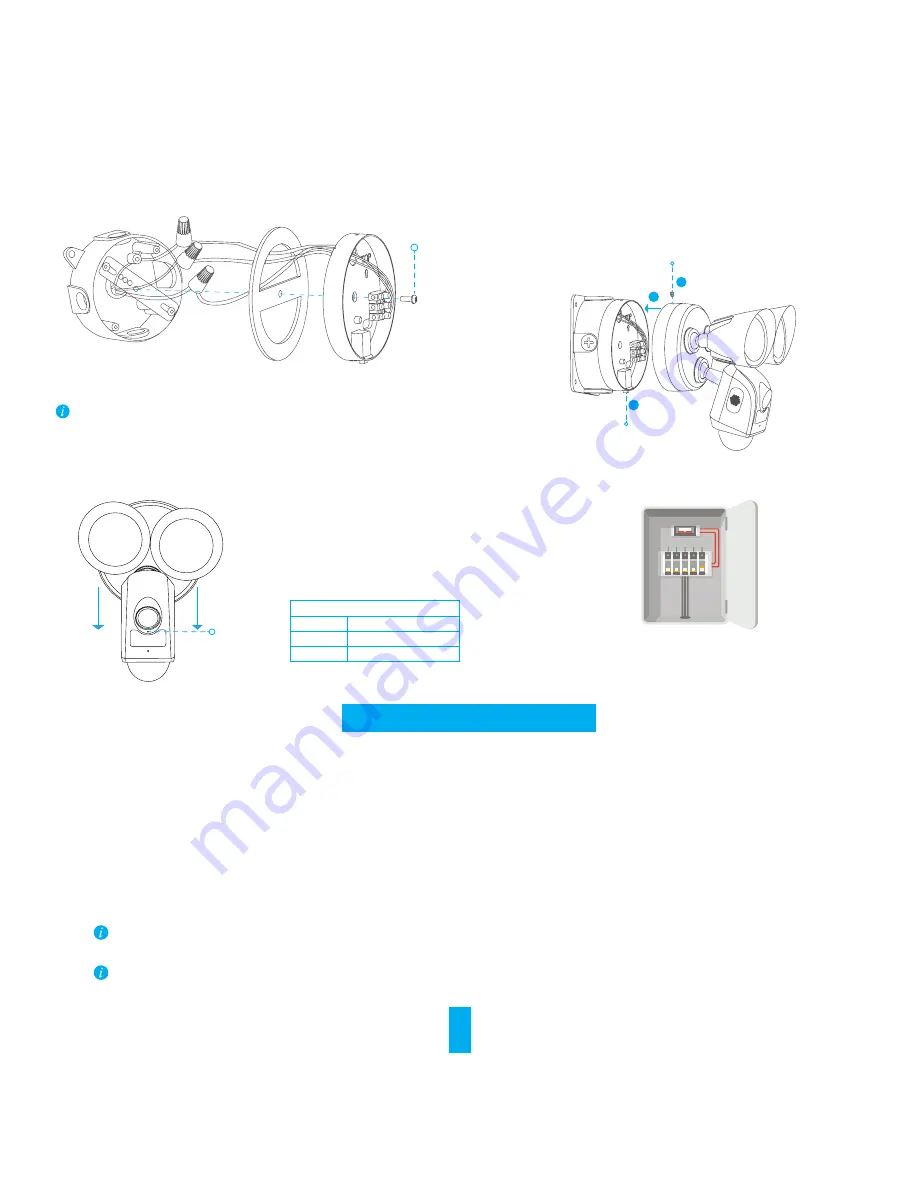
Mount the base with the provided long bracket screw through the center screw-hole.
Step8
Mount the Floodlight Camera to the base plate.
Long Bracket Screw
Ensure the gasket and base is tighten and does not move.
Adjust the camera position and ersure the top screw-hole matches the one on the base. Mount the camera
to the base with the mounting base screw in the top base. Fix the bottom button first and mount the top
screw later.
Bottom Button
Mounting Base Screw
1
2
3
Step9
Adjust the position of the LED lights and camera. The installstion is complete.
LED Indicator
Step10
Turn on power to your floodlight camera’s circuit.
Floodlight Camera Setup
Step1
Create a user account
- Connect your mobile phone to Wi-Fi.
- Download and install the app.
- Launch the app and register for a user account following the start-up wizard.
Step2
Add a floodlight camera to APP
- Log in the app.
- From the app Home screen, tap “+” on the upper-right hand corner to go to the scan QR code interface.
- Scan the QR Code on the the Floodlight Camera.
- Follow the app wizard to finish Wi-Fi configuration.
If you want to change your floodlight camera's Wi-Fi, press and hold the reset button for 5s and repeat this part.
•
The floodlight camera works with 2.4GHz Wi-Fi signals. If you have a dual-band router with separate 2.4GHz and 5GHz networks, make sure your phone is connected to the 2.4GHz one.
•
If your Wi-Fi network signal is less than 50% where you want to install the floodlight camera ,a Wi-Fi signal extender is recommended to boost the signal at the installation point.
LED Indicator
Solid Red
Initializing
Flashing Blue Ready for Wi-Fi Configuration
Solid Blue
Network Connected


