background image


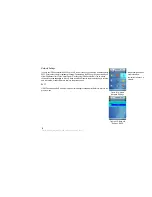
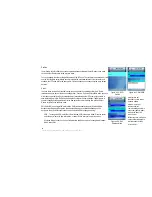
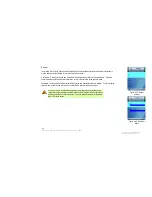
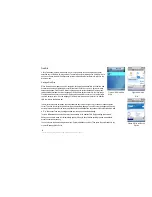
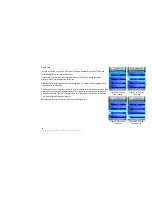
Keypad Tone 


To hear the actual keypad tone, scroll through these choices: Off, Soft, and Loud. The selected keypad tone is 
indicated by the <*> symbol. Highlight the keypad tone you want to select, and then press the center selection 
key to save your change. Select Exit to return to the Phone Settings menu without changing the keypad tone. 


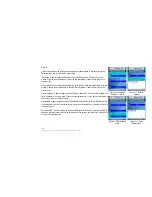
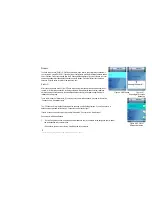
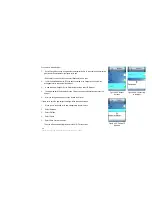
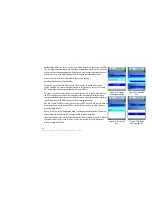
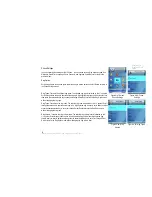
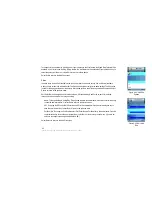
Wallpaper 


To see the different wallpaper choices, highlight the wallpaper you want to select, and then select Preview. Click Exit 
to return to the Wallpaper menu. The selected wallpaper is indicated by the <*> symbol. Highlight the wallpaper 
you want to select, and then press the center selection key to save your change. Select Exit to return to the Phone 
Settings menu without changing the wallpaper. 


Figure 4-51: Keypad 

Tone 


Figure 4-52: Wallpaper 


48                                                                                                                                                                                                                                                           

Chapter 4: Configuring the EZLoop® 3rd Generation Wi-Fi Phone


Содержание 3rd Generation Wi-Fi Phone

Страница 1: ...EZLoop 3rd Generation Wi Fi Phone User Manual Welcome to ...

Страница 2: ...to while using the IP Phone This exclamation point means there is a caution or warning and is something that could damage your IP Phone In addition to these symbols there are definitions for technical terms that are presented like this Also each figure diagram screenshot or other image is provided with a figure number and description like word definition Figure numbers and descriptions can also be...

Страница 3: ...Wi Fi Phone 12 Using the EZLoop 3rd Generation Wi Fi Phone 22 Chapter 4 Configuring the EZLoop 3rd Generation Wi Fi Phone 25 Instructions for Configuring the EZLoop 3rd Generation Wi Fi Phone 25 Status Information 27 How to Access the Web based Utility 29 Administrator Access 29 Settings of the EZLoop 3rd Generation Wi Fi Phone 30 Chapter 5 For Administrators Only 65 Administrator Settings of the ...

Страница 4: ...Select Wireless Network 12 Figure 3 8 Connect to Wireless Network 13 Figure 3 9 Enter WEP Key Secured Network 13 Figure 3 10 Enter WPA Key Secured Network 13 Figure 3 11 Successful Connection 13 Figure 3 12 Select Menu 14 Figure 3 13 Select SIP Settings 14 Figure 3 14 Edit Proxy IP 15 Figure 3 15 Save Proxy IP 15 Figure 3 16 Save Proxy Port 16 Figure 3 17 Save Register Proxy IP 16 Figure 3 18 Save...

Страница 5: ...Options 22 Figure 3 30 Second Call 23 Figure 3 31 Unlock Keys 23 Figure 4 1 Front Panel 25 Figure 4 2 Symbol Selection 26 Figure 4 3 Standby Screen 27 Figure 4 4 Standby Screen 28 Figure 4 5 Main Menu 28 Figure 4 6 Call Log 30 Figure 4 7 Call Log Options 30 Figure 4 8 Type of Phone Number 30 Figure 4 9 Select Phone Book 33 Figure 4 10 Phone Book 33 Figure 4 11 Phone Book Options 33 Figure 4 12 Add...

Страница 6: ... 41 Figure 4 34 Edit Wireless Mode 41 Figure 4 35 Change Authentication Mode 42 Figure 4 36 Edit WEP Key 42 Figure 4 37 Enter WEP Key 42 Figure 4 38 Change EAP Type 802 1x 42 Figure 4 39 Edit EAP Type WPA PSK 43 Figure 4 40 Change EAP Type WPA PSK 43 Figure 4 41 Enter SSID 43 Figure 4 42 Change Transmit Key 44 Figure 4 43 Edit WPA Key 44 Figure 4 44 Profile Added 45 Figure 4 45 Select Hotspot 46 F...

Страница 7: ...oxy Port 55 Figure 4 77 Register Proxy Port 56 Figure 4 78 Edit Proxy IP 56 Figure 4 79 Enter Proxy IP 56 Figure 4 80 Enter Register Proxy Port 56 Figure 4 81 Change Outbound Proxy IP 57 Figure 4 82 Outbound Proxy Port 57 Figure 4 83 Web Cam 58 Figure 4 84 Web Cam Options 58 Figure 4 85 Edit Web Cam 58 Figure 4 86 Add Web Cam 58 Figure 4 87 MSN 60 Figure 4 88 Skype 60 Figure 4 89 Web Site 61 Figur...

Страница 8: ...phone service provider even while you re surfing the Internet on your computer So networks not only are useful in homes and offices but also can be fun Use the instructions in this User Guide to help you connect the IP Phone after you have set up an account with your Internet phone service provider These instructions should be all you need to get the most out of the EZLoop 3rd Generation Wi Fi Pho...

Страница 9: ...one and use it Chapter 4 Configuring the EZLoop 3rd Generation Wi Fi Phone This chapter discusses how to configure the IP Phone s settings Appendix A Troubleshooting This appendix describes some potential problems and solutions as well as frequently asked questions regarding use of the IP Phone Appendix B Glossary This appendix gives a brief glossary of terms frequently used in networking 2 Chapte...

Страница 10: ...s headset jack and USB port are located on the bottom panel Headset Jack USB Port Figure 2 1 Bottom Panel Headset Jack This jack allows you to connect a headset USB Port The USB port allows you to attach the included power adapter 3 Chapter 2 EZLoop 3rd Generation Wi Fi PhonePanels ...

Страница 11: ...s powered off and charging The buttons of the IP Phone are described in this table Icon Button Name Function Power LED Soft Key Selects the appropriate action shown on the left or right hand side of the screen Navigation Pad and Center Soft Key Soft Key Navigation Pad and Center Selection Key Lets you navigate menus and select your choices Controls cursor for its web browser Selection Key Call Pow...

Страница 12: ...ent uppercase letters A B C lowercase letters a b c or numbers 1 2 3 Press the star key to switch between the different choices Press the star key twice to enter the sign Press the pound key to open the Symbol Selection menu Use the navigation pad to move through the menu When you have the appropriate symbol highlighted press the center selection key Press the pound key twice to enter a space Chap...

Страница 13: ...ry compartment is located on the back panel of the IP Phone For directions on how to insert the battery refer to Chapter 3 Installing and Using the EZLoop 3rd Generation Wi Fi Phone Volume Battery Compartment Figure 2 4 Side Panel Figure 2 5 Back Panel 6 Chapter 2 EZLoop 3rd Generation Wi Fi PhonePanels ...

Страница 14: ... EZLoop 3rd Generation Wi Fi Phone To insert the battery follow these instructions 1 Remove the cover of the battery compartment Push down on the button and slide the cover downward 2 Insert the battery Make sure the metal contacts of the battery line up with the metal contacts of the battery compartment 3 Insert the door and slide it upward until it snaps into place Proceed to the next section Po...

Страница 15: ...f the included power adapter into the USB mini B port of the IP Phone Then connect the power adapter to a standard electrical outlet 3 The power LED will flash alternating between blue and purple For the initial charge allow the battery to charge for at least 10 hours so the battery will have a full charge which is indicated by a solidly lit power LED This maximizes battery performance and life NO...

Страница 16: ...and Center Selection Key To navigate menus and control the cursor for the web browser use the navigation pad Use the center selection key to make menu choices Key Choice Call Uses Internet phone line Power or End Call To exit a menu without making changes press this button Navigation Pad and Center Selection Key Soft Key Call Soft Key Power or End Call Different alpha numeric Key Choices or Sign F...

Страница 17: ...ey twice to enter the sign Press the pound key to open the Symbol Selection menu Use the navigation pad to move through the menu When you have the appropriate symbol highlighted press the center selection key Press the pound key twice to enter a space For more details refer to Chapter 2 EZLoop 3rd Generation Wi Fi PhonePanels Proceed to Setting up the EZLoop 3rd Generation Wi Fi Phone Figure 3 5 S...

Страница 18: ...ork names also known as Service Set Identifier or SSID security status a lock indicates wireless security and signal strength which is indicated by a bar graph Figure 3 6 Scan for Wireless Networks Scroll through the network choices and press the center selection key in the middle of the navigation pad to select the wireless network you want to use If the network you want is not shown select Resca...

Страница 19: ... center selection key Figure 3 8 Connect to Wireless Network Figure 3 9 Enter WEP Key Secured Network 5 You will be notified when the IP Phone has connected to the network and a checkmark will appear next to the name of the network Select Exit If you are NOT an administrator please proceed to the next section If you are an administrator you will need Administrator access to set up SIP settings If ...

Страница 20: ...or a password and return to the menu 9 Power down the phone and turn it back on Phone Password displays Press the Call button for 3 seconds Phone Password Admin displays Enter your admin password factory default is 0000 TIP Press the star key twice to access numeric key presses Press the OK softkey 10 The standby screen appears Select Menu 11 Phone Settings will be highlighted Navigate the menu ch...

Страница 21: ...en supplied by your Internet phone service provider If you do not have this information contact your Internet phone service provider 13 Enter the Proxy IP address in the new window and then press the center selection key Figure 3 14 Edit Proxy IP Figure 3 15 Save Proxy IP 14 Chapter 3 Installing and Using the EZLoop 3rd Generation Wi Fi Phone ...

Страница 22: ...ress the center selection key 16 Scroll down to Register Proxy IP and select Edit 17 Enter the Register Proxy IP address in the new window and then press the center selection key Figure 3 16 Save Proxy Port Figure 3 17 Save Register Proxy IP 15 Chapter 3 Installing and Using the EZLoop 3rd Generation Wi Fi Phone ...

Страница 23: ...press the center selection key 20 Scroll down to Outbound Proxy IP and select Edit 21 Enter the Outbound Proxy IP address in the new window and then press the center selection key Figure 3 18 Save Register Proxy Port Figure 3 19 Save Outbound Proxy IP 16 Chapter 3 Installing and Using the EZLoop 3rd Generation Wi Fi Phone ...

Страница 24: ...e Time setting then keep the default setting 3600 seconds and proceed to step 22 If your Internet phone service provider provided an Expire Time setting then scroll down to Expire Time and select Edit 25 Enter the Expire Time in the new window and then press the center selection key Figure 3 20 Edit Outbound Proxy Port Figure 3 21 Save Expire Time 17 Chapter 3 Installing and Using the EZLoop 3rd G...

Страница 25: ...one calls and then press the center selection key 28 Scroll down to User Name and select Edit 29 Enter the User Name in the new window and then press the center selection key Figure 3 22 Save Phone Number Figure 3 23 Save User Name 18 Chapter 3 Installing and Using the EZLoop 3rd Generation Wi Fi Phone ...

Страница 26: ... Edit 31 Enter the Password and then press the center selection key 32 On the SIP Settings screen select Return Figure 3 24 Save Password Figure 3 25 Save SIP Settings 19 Chapter 3 Installing and Using the EZLoop 3rd Generation Wi Fi Phone ...

Страница 27: ...dy for phone calls The installation of the EZLoop 3rd Generation Wi Fi Phoneis complete Proceed to the next section Using the EZLoop 3rd Generation Wi Fi Phone Figure 3 26 Return to Standby Screen Figure 3 27 Standby Screen 20 Chapter 3 Installing and Using the EZLoop 3rd Generation Wi Fi Phone ...

Страница 28: ...old Then select UnHold when you are ready to return to this call Line 2 When you want to switch back and forth between two separate conversations use the Line 2 feature When you are on your first call select Line 2 to switch to a second line A new window will appear Enter the phone number of the second call and then press the Call button The current call will be put on hold and you will be switche...

Страница 29: ...umber of the second call and then press the Call button When the second call is answered select Conference Second Incoming Call When you have a second call coming in you can select Option to see a list of menu choices Select HangUp to end the call Keyguard To lock the keys press and hold down the key To unlock the keys select Unlock and then press the key Voicemail For instructions on how to check...

Страница 30: ...lect the appropriate action shown on the left or right hand side of the screen Navigation Pad Soft Key Key Choice Soft Key Navigation Pad and Center Selection Key To navigate menus and control the cursor for the web browser use the navigation pad Use the center selection key to make menu choices and Center Selection Key Call Power or End Call Power or End Call To exit a menu without making changes...

Страница 31: ...ss the star key to switch between the different choices Press the star key twice to enter the sign Press the pound key to open the Symbol Selection menu Use the navigation pad to move through the menu When you have the appropriate symbol highlighted press the center selection key Press the pound key twice to enter a space Figure 4 2 Symbol Selection 26 Chapter 4 Configuring the EZLoop 3rd Generati...

Страница 32: ...s of the IP Phone The IP Phone has three status messages Ready indicates that the IP Phone is ready to make and receive calls Not Ready indicates that the IP Phone has no wireless connection Not Registered indicates that the IP Phone does not have a registered phone number Date Display The date display gives you the current date You can change this date using the main menu Battery Strength The ico...

Страница 33: ... left soft key button to view the main Menu Its choices will be described in further detail below Phonebook Press the right soft key to access the Phonebook This can also be accessed through the main menu Web Browsing Press the center selection key to launch the web browser Figure 4 4 Standby Screen Figure 4 5 Main Menu 28 Chapter 4 Configuring the EZLoop 3rd Generation Wi Fi Phone ...

Страница 34: ...m your PC launch any Internet browser In the Address field enter http and then the phone s IP address Press the Enter key To login as a user the Login screen appears and asks you for your User Name and Password Enter user in the User field The default password is user Click the Login button To login as an administrator from the Login screen enter admin for username and your admin password Click th...

Страница 35: ...Option You have these choices Dial available when you have contacts in the Phone Book Delete available when you have contacts in the Phone Book Delete All and Add to or Modify PhoneBook Select Return to return to the previous menu Dial Select Dial to dial the phone number of the selected call Delete Select Delete to delete the selected call Figure 4 6 Call Log Delete All Select Delete All to delet...

Страница 36: ...Delete All and Add to or Modify PhoneBook Select Return to return to the previous menu Dial Select Dial to dial the phone number of the selected call Delete Select Delete to delete the selected call Delete All Select Delete All to delete all calls Add to or Modify PhoneBook If the call information is new select Add to PhoneBook to add the phone number to the Phone Book To select the type of phone ...

Страница 37: ... All Select Delete All to delete all calls Add to or Modify PhoneBook If the call information is new select Add to PhoneBook to add the phone number to the Phone Book To select the type of phone number it is scroll down and select Home Office Mobile Home 2 Office 2 or Mobile 2 select Return if you want to return to the previous menu The Add Person screen will appear Then follow the instructions fo...

Страница 38: ...you have contacts in the Phone Book and Mem Usage Select Return to return to the previous menu Edit Select Edit to edit a contact s information Name Home Number Office Number Mobile Number Home 2 Number Office 2 Number Mobile 2 Number Speed Dial Number Ring Tone and E Mail For each setting select Edit Enter the appropriate information in the new window Press the center selection key to save the ne...

Страница 39: ...have entered all of the new contact information select Return to return to the Phone Book screen Delete To delete a contact scroll down the entries until the contact is highlighted Select Option and then select Delete Then you will be automatically returned to the Phone Book screen Mem Usage Select Mem Usage to find out how much memory has been used The total number of phone book entries available...

Страница 40: ...he on screen choices will change depending on which IP Mode is selected Press the center selection key to save the new information or select Return to return to the previous menu DHCP If DHCP is selected as the IP Mode there are no other settings to change Select Return to return to the previous menu ip address the address used to identify a computer or device on a network Figure 4 14 Select Netwo...

Страница 41: ...way select Edit Enter the new IP address of the Default Gateway in the new window Press the center selection key to save the new information or select Exit to return to the previous menu Primary DNS To add or change the Primary DNS address select Edit Enter the new DNS IP address in the new window Press the center selection key to save the new information or select Exit to return to the previous m...

Страница 42: ... a lock indicates wireless security and signal strength which is indicated by a bar graph There are three sets of instructions If you will connect to a wireless network proceed to this section Connection to a Wireless Network Figure 4 20 Wireless Figure 4 21 Scanning for Wireless Networks The IP Phone has a list of default hotspots which are shown on the Hotspot screen If you will connect to a def...

Страница 43: ...r selection key WPA Security If WPA security is enabled on the selected network a new screen will appear Enter the network s WPA key Press the center selection key 3 You will be notified when the IP Phone has connected to the network and a checkmark will appear next to the name of the network Select Exit to return to the Wireless screen Figure 4 23 Connecting to Wireless Network Figure 4 25 Enter ...

Страница 44: ...ed when the IP Phone has connected to the hotspot and a checkmark will appear next to the name of the hotspot 3 A new window will appear On the Select Hotspot screen scroll through the choices and press the center selection key to select the appropriate hotspot If the hotspot you want is not listed on the Select Hotspot screen proceed to step 3 of the following section Connection to a New Hotspot ...

Страница 45: ... screen select IE Browser 4 The web browser will automatically open Follow the on screen instructions to access the hotspot 5 After you have gained access you can browse the Internet If you want to save the new hotspot s settings follow these instructions 1 When you are connected to the new hotspot view the main menu 2 Select Wireless 3 Select Profiles 4 Select Option 5 Select Save network name Th...

Страница 46: ...changing existing profiles while the Add option is used for creating new profiles Select Return to return to the previous menu Edit Select Edit to edit a profile s information SSID wireless network name Wireless Mode Authentication Mode and Encryption Additional setting may be available depending on the encryption used Scroll through these choices and select Edit to change a setting SSID To change...

Страница 47: ...ct Edit A new window will open Scroll through the numbers and select the appropriate transmit key number Select Save to save the new transmit key number or select Exit to return to the Edit Profile menu without changing the number WEP Key To enter the WEP Key select Edit Enter the new WEP Key in the new window Press the center selection key to save the new WEP Key or select Exit to return to the E...

Страница 48: ...Type WPA PSK Wireless Mode Authentication Mode Key Index and WEP Key Scroll through these choices and select Edit to change a setting SSID To enter the SSID select Edit Enter the new SSID in the new window Press the center selection key to save the new information or select Exit to return to the previous menu Wireless Mode You have a choice of Infrastructure and Ad hoc modes To change the Wireless...

Страница 49: ... WEP Key select Edit Enter the new WEP Key in the new window Press the center selection key to save the new WEP Key or select Exit to return to the Add Profile menu without changing the key 802 1x You have a choice of Enable and Disable The Enable option configures the IP Phone for a network using 802 1x authentication To change the 802 1x setting select Edit If 802 1x is enabled configure the EAP...

Страница 50: ...he profile is highlighted Select Option and then select Connect The IP Phone will automatically connect to the appropriate network Then you will be automatically returned to the Wi Fi Profiles screen Go Down Up You can rearrange the order of the profiles on your list To move a profile scroll through the entries until the profile is highlighted Select Option and then select Go Down or Go Up to move...

Страница 51: ...he Password select Edit Enter the new Password in the new window Press the center selection key to save the new information or select Exit to return to the previous menu If you want to save a new hotspot s settings do not use this screen When you are connected to the new hotspot select Profiles on the Wireless screen Select Option and then select Save network name Then you will be automatically re...

Страница 52: ...ithout changing the ring type Ring Tones There are seven ring tones The selected ring tone is indicated by the symbol Scroll through these choices to hear the actual ring tone Highlight the ring tone you want to select and then press the center selection key to save your change Select Exit to return to the Ring Option menu without changing the ring tone Ring Volume There are five ring volume level...

Страница 53: ......
Страница 54: ...he keypad tone Wallpaper To see the different wallpaper choices highlight the wallpaper you want to select and then select Preview Click Exit to return to the Wallpaper menu The selected wallpaper is indicated by the symbol Highlight the wallpaper you want to select and then press the center selection key to save your change Select Exit to return to the Phone Settings menu without changing the wal...

Страница 55: ... soft key Time Zones Press the left soft key to select the Time Zone setting A list of multiple time zones will be displayed The selected time zone is indicated by the symbol Scroll through these choices and highlight the time zone Then select Settings to save your change Select Exit to return to the Date Time menu without changing the time zone Daylight Time Press the left soft key to turn on and...

Страница 56: ...ur changes and then press the center selection key to save your change Select Exit to return to the Date Time screen without changing the date Clock Press the left soft key to select the Clock setting A new window displays Make your changes and press the center selection key to save your changes Figure 4 57 Enable NTP Figure 4 58 Disable NTP Figure 4 59 Change Date Figure 4 60 Change Clock 50 Chap...

Страница 57: ...re 4 61 Select Language Figure 4 62 Language Phone Password By default you will not need to enter a password To protect your phone so only users who know the password can use the IP Phone you can set a user password NOTE To gain access into administrator mode you will need to configure a user password Figure 4 63 Password disabled default Figure 4 64 Enable Phone Password 51 Chapter 4 Configuring ...

Страница 58: ... select OK To access administrator mode to the EZLoop 3rd Generation Wi Fi Phone Some settings used by your Internet Telephony Service Provider ITSP require administrator privileges To gain administrator access first enable the user password see above Reboot the IP Phone When you power the phone back on the User password field displays Press and hold the Call button for 3 seconds The Admin passwor...

Страница 59: ...ing are the parameters required to set auto provisioning Server Type The http or https protocol used to access your voice service provider s profiles Server URL The Domain name File The configuration file used by the service provider Resync on Reset The option to resync your phone each time you power the phone on If you want this option press the Edit softkey until it displays Yes Period Time inte...

Страница 60: ...ice provider has given you new settings Figure 4 72 Factory Default settings Plug the USB mini B connector of the included power adapter into the USB mini B port of the IP Phone Then connect the power adapter to a standard electrical outlet NOTE If the upgrade is interrupted the IP Phone will revert to its old firmware and you can attempt the upgrade again Select Upgrade to start upgrading the IP ...

Страница 61: ...address select Edit Enter the new Proxy IP address in the new window Press the center selection key to save the new setting or select Exit to return to the previous screen Proxy Port To add or change the Proxy Port number select Edit Enter the new Proxy Port number in the new window Press the center selection key to save the new setting or select Exit to return to the previous screen Register Prox...

Страница 62: ...3600 seconds If your Internet phone service provider provided an Expire Time setting then scroll down to Expire Time and select Edit Enter the Expire Time in the new window Press the center selection key to save the new setting or select Exit to return to the previous screen Display Name This is the message displayed on the receiver s caller ID Phone Number To add or change the Phone Number you wi...

Страница 63: ... select Edit Enter the new UDP Port number in the new window Press the center selection key to save the new setting or select Exit to return to the previous screen RTP Port To add or change the RTP Port number select Edit Enter the new RTP Port number in the new window Press the center selection key to save the new setting or select Exit to return to the previous screen Session Timer The periodic ...

Страница 64: ...dit and Add options configure the same settings The Edit option is used for changing existing entries while the Add option is used for adding new entries Select Return to return to the previous menu Edit Select Edit to edit a web camera s information Name URL web address and Port Number Scroll through these choices and select Edit to change a setting Name To change the Name select Edit Enter the n...

Страница 65: ...key to save the new information or select Exit to return to the previous menu URL To enter the URL select Edit Enter the new URL in the new window Press the center selection key to save the new information or select Exit to return to the previous menu Port Number To enter the Port Number select Edit Enter the new Port Number in the new window Press the center selection key to save the new informat...

Страница 66: ...email and password select Settings from the MSN menu SKYPE Skype uses the Internet to make free Skype to Skype international calls Select Skype from the Main Menu and select Skype to get started The wizard will guide you through the setup process for a new or existing Skype account If you need to change your Skype contact information such as email and password select Settings from the Skype menu F...

Страница 67: ...he webpage Click the minimize button to the left of the Address field to minimize the Address bar Figure 4 89 Web Site Figure 4 90 Visit Web Site To auto scroll press and hold down the center selection key for two seconds until you see an orange navigation cursor Then use the navigation pad to scroll up and down the webpage To use the cursor as a page up and down button press and hold down the cen...

Страница 68: ...elect Edit to edit a web site s information Name URL web address and Port Number Scroll through these choices and select Edit to change a setting Name To change the Name select Edit Enter the new Name in the new window Press the center selection key to save the new information or select Exit to return to the previous menu URL To change the URL select Edit Enter the new URL in the new window Press ...

Страница 69: ... to save the new information or select Exit to return to the previous menu Port Number To enter the Port Number select Edit Enter the new Port Number in the new window Press the center selection key to save the new information or select Exit to return to the previous menu If you are not sure how to change this setting keep the default 80 Select Return to return to the Web Site screen Delete To del...

Страница 70: ... here is the name of the wireless network used by the IP Phone This is also known as the SSID MAC Address Displayed here is the MAC Address of the IP Phone eBoot Version Displayed here is the version number of the eBoot software Image Version Displayed here is the version number of the image software SIP Version Displayed here is the version number of the SIP software UI Version Displayed here is ...

Страница 71: ... the Web based Utility For your convenience you can configure admin settings for the EZLoop 3rd Generation Wi Fi Phoneeither on the IP phone or through the Web based utility provided The Web based utility is available for both user and admin level access of the IP Phone 1 Retrieve the phone s IP address From the phone press the Meny soft key and navigate down to Information and press the center se...

Страница 72: ... phone provides all level access After you choose to protect the phone using the web based utility then you will need to access admin level access on the IP Phone through a password Figure 5 2 Protect Admin Access To gain administrator access on the IP Phone first enable the user password through Phone Settings Reboot the IP Phone When you power the phone back on the User password field displays P...

Страница 73: ...plugging its power adapter 3 Power off the IP Phone by pressing and holding down the Power button for two seconds 4 Wait 30 seconds and then power on your cable or DSL modem by plugging its power adapter into an electrical outlet 5 Wait 30 seconds Power on the router by plugging its power adapter into an electrical outlet 6 Wait 10 seconds Power on the IP Phone by pressing and holding down the Pow...

Страница 74: ...e of external port s used by the IP Phone 6 Select the protocol you will be using UDP 7 Enter the IP address of the IP Phone For example if the IP Phone s IP address is 192 168 1 100 you would enter 100 in the field provided 8 Repeat steps 5 7 until you have entered all four port ranges for the IP Phone Application Start and End Protocol IP Address Enable Internet phone 1 5060 to 5061 UDP IP addre...

Страница 75: ... and reduce the bandwidth requirements for your service For more information refer to your Internet phone service provider s website There may be too many wireless routers or access points in your location using the same broadcast channel Try changing the channel that your wireless router or access point uses refer to the documentation of your router or access point for instructions 3 The IP Phone...

Страница 76: ...cumentation for instructions If you have a router then follow these instructions 1 On one of your networked computers open your web browser 2 Access the Router s Web based Utility by going to http 192 168 1 1 or the IP address of the Router 3 A login screen will appear Leave the User Name field blank Enter the Router s password the default is admin in the Password field Then click the OK button 4 ...

Страница 77: ...of IP Phone 9 Check the Enable option for the port services you want to use 10 When you have completed the configuration click the Save Settings button 4 The power LED does not light up Go through this checklist until your problem is solved Remove the IP Phone s battery from its compartment Wait five seconds while the IP Phone resets itself Insert the battery and power on the IP Phone You may be u...

Страница 78: ...make calls with the IP Phone while browsing the Internet on your computer Please note that your web browsing may affect the quality of your telephone call depending on the amount of upstream data traffic passing through your Internet connection Can I receive calls while my network is down You cannot directly receive calls while your network is down However your Internet phone service account may a...

Страница 79: ...Boot To start a device and cause it to start executing instructions Broadband An always on fast Internet connection Browser An application program that provides a way to look at and interact with all the information on the World Wide Web Byte A unit of data that is usually eight bits long Cable Modem A device that connects a computer to the cable television network which in turn connects to the In...

Страница 80: ...om a common transmission medium Firmware The programming code that runs a networking device FTP File Transfer Protocol A protocol used to transfer files over a TCP IP network Full Duplex The ability of a networking device to receive and transmit data simultaneously Gateway A device that interconnects networks with different incompatible communications protocols Half Duplex Data transmission that c...

Страница 81: ...hrase simplifies the WEP encryption process by automatically generating the WEP encryption keys for products Port The connection point on a computer or networking device used for plugging in cables or adapters RJ 45 Registered Jack 45 An Ethernet connector that holds up to eight wires Roaming The ability to take a wireless device from one access point s range to another without losing the connecti...

Страница 82: ...d for accessing remote PCs TFTP Trivial File Transfer Protocol A version of the TCP IP FTP protocol that has no directory or password capability Throughput The amount of data moved successfully from one node to another in a given time period Topology The physical layout of a network TX Rate Transmission Rate Upgrade To replace existing software or firmware with a newer version Upload To transmit a...

Отзывы: