background image


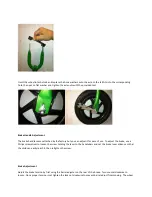
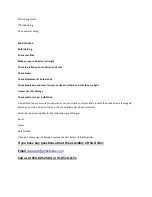
Insert the wheel into the fork and replace the hook washers onto the axle so the tab fits into the corresponding 
hole, then put on flat washer and tighten the axle nuts with the provided tool. 


Brake Handle Adjustment


The brake handle comes attached by the factory but you can adjust it for ease of use.  To adjust the brake, use a 
Philips screwdriver to loosen the screw holding the lever to the handlebars and set the brake lever distance so that 
the child can easily reach it, then retighten the screw. 


Brake Adjustment


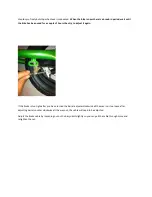
Adjust the brake tension by first using the barrel adjuster on the rear of the brake.  Turn counterclockwise to 
loosen. Once proper tension is set tighten the lock nut clockwise to prevent barrel adjust from moving.  The wheel 

Содержание Glider

Страница 1: ...eeded for Assembly Wrench included Philips Screwdriver not included Assembly Instructions Your Glider comes partially assembled The only things that you need to do are install the front wheel install and adjust the handlebars and put in the seat Installing and Adjusting the Handle bar 1 Remove the plastic cover on the end of the handlebar stem by first removing the Velcro cover on top of the handl...

Страница 2: ...rame 3 Tighten 12 mm bolt with provided wrench on top of stem until front wheel and handlebars won t twist 4 To adjust the angle of the handlebars for smaller riders simply loosen 13 mm nut on front of the handle bars and rotate the handles to the desired angle and retighten Loosen screw on brake handle attachment to adjust accordingly ...

Страница 3: ...ting Do not exceed this limit it is dangerous and can permanently damage your bike Insert seat post into seat tube opening and align your seat with the frame Once the seat is positioned to the proper height and direction tighten the silver quick release until the seat won t rotate or slide up and down Installing Front Wheel With the bike upside down on its seat and handlebars remove the nuts and w...

Страница 4: ...ou can adjust it for ease of use To adjust the brake use a Philips screwdriver to loosen the screw holding the lever to the handlebars and set the brake lever distance so that the child can easily reach it then retighten the screw Brake Adjustment Adjust the brake tension by first using the barrel adjuster on the rear of the brake Turn counterclockwise to loosen Once proper tension is set tighten ...

Страница 5: ...s then try to adjust it again If the brake is too tight after you have turned the barrel adjuster clockwise all the way in or too loose after adjusting barrel counter clockwise all the way out the cable will need to be adjusted Adjust the brake cable by loosening nut on the banjo bolt slightly so you can pull the cable through more and retighten the nut ...

Страница 6: ...ompletely out of the way To adjust the pegs simply depress silver button on spring pin and turn until tab falls into the appropriate hole Before Riding Before your child begins riding the glider here is some important information to read first Adults should explain this information to a child or anyone else who is otherwise not able to understand this information ...

Страница 7: ...quickly while others may take longer This depends on age ability and other factors The EZee Glider will help them achieve the goal of riding a bike as quickly as possible while providing then with a fun toy that they will continue to enjoy long after they have learned to ride Start using the Glider by sitting on the bike and pushing your feet The action should be just like walking one foot in fron...

Страница 8: ...age Check seat for proper installation A bicycle that does not work properly can cause you to lose control and fall Inspect the entire bicycle thoroughly before every ride and do not ride it until any problems have been corrected Carefully inspect your glider for the following signs of fatigue Dents Cracks Deformation If any part shows signs of damage replace the part before riding the glider If y...

Отзывы: