$80$6)0ROAND$80($-)3ERIESs/PERATION
20
3.
Press and release the Input 5 button.
1
2
3
4
6
7
8
Press and release the Input 5 button.
The button lights
amber
.
INPUTS
5
Figure 14.
Select Input 5
4.
Press and release the Output 3, Output 4, and Output 8 buttons.
1
2
5
6
7
PRESET
ESC
VIEW
CONTROL
Press and release the Output 3, Output 4, and Output 8 buttons.
The buttons blink
amber
to indicate that the selected input will be
tied to these outputs.
The Enter button blinks
green to indicate the need to
confirm the change.
OUTPUTS
ENTER
3
4
8
Figure 15.
Select the Outputs
NOTE:
9OUCANCANCELTHEENTIRESETOFTIESATTHISPOINTBYPRESSINGANDRELEASING
THE%SC
>
BUTTON4HE%SC
>
button flashes red once.
5.
0RESSANDRELEASETHE%NTERBUTTON
ENTER
All input and output buttons
become unlit or return to
background illumination.
Press the Enter button to
confirm the configuration
change.
The Enter button
becomes unlit or returns to
background illumination.
Figure 16.
Press Enter to Confirm the Tie
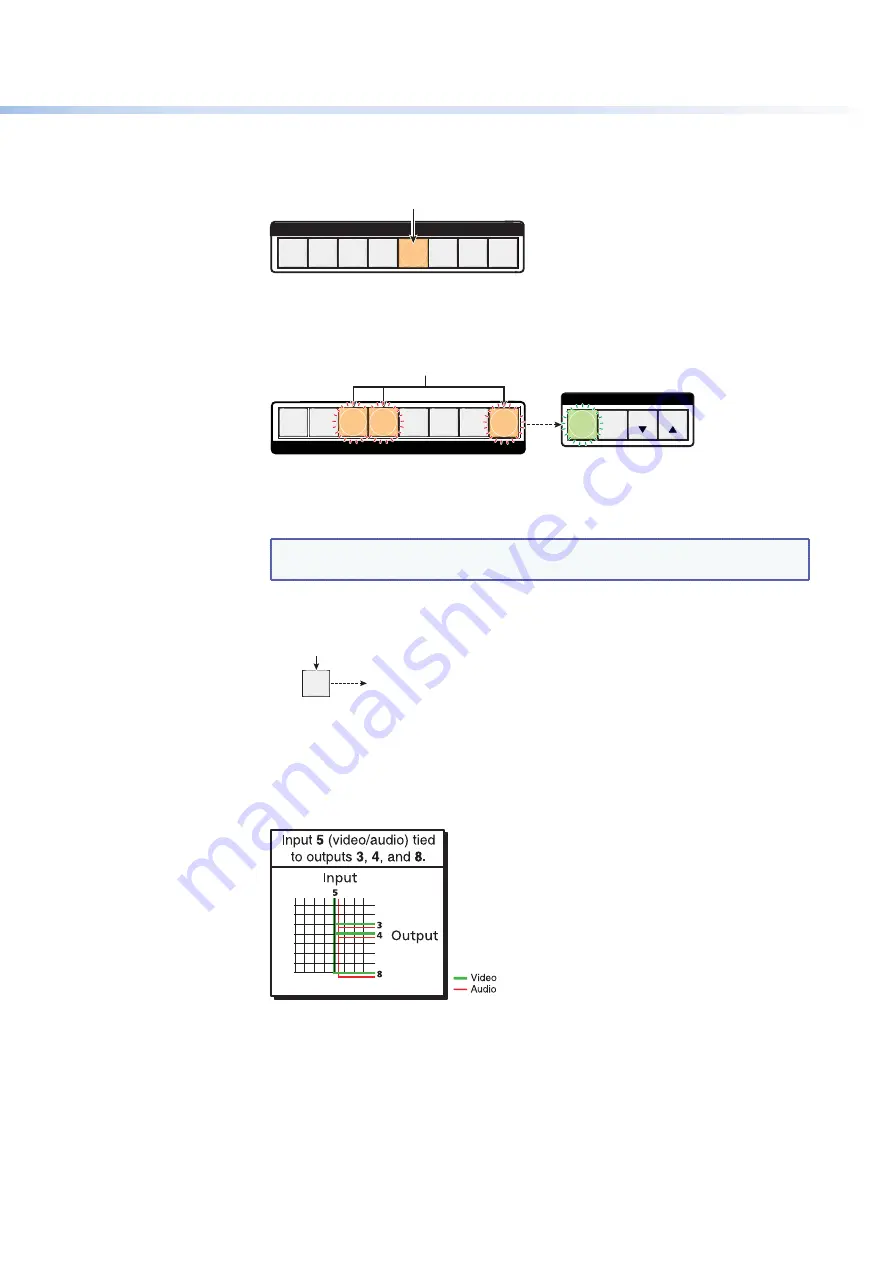
The configuration now is
input 5 video and audio tied to output 3, output 4, and
output 8
.
Figure 17.
Example 1, Final Configuration


