User Manual
Digital Microscope Model MC200
Страница 1: ...User Manual Digital Microscope Model MC200 ...
Страница 2: ...Insert Installation CD Step 1 16 2 2 Install Application Program Step 2 2 3 Install Driver Step 3 2 4 Quit Installation Program Step 4 3 Application Program 3 1 Video Preview Window 3 2 Photos Preview Window 3 3 Main Menu 3 4 Main Button 3 4 Files List Type 3 6 Special Function Modes 4 Maintenance and Safety 4 1 Maintenance 4 2 Specifications 4 3 Depth of Field 4 4 Safety Instructions 5 Warranty R...
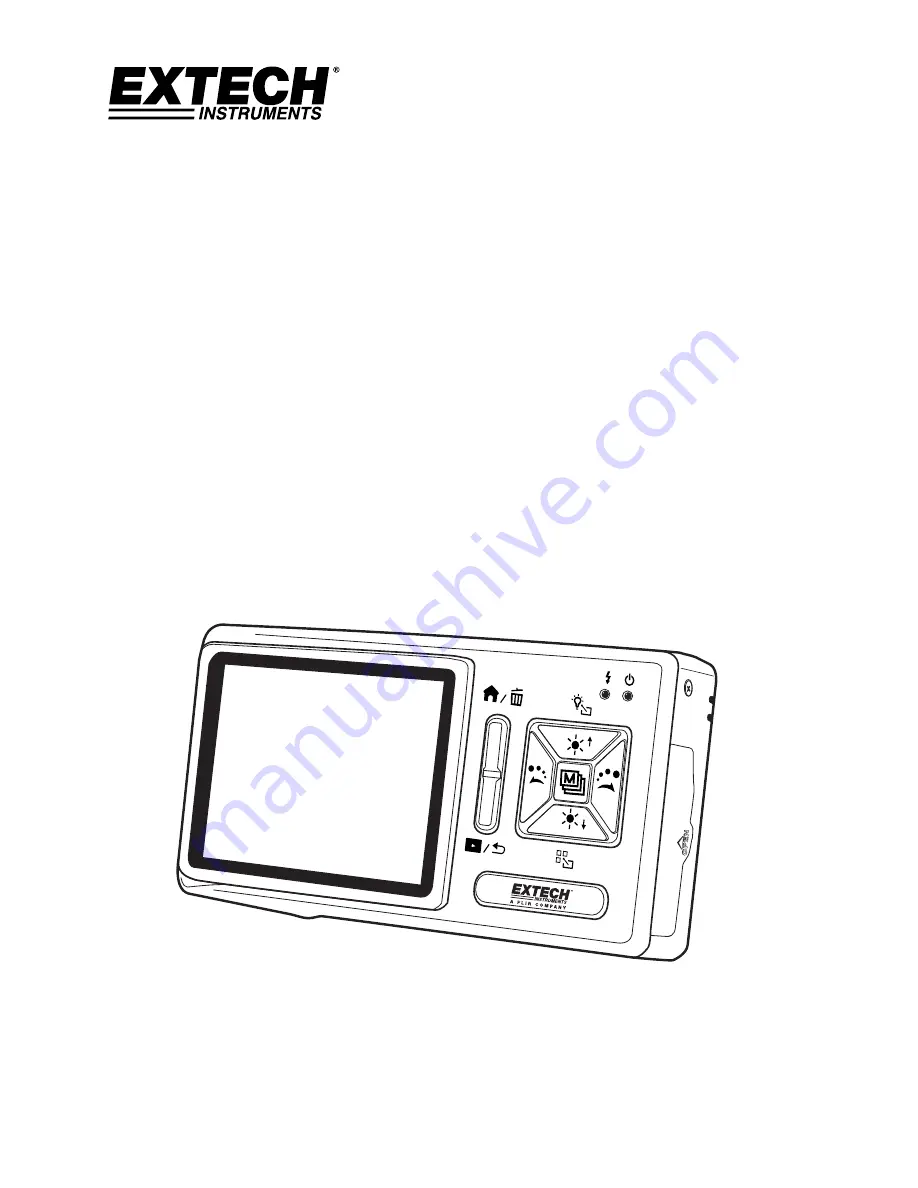
Страница 3: ...eep tank Water rocks etc 5 Shallow tank Fish eggs spores sand gems etc 1 2 Microscope Functions The Microscope includes push buttons communication ports and interfaces for external storage Refer to the following descriptions 1 Power Supply Press this button for two seconds to switch on the instrument press again to switch off the instrument 2 Zoom Out Use this button to zoom out on a digital image...
Страница 4: ...e Lighting Brightness Press this button to decrease the brightness of illumination Press and hold this button to switch the scene mode please refer to c of item 1 of Section 1 4 This button is also used for advanced programming options described later in this guide 13 Rotate Lamp Left Rotate the lamp to the left Press and hold this button to display the center alignment grid on the monitor press i...
Страница 5: ...efer to item 6 of Section 1 4 and item 1 of Section 1 5 19 TV Signal Output Socket Used to connect a television please refer to item 5 of Section 1 4 and item 2 of Section 1 5 20 Camera Lens 21 Battery Compartment please refer to item 5 of Section 1 5 22 SD Card Slot please refer to item 4 of Section 1 5 and F of item 1 of Section 1 4 23 Tripod Mount please refer to item 7 of Section 1 5 ...
Страница 6: ...ion and to the right for larger magnification In the following image the button is in the 10x position 2 Flush Shot Camera placed against surface Adjust the Focus dial by turning left for a low mag 10x or turning right for a high mag 40x Turn left for a smaller magnification and right for a greater magnification Start with the focus dial in the center and adjust as needed 3 Long Shot Adjust the Fo...
Страница 7: ...bservation mode As shown small display icons are used to represent the function modes A Indicates that the device is in the observation mode B Lamp Sign Mode There are 8 white LEDs on the instrument for lighting For the array and corresponding presentation of these LEDs please refer to the following image Press and hold the button enter the 6 mode lighting selection screen and use the and buttons ...
Страница 8: ... Automatic repetition mode to light one lamp B 5 Automatic repetition mode to light two lamps B 6 No lamp light C Scene Mode Press and hold the button to switch among the six scene modes and then use the and buttons to make a selection C 1 Automatic mode default C 2 Camera mode LED will turn off automatically in this mode If another lamp mode is selected the system will set Camera mode as default ...
Страница 9: ... instrument and the icon indicates that an SD card is not inserted G Battery Status There are three battery states Battery in Use Battery Charging and external Power Supply Battery in Use Full Capacity High Capacity Medium Capacity Low Capacity Battery Charging This symbol appears when the battery is charging The charging stops when the battery is full The battery can be charged using the external...
Страница 10: ...ng the observed article K Cross hair Alignment Press and hold the button to display hide the cross hair alignment tool Use the cross hairs to indicate the position in which the lens of the instrument is located and to make observation alignment more convenient L Scale Press Confirmation button to display hide the scale Press and hold the button to select the desired scale After the selection relea...
Страница 11: ...iew mode to enter the Comparison mode Refer to the illustration below The window at the right is the latest photo the window on the left is the previewed image All of the buttons have the same functions as previously described but only affect the preview window window on the left From the photo browsing mode press and hold the button for 10 seconds to enter the Comparison mode refer to the illustr...
Страница 12: ...e Press to pause the playback D Last File Press to play the last file E Hide the Panel Press to hide the control panel F Next File Press to play the next file G Current Time Current playback location H Time line Video Playback time line In addition the button can be used to delete the current video The button is used to quit the playback mode 3 Video REC Video Record mode Refer to the following A ...
Страница 13: ...e the instrument can be linked to a PC as an internet camera or a microscope camera Before using please connect the USB cable and install the software driver on the PC For program installation please refer to Section 2 The PC Camera operates as follows 7 Set Up mode Configure the system using five functions Refer to the following diagram Use the and buttons to select and adjust settings and use th...
Страница 14: ...cable s smaller connector end is used to connect to the MC200 and the larger connector end is used to connect to the USB port on a PC When the MC200 is connected to the PC the PC can power and charge the MC200 while transmitting images PC Camera Refer to the following diagrams for USB connection 2 Connect the AV audio visual interface cable Refer to the diagram below Connect the smaller connector ...
Страница 15: ...racket and placing the battery carefully in place Close the metal bracket reinstall the battery and secure the battery compartment cover Refer to the diagram below 5 Install Battery Remove the battery compartment cover and install the battery as shown in the diagram below Close the battery compartment cover before use Refer to the following diagram 6 Install Wrist Strap Remove the battery compartm...
Страница 16: ...should automatically read the disk and display the start up prompt screen process If the computer does not automatically read the CD please open the Installation CD and select Autorun ext as shown below 2 2 Install Application Program Click on Install Application Program to install the software Application Program 2 3 Install Driver Click Install Driver to install the software driver 2 4 Quit Inst...
Страница 17: ...rmation Formatting Sources Compression Automatic Storage and others 3 Windows Adjust the size of the video information windows and switch to the single window mode if desired 4 Tools Select file types such as BMP JPG and AVI Languages and the file storage path can be programmed 5 Languages Select from five languages including Chinese complex and simple English Japanese and German 6 About Show the ...
Страница 18: ...nt Images Print the images displayed in the Images Preview Window 13 Quit Close the Application Program 3 5 Files List Type Select from BMP images JPG images and AVI videos 3 6 Special Function Modes The Special Function tools appear below the Video Information Preview Window Special Functions include Comparison Center Concentration Image Control and Measurements 1 Comparison Mode Observe the simi...
Страница 19: ...ns 7 When not in use switch off the power supply and remove battery or unplug power cable and store in a dry place with excellent ventilation Do not expose the instrument in an environment lower than 5 C or higher than 50 C 8 Store the MC200 in its protective sleeve or original packaging when not in use 4 2 Specifications Sensing Element 2 million pixels CMOS Lens High sensitivity Lens Auxiliary S...
Страница 20: ...ide the instrument or the instrument falls or the housing becomes damaged please switch off the power supply and remove the battery or the power supply device to avoid fire and electric shock 5 Do not look steadily at auxiliary sources after switching the instrument on 6 Do not use 3rd party product accessories without the approval from the original factory 7 If the instrument is to be unused for ...