APEX 4 User’s Guide
Rev 1.0
14
3. Using the Printer
3.1 Initial power up and self-test
Once the Battery is charged and the paper is loaded, an initial
power up self-test can be performed:
•
Press the <ON/OFF> switch once. This turns the printer on.
LED #1 illuminates in green, blue or amber depending on the
mode of communication.
The printer will stay ON until it is manually turned OFF.
If the printer is set for Bluetooth communication mode the
printer will stay on all the time. Pressing the <ON/OFF>
switch again will turn the printer off.
•
Press the <ON/OFF> switch to turn the printer off. The LED
turns off.
•
To start the self-test, press and hold the <FEED> switch then
press the <ON/OFF> switch.
•
The printer will start printing the self-test message. Release the
<FEED> and <ON/OFF> switches.
Press the <ON/OFF> or <FEED> switch to stop or cancel
the self-test print.
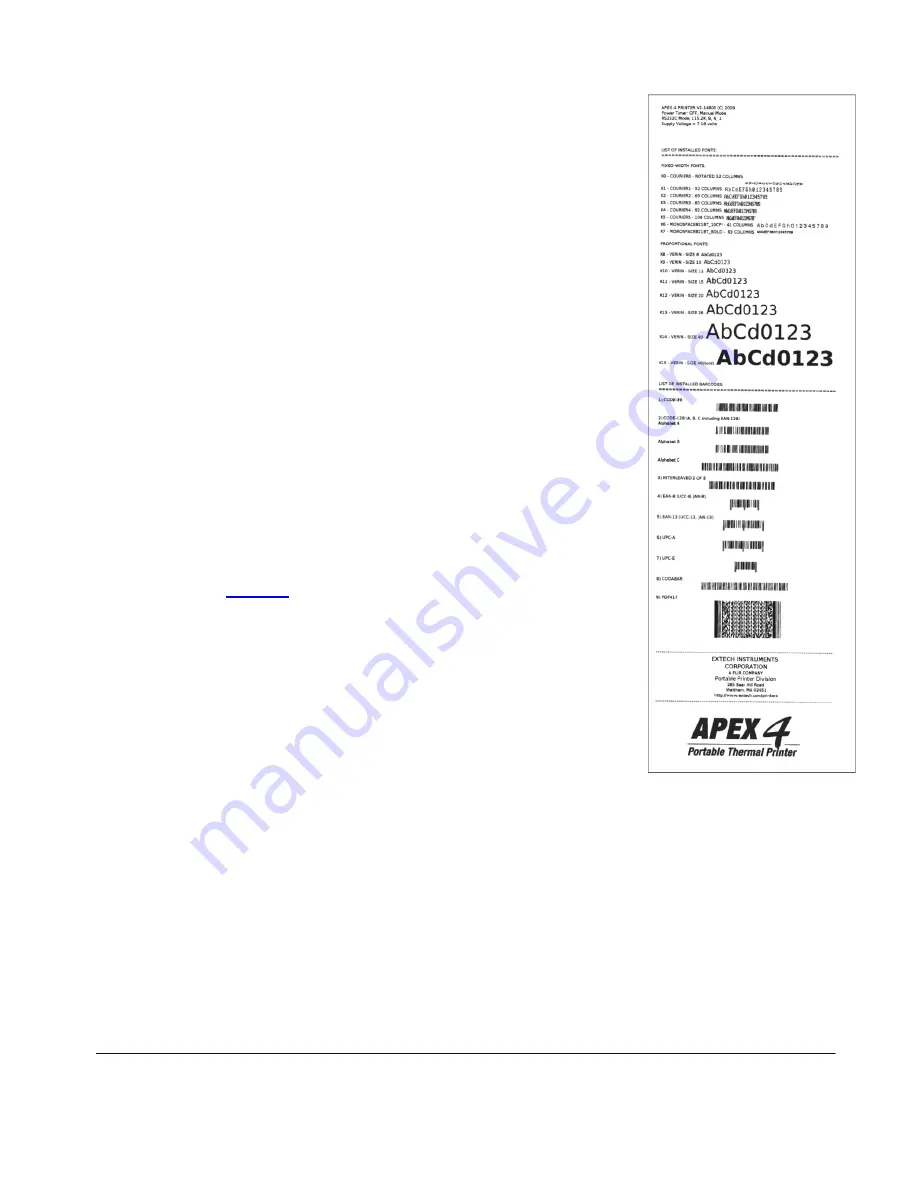
The first few lines of self-test show the printer firmware
version, the current printer settings (for example Bluetooth
or USB mode) and a list of any optional or special features
installed
.
Figure 9
shows a printing sample.
3.2 Connecting the Printer
•
The APEX 4 printer supports USB and Bluetooth ™
communication as default communication interfaces. WiFi
communication and IrDA is also available as an optional
feature.
•
USB, Bluetooth™, and 802.11 communication settings can be
changed via a DIP switch located on the control card. See
Figure 10 for details.
•
Printer drivers for Windows 95/98/NT/2000/ XP and Vista
are available from Extech.
•
Printer CE print Control utility is available from Extech for Windows CE and Windows Mobile
devices.
•
Printboy Print Utility from Bachmann Software or PalmPrint Utility from StevensCreek are
recommended for Palm Pilot devices.
FIGURE 9: SAMPLE SELF
TEST