


Network Camera
9
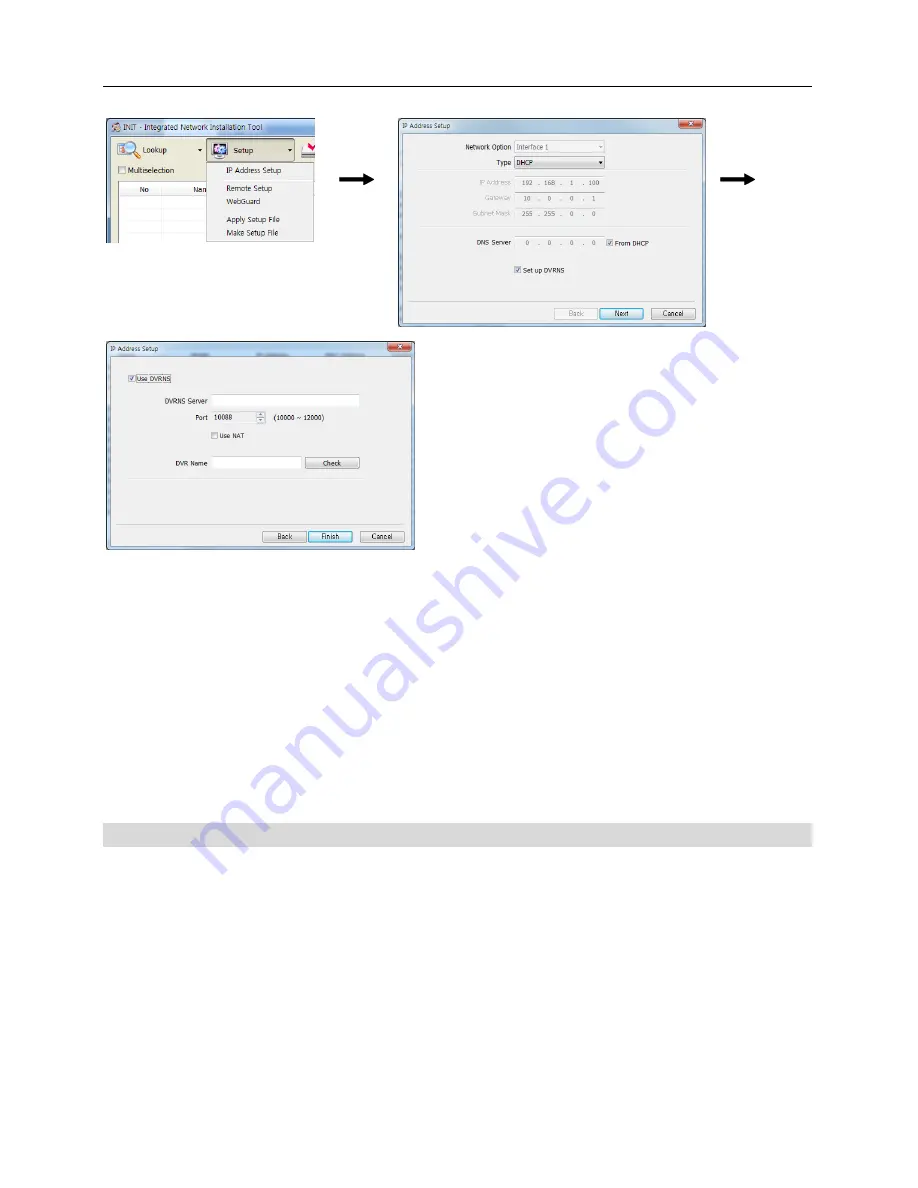
Use DVRNS
: Enter the IP address or domain
name of the DVRNS server.
Port
: Set up the port number of the DVRNS server.
Use NAT
: Check the box when the camera uses
a NAT (Network Address Translation) device for
network connection.
DVR Name
: Enter the camera name to be
registered on the DVRNS server. Check whether
or not the name is available by clicking the
Check
button.
NOTES:
The network camera supports DVRNS (DVR Name Service) function. The DVRNS function
allows you to access the network camera remotely by using the camera name instead of its
IP address and it allows the network camera to use dynamic IP addresses for remote connection.
For the DVRNS function to work properly, the camera should be registered on the DVRNS server.
You will need to get the IP address or domain name and the port number of the DVRNS server
from your network administrator.
CAUTION: The DVRNS server that we support is for your convenience and it can
stop operating unexpectedly for the server update or malfunction. We are not
responsible for any problems caused by the DVRNS server stopping operation.
UPnP Function Setup in Network Camera
1.
Run the INIT program on the local PC and find the network camera to connect. Refer to the
Connecting from Local PC
section.
2.
Select the network camera to connect and click the
Setup
icon.
3.
Select
Remote Setup
and select
Network – Port/QoS
from the menu on the left side.
4.
Check the
Use UPnP
box at the bottom and click the
Check
button. The network camera checks
the current port settings.


