


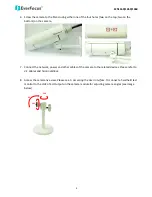


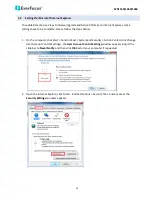

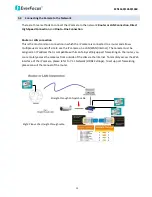


EZN1160/1260/1360
18
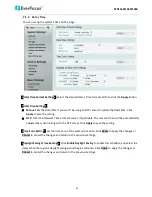
7.
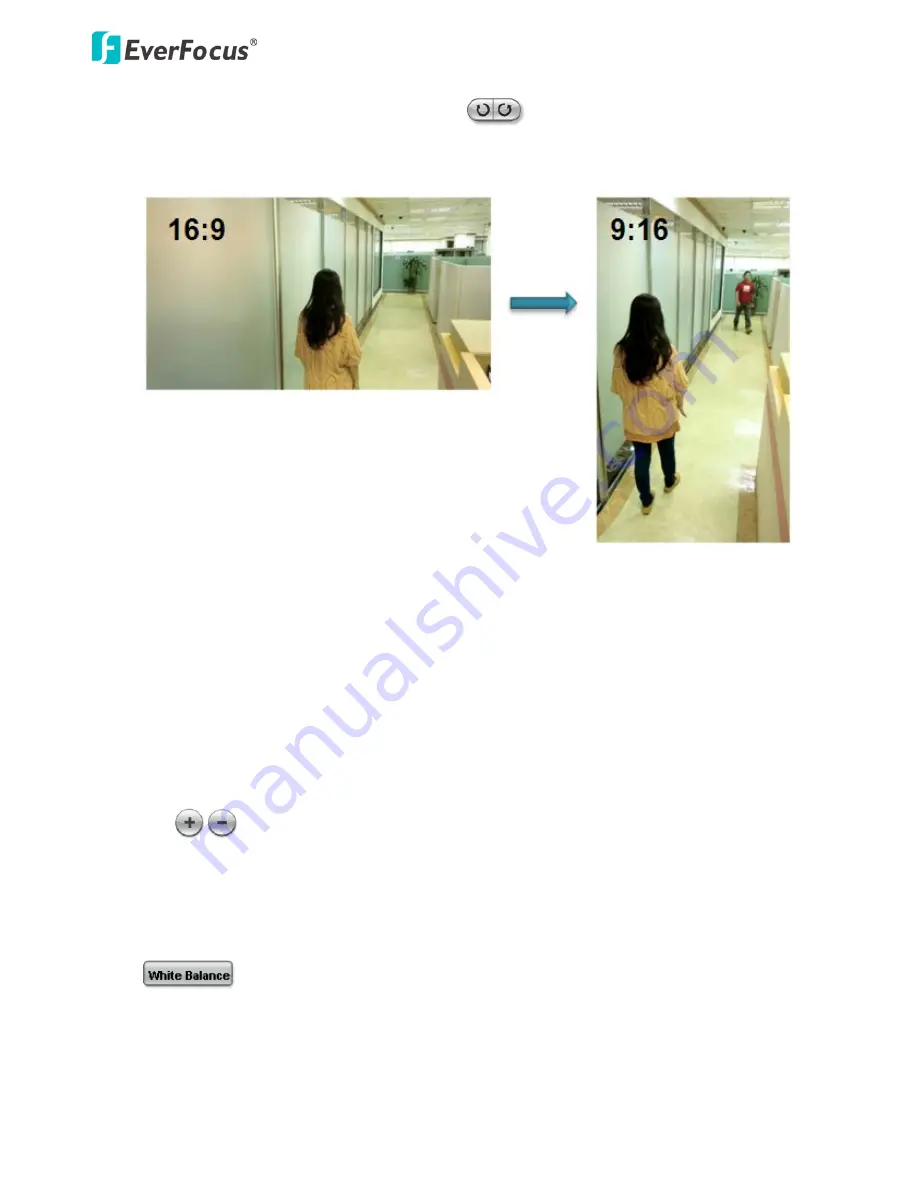
Hallway Display (9:16): Click the Rotate button
to rotate the live image. This function allows
users to monitor vertically-oriented areas such as hallway, corridors and aisles. It’s recommended to
select a 16:9 View Size (e.g. 1920x1080 / 1024x768) to achieve the best display effect.
8.
Video Stream
Select the Video Stream (Stream 1, Stream 2, Stream 3 or Stream 4) that will be displayed in the video
box on the bottom. Stream 2, Stream 3 and Stream 4 are only selectable if you have enabled the
stream. The default setting is Stream 1 only. See
7.2.1 Streaming
.
9.
View Size
Use this to select the appropriate view size and shape of the video box on the bottom. A smaller size
might increase transmission speed and video quality.
10.
Language
Click the Language drop-down list to select the desired language.
11.
Digital Zoom
Click
to zoom in / out the camera view up to 10x. Clicking on a magnified image will
re-center the image around that point.
12.
One Push
The One Push button can be displayed on the live view window by enabling the Show One Push
Buttons function in the Live View Layout Settings (see
7.1.4 Display and Overlay
). For the
button to work, select One Push from the White Balance Mode drop-down list (see
7.2.5 Image
). Once this is done, clicking the White Balance button on the Live View Window will
instruct the camera to adjust the white balance settings, and these settings will be active until the
button is pushed again. This is like a “semi-automatic” way to adjust white balance to suit the user, if
the Auto or Manual mode does not give the result the user wants.


