34
Using
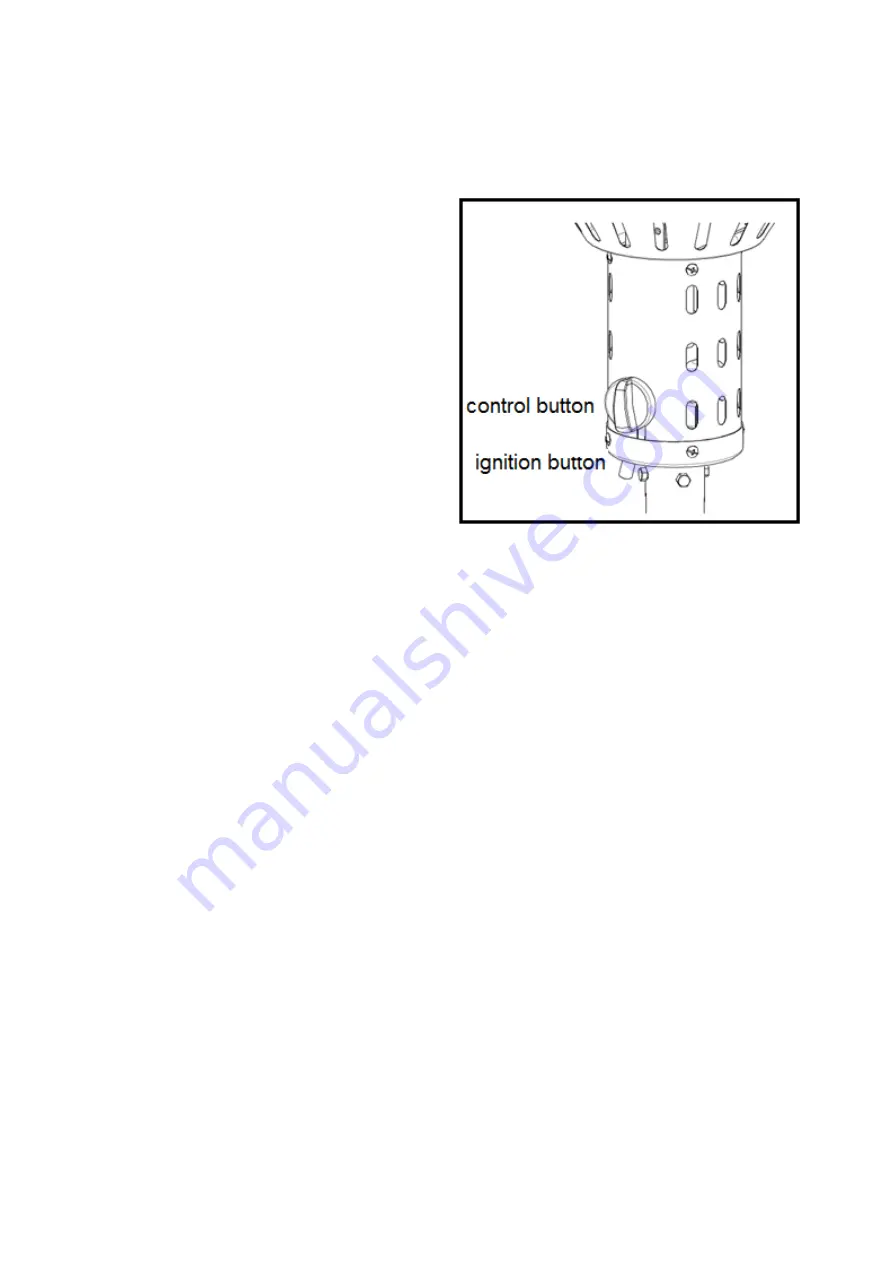
Turning on the patio heater
1. Fully open the tap on the gas bottle.
2. Push in the control knob and turn it to
the PILOT position. Hold the button
down for at least 60 seconds. (after
using a new gas bottle for at least 75
seconds) to allow the air in the system
to escape.
3. While holding down the control button,
press the ignition button several times
until the pilot ignites. The pilot flame
can be viewed and controlled through
the slot openings at the bottom of the
shiny part of the burner head, at the
top left of the ignition button. (The
pilot can also be lit with a match.) If
the pilot flame is ignited, keep the control button pressed for at least 30 seconds
to activate the thermocouple. Now you can release the control button.
4. Turn the control knob to the highest position (Hi) and leave the patio heater on
for 5 minutes. You can then turn the control knob to the desired power.
Turning off the patio heater
1. Completely close the tap on the gas bottle.
2. Turn the control knob to the PILOT position.
3. Push in the control knob and turn it to the OFF position
Connecting and changing the gas bottle
You need a water pump wrench for changing the gas bottle.
Change the gas bottle outside, without open flames or sparks in the area. Never turn
the gas bottle upside down or put it down.
• Check the new gas bottle for damage and the connection to the pressure
regulator for a flawless seal. If you suspect damage or malfunction, change the
gas bottle at your gas supplier.
• Check whether the gas valve on the empty and new gas bottle is closed (the gas
valve is turned as far as possible clockwise). Check that the gas valve seal on the
new gas bottle is in good condition. Do not use additional seals.
• Open the gas bottle housing door and take out the empty gas bottle.
• Unscrew the pressure regulator (clockwise) from the empty gas bottle with a
water pump wrench.
• Check whether the gas hose shows any twists or kinks.
• Before mounting the gas pressure regulator on the new gas bottle, check
whether the black sealing rubber is present in the union nut and is in good
condition. Screw the union nut of the pressure regulator counter-clockwise (left-
Содержание 323900
Страница 55: ...55 Rating label...
Страница 75: ...75...
Страница 76: ...76 EUROM Kokosstraat 20 8281 JC Genemuiden info eurom nl www eurom nl...


